- Home
- About
-
Shop
-
Sewing Patterns
-
Fabric
- Sewing Supplies
- Folkwear Clothing
-
- Blog
- Customer Gallery
- Contact
January 31, 2022 5 Comments on Quilted Basics Jacket Sew Along
by Esi Hutchinson
Hello! Today I will be showing everyone how I made a quilted jacket from the Basic Jacket pattern using an arbitrary patchwork assembling process, similar to Crazy Quilting.
I was inspired to do this by the quilted jackets that went into our inspiration post, as well as all the gorgeous scraps of linens we had laying around (we have most of these linens in stock here), as well as crazy quilts that I'd seen in the past. Here is a linked video about Crazy Quilting. The Crazy Quilt - The Ultimate Stash Buster! - YouTube
This was my first time quilting a garment, so I will give a few tips on what worked and did not work for my personal process. Making a patchwork garment is a great way to use the scraps that you haven't wanted to throw away of your main fabric, and with this project you can do the outer and possibly the lining if you have enough scraps.
I have selected most of the linen scraps that Folkwear had left over from previous projects and started to cut them up into large shapes with straight edges. You may cut them into whatever size and shape you wish, or cut them into equal sizes and shapes to make the patchwork process more straight forward.
This is how I started. I just cut straight edges on the scraps and started to sew them together to make a large piece of fabric that I could cut the pattern from.


It is helpful to press after you have sewn each piece together. Either pressing the seams open or pressing them to one side. Don't worry about finishing the raw edges, because you will be quilting all three layers of fabric together encasing each edge. And, the jacket has a lining so you won't see the inside.


Every now and then I placed the pattern piece on the patchwork cloth I was assembling to make sure it would be big enough.

Sometime later I came out with this.

Make sure to press the patchwork fabric well before cutting out the pattern from it. It's important that the pattern pieces are cut out to be the same size before your start to sew the jacket together. This will prevent a headache when sewing the jacket together as well as bunching when quilting the jacket.
I cut out my pieces for the Outer Layer from the patchwork above. I serged the edges around the pattern pieces, but depending how sturdy your fabric is you may not need to finish the edges. For fabric edges that are on the bias or loosely woven fabrics, it may be best to just staystitch the edges of the pattern pieces, especially around the curves. Actually, it would probably be best to staystitch all the edges of the pattern pieces before finishing them.


Now that the outer layer is done, it's time to cut the lining and inside batting. For this jacket, I used a white flannel for a lightweight layer.
If you'd like, you can use the same patchwork process for the Lining that you used for the Outer Layer, if there are enough scraps. I had large enough pieces in two different colors that worked for the Lining.


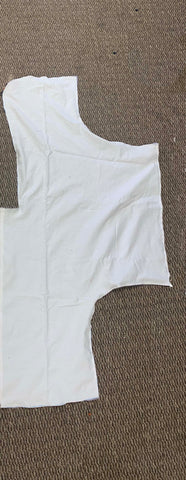
Flannel cut from the same pattern piece as the jacket.


Now that the front and back pieces are all cut, check again if they are all the same size, and trim edges if needed.
I then followed the instructions from the pattern: With right sides together, sew outer Front/Back pieces together at center back seam. Press seam open. Repeat with lining and with flannel (batting).
Then, I basted the raw edges of lining to the flannel wrong sides together, making it one piece.

With right sides together, I stitched the Front to Back outer layer at underarm/side seams; trimmed and clipped seam allowances, and pressed seams open. I repeated this with the lining/flannel layer.

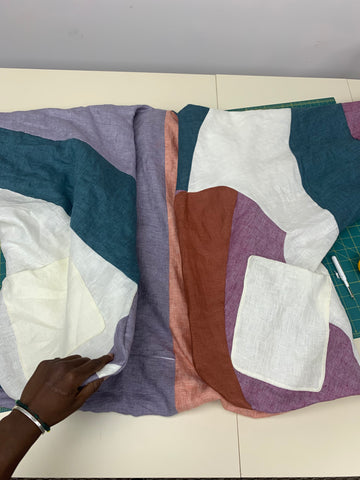
Decide where to place the pockets. You can place them as indicated in the pattern, or angled up further from the original placement lines indicated. I angled the pockets up a little bit, then topstitched the pockets to the outer layer of fabric. I decided to use one solid color for my pockets, I thought it would be a nice contrast. If you want to quilt the whole jacket (i.e. also under the pockets), you will need to add the pockets after the jacket is finished and hand-stitch the pockets to the jacket.

I put together all layers of the Jacket as instructed.

If you wish to not stitch along neckline and hem edges as indicated in STEP THREE of the instructions, just layer the fabrics as they would be in a finished jacket. You can baste the layers together to prevent shifting and then trim any excess fabric from the edges when you are finished. However, you will have to bind the neckline and hem edges. You can use bias tape to finish the edges.
Quilting Time!
I practiced stitching on a separate piece I made similar to the Jacket to get a sense of the thickness I would be working with and whether or not to change the tension and the length of the stitch. Troubleshoot with your sewing machine to see what length and tension works best with your fabric thickness. I used the stitch length 3 so it would not be too tight and easier for me to take out stitches if I made a mistake.

 Practicing on more scraps
Now starting to stitch onto the Jacket. I bascially decided to give each scrap section its own stitching design.


Drawing onto the fabric is helpful, it makes the planning process easier. Use a fabric marker, Crayola markers are washable.


This is what the inside looks like so far.

Planning the lines for the back of the Jacket.

 Almost done!

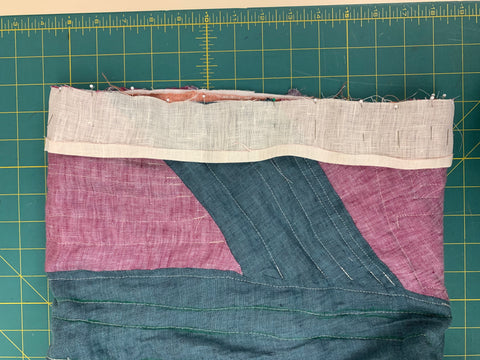
I am finished quilting the Jacket, and used the same color for the cuffs to match the pockets. The cuffs neatly and easily bind the sleeves. This is basically the same method you would use to bind the front, neck, and hem of the jacket if you stacked the layers.

My only other advise would be to baste the layers together a bit more than I did to avoid shifting fabric. I enjoyed this project (such beautiful linens!), and I hope you are inspired to try something like this yourself!
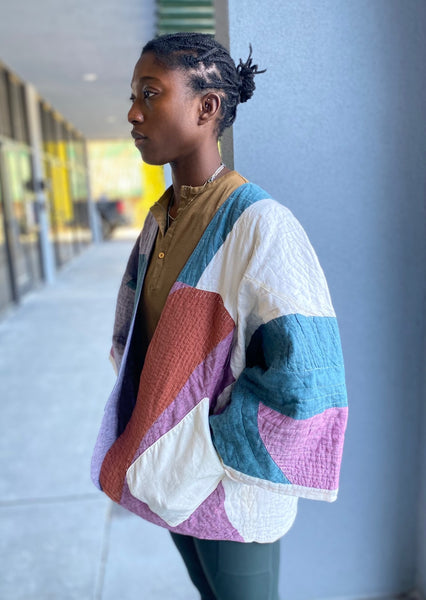
Here is the final product! Thank you!


See the Basics Collection jacket pattern here
February 04, 2022
Your finished jacket is really lovely, Esi! There’s such a good balance of color and shape in the garment. Thanks for a clear tutorial.
February 02, 2022
I have sew in.mill for years. Give me a pattern and I can probably make it but I’m not that good yet willing to learn I think the jacket’s beautiful
February 01, 2022
Hi Mary, it is available in both print and pdf patterns. If you search Basics on the site search you will see it on the page. It is also part of the collection if you like all the patterns! Hope this helps!
February 01, 2022
so why is this pattern not available to buy except as a large & expensive set??

Kat B
February 05, 2022
Hot dang, that quilting is beautiful! Amazing work!