- Home
- About
-
Shop
-
Sewing Patterns
-
Fabric
- Sewing Supplies
- Folkwear Clothing
-
- Blog
- Customer Gallery
- Contact
November 09, 2023 7 Comments on How I made 223 A Lady's Chemise into a Blouse!

by Esi Hutchinson
When it comes to lingerie, there are countless options to choose from. And Folkwear has been exploring our own designs of lingerie this year in particular, with our new 1950s-inspired patterns 510 Passion Flower and 511 Juliette's Dream. We also have the Edwardian 226 Princess Slip which makes great nighttime wear but could also be made for a more formal outing in my opinion. I've been thinking about making it recently into an everyday dress, so maybe I'll tackle that project soon. And lots of other vintage lingerie, undergarments, and nighwear patterns can also be great modern day daywear. However, this blog post will show you how I made another one of Folkwear's undergarment patterns into a blouse from the 223 A Lady's Chemise.
Folkwear's 223 A Lady's Chemise pattern is based on chemises that were worn in the mid- to late-1800s. Chemises were originally worn right next to the skin as a simple, practical garment to protect outer clothing (including corsets and stays) from sweat and body oils. However, over time, they evolved into a fashionable and seductive lingerie item. This vintage dress still resonates in style today, with baby doll style dresses, tops and lingerie with beautiful lace and bows.
Our chemise is a loose-fitting undergarment that can be made into a blouse or a dress, falling to whatever length you desire. It makes a great nightdress or a dress for everyday wear. I made a blouse and will show you the changes I made so that you can do it too!
Typically, the chemise was made from lightweight and breathable fabrics such as cotton lawn, voile, silks, lightweight muslin, and linen. For our pattern, you also need eyelet beading, lace or eyelet ruffles to finish and embellish the neckline and sleeves.
Folkwear suggests using silks, like crepe de chine and charmeuse, which would give it such a beautiful and luxurious look and feel (I don't know who doesn't love silk). Satin, cotton, or rayon challis and other lightweight fabrics such as batiste, lawn, voile, gauze, eyelet, and handkerchief linen would also work well. We recently have been loving our new cotton/linen blends from Merchant and Mills, its a great substitute for linen or cotton that would work really well. Our cotton voiles and Indian cotton are also light and breathable and would suit this garment as well. For this shirt, I used our cotton/linen blend in Blackberry. It is a bit hard to tell on the screen, but this fabric is woven like a chambray and looks different at different angles. It is very pretty! Check out or fabric collection, I am super proud of it right now, we have so many options and I just want to buy everything for myself.
Now to show you how I made this pattern into a shirt for myself. Not only did I shorten the pattern to make a blouse, I made some design changes as I went that were fun and gave me a look I was really pleased with. I love using my creativity when sewing to take a fabulous pattern and make it perfect for me (and you should too!). Lets begin!
Cutting the Pattern and Tracing the Pleats
First, I traced the pattern in a size small. I wanted to make a shirt-length top, not a dress-length garment, so I shortened the front and back by cutting the pattern about 18.5" (47cm) from the top of the center front/back on the pattern piece (I did not use the lengthen/shorten lines, but you could!). The other thing to know about this pattern when starting, is that the front and back are cut and pleated, and then they are cut again after pleating to make the neckline (after the pleats are basted). This is to make the tiny pleats easier to manage. But it also gives you some flexibility about where you want your neckline to fall.
 I traced my pattern on tracing fabric (and to get the most out of this fabulous sewing product, we often tape sections together of previously used pieces to get full pattern pieces).
There are a LOT of pleat lines, but don't let that discourage you! The easiest way to transfer these markings to your fabric is to use tracing paper and a tracing wheel. If you don't have these tools, they are indispensable and last a very long time. 
I used a double tracing wheel here because I could set it to trace several lines at the same time.
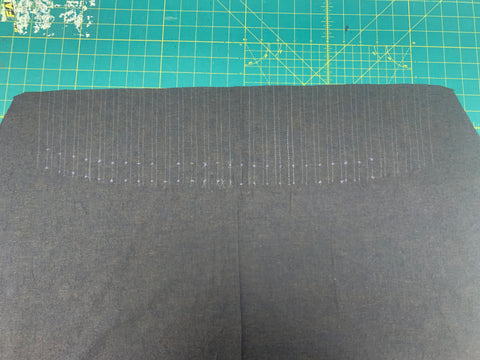
With wrong sides together, I folded along all the pleat lines lines with dots; bringing folds to meet the second line, in the direction of the arrows. I pin-basted the pleats lengthwise from the top edge to bottom dots. This will helped keep everything together. The pleats fall away from Center Back and Center Front.

 Original pattern neckline template on my front.
 Here I chalked a new cutting line, 1" above the template neckline. Note that by doing this I added to the shoulder of the pattern too. I could have made the chalk line go toward the original shoulder line, but I liked my pintucks too much, I guess.


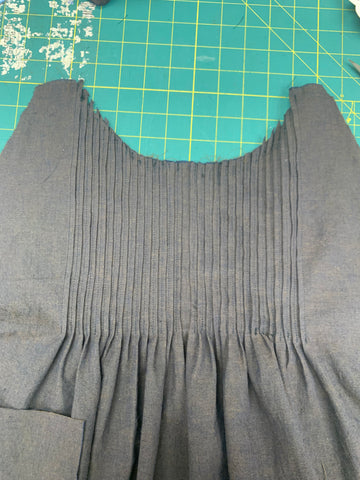

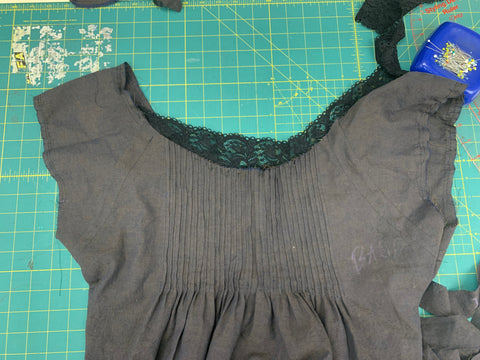
This pattern has clever ways of covering the seams around the sleeves and neckline.



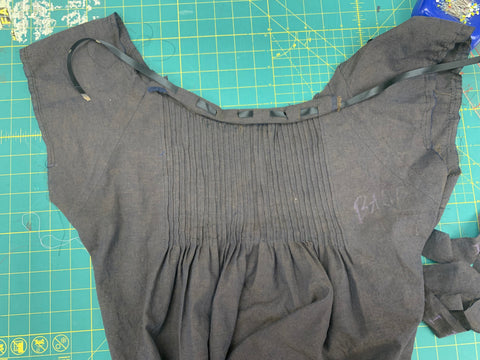


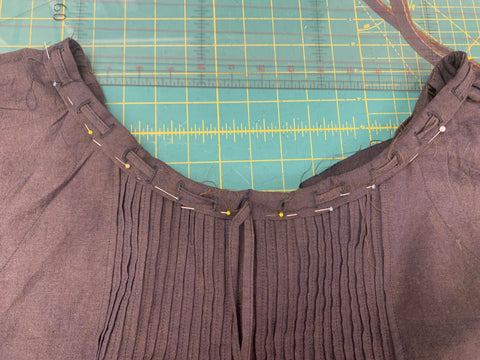


 My finished fabric ribbon.


November 15, 2023
Your blouse is spectacular. You’re diffinatly a very skilled seamstress.
November 12, 2023
Esi, your top is beautiful! I love the way you experimented, followed your instincts and and knowhow on the way to make it the way you wanted it to look and feel! I was thinking a bit later while looking at stripe fabrics how it might work to use the stripes to make the pleats….then that led to visualizing a patterned fabric and how that would turn the back and front bodice into a mosaic. I’m going to give that a try on a few leftover fabrics and find out. Victoria B.
November 11, 2023
I have made the chemise using a stunning cotton voile, so comfortable. One of my daughters was asking me about my “high end” nightie. I will definitely make this little top over our southern hemisphere summer.
November 11, 2023
Thank you for showing all the steps that you used to make your wonderful top. It looks great one you. It was clever of you to use a pattern already in your stash. I am guessing that you had made the chemise already, yes?
I have the pattern, but have not made it yet.
November 11, 2023
Beautifully done!
November 11, 2023
Just gorgeous – thank you for outlining the choices you made and why,.as well as ‘showing your work’. Inspiring!
April 10, 2025 3 Comments on How I made 223 A Lady's Chemise into a Blouse!

Joann smith
November 21, 2023
This is a beautiful garment and the sewing looks very well done. I am wondering though about the fold of fabric that starts at the bust point and runs through the sleeve. Is this just the posture of the model or might the top be a little too snug across the bust?