- Home
- About
-
Shop
-
Sewing Patterns
-
Fabric
- Sewing Supplies
- Folkwear Clothing
-
- Blog
- Customer Gallery
- Contact

Our 104 Egyptian Shirt pattern comes with detailed information on applying applique to the shirt front, back, and sleeves. It also has instructions for applying soutache (narrow braid used for trim), creating your own cording to apply as trim, and how to make knotted buttons from soutache or your own cording. Here, I am going to briefly cover how to make your own flat cording and then use it to make a knotted button.
To make self-cording, cut bias pieces at least 1" (2.5cm) wider than the cord you are using, and at least 12"-15" (30.5 to 38cm) long. Cut cords about 5" (12.5cm) longer than your bias strips.

Fold the bias strip in half lengthwise, rights sides together, over the cord. Pin cord in place, butted up against fold, and using a zipper foot, stitch down the length of the strip, making a 1/4" (6mm) seam.


Backstitch at beginning and end to secure. Secure one end of the cord by stitching several times through cord and fabric about 1/2" (13mm) from end of fabric at one end.

Now grasp the fabric near the secured end with thumb and index finger while bulling the loose end of the cord with the other. Ease the fabric over the secured end and continue pulling, turning the tubing so the raw edges are on the inside. When it is all turned, you will have a piece of flat tubing. Trim the cord off of the handmade cording.


The small knotted round button is a three-dimensional Josephine knot, tied with one piece of cord. Soutache or a small flexible braid or fabric tubing are recommend. In Middle Eastern clothes, soutache made of metallic thread is commonly used.

Make a loop with the cord.

Bring cord around and make another loop on top of the first.

Bring the same cord end around, underneath the first loop cord.

Bring that end over the first cord in the loops, under the second,

over the third cord in the loops, and under the forth cord in the loops. Creating the shape you see below.

Now pull the center loops slightly tighter, then pull gently on the cord ends to tighten. Continue to do this until you have a fairly tight knot.


The finished button size will depend on the size of the cording and how tight you pull the knot. You can use the "tails" of the knots to create the button hole loops.
You can print this by using this link.
Here is a video of how to make flat cording and tie the knotted button.


Frocktails is a social event for sewists to wear a handmade garment or accessory, get together, enjoy a cocktail, and meet other people in the community who sew. We are excited to be part of the event that has made its way from Australia, to Europe, to Canada, and recently, to the United States!
A wonderful group of sewists in Asheville has organized this event, and Folkwear is proud to be one of the amazing sponsors of this event. There will be door prizes, goodie bags, and lots of fun!
Asheville Frocktails will take place on August 24, 2019 at the Capital Club of Asheville (82 Patton Avenue) from 6:30 to 9:30 pm.
Tickets ($55) include h'ours devours, a drink ticket, a gift pack, a raffle ticket, and the opportunity to meet other members of our sewing community! You can get them here: https://ashevillefrocktails.com/tickets
More information about Asheville Frocktails is here: https://ashevillefrocktails.com/
You can find Asheville Frocktails on social media at:
Instagram: @ashevillefrocktails
Facebook: @ashevillefrocktails
Email: ashevillefrocktails@gmail.com

Guest post by Kate Mathews, former weaver and former owner of Folkwear.
If you weave unique and beautiful fabrics, you will naturally want to showcase them in equally unique garments...and not just in scarves and shawls, but in wearable art. After all that work of creating the fabric, you probably won’t want to cut into your precious yardage, so traditional ethnic garments are a perfect option for you because they typically are made up of components that retain their straight-edged loom widths. Weavers of the past didn’t waste material, so they used cloth just as it came off the loom. You can do the same.
 150 Hungarian Szur has many rectangular pieces that are great for handwovens.
Many Folkwear patterns offer creative options for handwoven fabric. Look for the styles with straight-edged and rectangular pattern pieces like the center front panel of 105 Syrian Dress, the center back panel of 106 Turkish Coat, the front and back panels of the Kamiz in 135 Jewels of India, 150 Hungarian Szur, the various Japanese patterns, and many others that have pieces you won’t have to cut to shape.
 118 Tibetan Panel Coat can be almost completely made of handwoven panels.
In fact, 118 Tibetan Panel Coat and 207 Kinsale Cloak include special “Notes for Handweavers” right inside the patterns. The notes in the Tibetan Panel Coat detail the loom set-ups and weaving of the different 2/2 twill panels, and the Kinsale Cloak notes specify the 3/1 twill draft, along with suggestions for shaping the hood from the finished cloth.
 207 Kinsale Cloak is gorgeous made from handwoven cloth.
When you’re done with the weaving and ready to start sewing, you will need to take some preparatory steps to ready the fabric . . . just like you would with store-bought yardage. Pre-washing is a usual first step for treating the fabric, locking the weave in place, “fulling” or plumping up the fibers, and accomplishing needed shrinkage. Always experiment with a sample of your yardage to determine the best way to pre-wash: cold water on a gentle cycle in the machine, hand washed and rolled up in towels, or steam-pressed at the dry cleaners.
If you do need to cut into the yardage for any of a pattern’s pieces, take some preliminary steps to stabilize the fabric so it won’t stretch out of shape or unravel. Don’t let the fabric hang off the edges of the table while laying out, marking, and cutting pattern pieces, because the weight of the overhanging yardage is enough to pull it off grain and out of shape. You can reinforce the material along cutting lines with light-weight fusible stabilizer on the wrong side, being sure to use narrow strips only in the seam allowances. Before starting to sew, you can also zigzag stitch or serge along each cut edge to prevent unraveling, although be careful here because serging can stretch an edge out of shape or make it ripple.
 This seam allowance was zig-zag stitched to keep the fabric from unraveling.
During garment construction and finishing, consider binding raw seam allowance edges with lightweight bias strips, to secure the edges and to achieve a clean look. This also minimizes bulkiness, because you avoid the double thickness of a turned-under seam allowance edge.
 These seam edges were bound with bias binding (hand stitched), then the seam was hand stitched closed with a type of hem stitch (faggoting).

Finally, think about finishing techniques as a way to add decorative elements to your already-special garment. For example, others may not see the silk-bound seam allowances inside your creation, but you’ll know they’re there. And instead of simply turning under a hem to the inside, create a contrasting facing band that turns out to the right side: a wide brocade or fancy-weave hem band at the cuffs and bottom of a coat can make it truly spectacular.
 This 106 Turkish Coat hem is faced on the outside with velvet and was then quilted.


This square-bottomed tote bag is fun and easy to make, and perfect for carrying your towel, bathing suit, water bottle, sunscreen, and book to the pool or beach. It is also great for going to the farmer’s market, gym, or grocery store. It is a perfect pattern for using up the single yards of fabric you have left in your stash! The pattern is based off a similar bag in the Folkwear collection from India. You can make it with a main fabric and lining or you can make it reversible (using two of your favorite fabrics). The bag also has optional ties so that you can provide some closure to the bag to keep items upright or from falling out. Instructions and pattern are below, and you can download the pattern for free here!

Materials:
Cut out your pattern:
Instructions
1/2" (13mm) seam allowance is used throughout this pattern.
For regular tote bag with shell and lining:
Step 1. With right sides together, sew sides of outer shell together at side seams. Then, with right sides together, sew sides of lining together at side seams.

Step 2. With WRONG sides together, put the lining inside the outer shell, matching side seams.

Pin outer bottom square to outer shell at the bottom with right sides together, matching dots at corners of square to dots on bottom of the bag. Pin lining bottom square to lining at the bottom with right sides together, matching dots at corners of square to dots of bottom of the bag. The lining and shell will be sandwiched between the bottom squares. Stitch between dots, back stitching at each dot.

Step 3. Pin next side of outer and lining bottoms to bottoms of shell and lining, again matching dots and sandwiching the shell and lining between the bottoms. Stitch between dots, backstitch at each end.

Do the same for the next side of the bottom pieces. Try not to catch extra fabric in the stitches.

Step 4. Turn bag right side out, then flip the lining out so you can sew the last bottom edge. First, sew the shell pieces together (bottom piece to shell bottom) between dots, backstitching at each end.

Slip stitch or machine stitch the lining opening of the lining bottom and bottom piece closed between dots. If machine stitching make sure you catch both sides and back stitch at each end.

Step 5. Sew top of handles together: With right sides together, sew the outer handles together at top edge. With right sides together, sew the lining handles together at top edge.

Step 6. Turn under and press 1/2" (13mm) to wrong side the open edges of shell and lining.

For optional ties:
For each tie, fold and press ½” (13mm) to wrong side at one short end.

Then fold in half lengthwise and press, wrong sides together.

Open up and fold long edges toward center fold (wrong sides together).

Then, fold back together along center and press. Stitch from folded under short end, turn and stitch along long edge, catching both sides of the tie.

If using ties, pin them, with at least ½" (13mm) of the open end of the tie inside the areas between the outer shell and lining, centered at the lines marked on the pattern piece. You only need one tie on one side of each side seam.

Line up and pin the folded edges of the outer shell and lining (bag and handle) and top stitch close to edge.


For a fully reversible bag: This bag does not have one bottom lining side top stitched together as the other bag does - all lining and outer bottoms are sewn with normal seams to the rest of the bag. This one is made similarly, though, but the lining and outer fabrics are sewn together at the top first (not top stitched), then turned right side out. It can be made with different fabrics that will look good no matter which side is out. The lining and shell are not attached to each other at the bottom as the bag above is.
Step 1. With right sides together, sew outer shell together at sides. With right sides together, sew lining together at sides.
Step 2. With right sides together, sew bottom lining to bag lining between dots, matching dots and back stitching at each end. Turn and match the next bottom edge to the lining bottom, matching dots, stitch between dots and back stitch at each end. Continue around to sew all four sides of the bottom lining to the bottom of the lining of the bag.
Do the same with the outer shell and outer bottom.

Step 3. Turn lining right side out and put inside shell with right sides together. Match side seams.

Pin optional ties inside, between the outer shell and lining with ties hanging down between the layers.
Step 4. Stitch each side of the bag together, leaving a 3” (7.6cm) opening in one area on the lower area of one side of the bag handle.

Clip curves within the seam allowance. Turn right side out through the opening in the stitching.


Step 5. With right sides together, stitch outer handle side to other outer handle side, matching seam lines and stitching as far around as you can. This will be like stitching a "ring" together. You can stitch one side (lining or outer fabric completely together) and part of the other, but you won't be able to get all the way around the "ring". Slip stitch the rest of the open closed.
Pocket: If you want to add a pocket, it is easy to add a rectangular (or other shaped) patch pocket to the lining of one side before you put the lining and outer shell together.

I thought you might like to learn about and see how to do the embroidery stitches used in Folkwear's 103 Romanian Blouse pattern. These stitches are taught in the pattern itself, and the design is printed on the pattern for you to use, or modify as you wish. These stitches are fairly simple, and once you learn them, they can be used to decorate lots of your home sewing projects!
You can also watch a video on how to do this on our YouTube channel!
You should use #10 waste canvas (though linen works too if the holes in the weave are large and regular) as the foundation for the embroidery. This size has larger holes than #12 or #16, so if you want finer embroidery, you can use those sizes. Do NOT use mono canvas because you will want/need to remove the canvas you are embroidering on for the garment.
When doing embroidery, all blue on white fabric is stunningly authentic, but multi-colored blouses of red, black, blue, with yellow and green touches and in varying combinations are common. Red and black on white is a strong combination also. I used three strands of DMC embroidery floss, and an embroidery needle.
To use waste canvas, you can soak it and air dry it by laying it flat. It is important not to skew the fabric when washing or letting it dry. Soaking may shrink the canvas by about 10%. Once dry (or if not washing), cut the canvas at least 1/2" (13mm) larger than the area you want to embroider, and lay the canvas over the area where you want to embroider. Then, with long running stitches, baste the canvas to the fabric, as below.

CROSS STITCH
The most common stitch in this pattern, and most commonly know, is the cross stitch. Each stitch is worked diagonally one direction, then crossed diagonally the other direction on the way back across the row.

It does not matter which direction you start, but the most important thing is to keep the first stitches going in the same direction, as well as cross the stitches in the same direction every time. This gives the work an even and regular look. You may work the first half of the stitch in vertical or horizontal rows and cross them on the return journey. In small areas, it is generally easier to cross each stitch individually.


TRIPLE-BACK HUNGARIAN STITCH
This stitch is fun and fast but watch the scrim because this is the only stitch given which requires using the small spaces in the double weave; all other embroidery stitches use only the large holes, whereas this one squeezes a line of straight stitches between each of the usual spaces. Push the scrim aside if necessary with the point of the needle to avoid splitting threads.
One complete stitch is composed on three parallel threads, worked by taking outside stitches first, then the center advancing stitch. Follow letters in diagram below.
This stitch makes a lovely border, and multiple rows can be put together to create a more dramatic border.

Do the top and bottom stitches first, then go to the small space between those larger squares in the waste canvas to take another stitch between them and offset.


Finished stitches on the waste canvas.


Triple back Hungarian stitch with waste canvas removed.

Triple back Hungarian stitch from the backside of the fabric. It makes a nice cross stitch pattern.

HOLBEIN STITCH
This is a running stitch filled in by return journey. Each stitch covers one horizontal or vertical mesh unit. There are ways of putting this stitch together to create more, and interesting, geometric designs.

Here are the basic steps. Do the horizontal stitches first.


Once you get the horizontal stitches in as far as you want to go, come back and do the vertical stitches.


Once finished, all of the horizontal stitches will be connected by vertical stitches. And, once the waste canvas is removed, it looks very nice and looks the same from the back side.

Finished row from the front:

Finished row from the back:


So, World Cup Soccer is back! This summer the women's teams are playing to find out which are the best in the world. I am really excited for a number of reasons: 1. I LOVE soccer (playing it, watching it); 2. I am happy to be support and rooting for women all over the world; 3. women's soccer is fun to watch (amazing skill, less rolling around on the ground).
I saw Abby Wambach (famous women's soccer player for the USA - she has scored more goals in professional matches than anyone in the world, including men) speak the other week and I got re-inspired to support women, support women's athletics, and to admire hard work, kindness, and skill. So, my family and I are not only watching, but we are doing another "World Cup Project". We did this last year, but each child picks 6 teams and creates an information sheet with the flag, capital, main religion, official languages, country outline, population, and favorite player. They also pick a typical food from the country, write down the recipe, and we have it for supper that week. The night of their country's meal, they give a short presentation about the country and show us where it is on the globe. It is a fun project and I like that they are thinking of, and identifying with, other places in the world and admiring culture and women athletes.
So, again, this summer I will be watching soccer nearly everyday for the next month. And, again, I am bringing you a list of the countries that we have patterns for clothing typical of that country. A sewing and Folkwear connection that is not typical!
France - 102 French Cheesemaker's Smock

Korea - 141 Korean Han-bok

Germany - 123 Austrian Dirndl (also German)

China - 114 Chinese Jacket, 145 Chinese Pajamas

Spain - 140 Flamenco Dress

Australia - 130 Australian Bush Outfit, 137 Australian Drover's Coat, 138 Child's Australian Drover's Coat

Scotland - 152 Scottish Kilts

Japan - 112 Japanese Field Clothing, 113 Japanese Kimono, 129 Japanese Hapi & Haori, 151 Japanese Hakama and Kataginu, 143 Japanese Michiyuki, 305 A Japanese Interior

Thailand - 134 South Asian Tops & Wraps (Thai Blouse), 146 Bags from Around the World: Thai Sling Bag


We are having an open house at our new location (studio/shop/office) on June 7 and 8! Join us to see the new space, shop for patterns, fabric, clothes, and notions. And, everything with be 25% off! We will also have our garment samples to view and our fashion library to peruse.
There will be gifts for everyone who attends, so join us June 7 from 4 to 6 pm, and/or June 8 from 10 am to 3 pm. The studio shop is located at 1185 Charlotte Hwy (Unit G), Fairview, NC 28730.
And, if you cannot join us for the open house, please know that we are having an online sale as well! Just enter the code SUMMER from now until June 8 (midnight EDT) to get 25% off your order! The code works for Folkwear Clothing as well!
We are excited to meet you and inspire your summer sewing!

Folkwear has over 100 patterns in print! And while many of them are perfectly suitable for beginning and intermediate sewists, a number of them have tricky construction techniques (plackets, unusual pleats or large number of tiny pleats, unusual construction, etc.). These patterns are lots of fun and perfect for a sewist who is up for a (moderate) challenge, but sometimes we want an easy pattern. Or, if you are new to Folkwear patterns, or new to sewing, you might want to try one of the simpler-to-sew patterns. So, here I have compiled a list of some of our easiest patterns to sew. This is not to say that the other patterns are too complex for beginners (they usually are not), but if you want some top suggestions, here they are! These are great for beginners, or for experienced sewists who want a quick and easy project.

103 Romanian Blouse - This blouse is one-size-fits-all, has only 4 pattern pieces and is simple to sew in its easiest version with a drawstring neckline and hemmed sleeves. Make it more complex by choosing the more complicated, and traditional, finishing techniques and/or adding traditional embroidery (included in pattern).

119 Sarouelles - These pants have a crotch gusset that is easy to insert, they are easy to sew, take very little fitting, and are comfortable! There are 3 versions in this one pattern. The one above is the Turkish pants, the pants at the top of this post are the African pants - both from this pattern.

128 Russian Settler's Dress - The pattern for the dress and apron is very simple and easy to fit, especially if you do the "simple" version. Like many of our patterns, this pattern has techniques that are more advanced, but you can choose the simpler version. The shirt is also fairly easy, but it has a collar to install (simple) and underarm gussets.

132 Moroccan Burnoose - This pattern makes large cape-like garment with a hood. It is easy and quick to make, and you can choose to add embellishments around the edge or leave it simple.

142 Old Mexico Dress - Simple and quick to sew, this pattern is easy to fit and great for beginners. Make a blouse or a dress. Add embroidery to the yoke and/or openings to add complexity, or just a different fabric to the yoke for interest! This pattern is one of most popular patterns ever.

153 Siberian Parka - Easy-to-sew pullover with several pieces. No closures to make, no fitting to worry about. And you make a super warm, very comfortable garment.

254 Swing Coat - A simple unlined, long, jacket that is quite easy to sew, with no buttons or zips to worry about.

271 Sunset Wrap - One-size, one arm wrap that you can make in an hour. Very easy.

Finally, we have our Basics Collection. These are five patterns that are a breeze to sew up. Easy to sew and easy to fit, these garments are comfortable and customizable. Make in your favorite fabrics, add embellishments, or just keep it simple. Pants, Tunic, Jacket, Pinafore Dress, and Overcoat - these are great garments to learn on, but also great garments to sew up for a quick and easy project.

The Haori is a lightweight coat that was traditionally worn several ways by different groups of people. Even today is an essential feature of the ceremonial kimono attire for men, along with the Hakama. The Haori was not worn by women until the Edo period (1615-1868) when geisha started to wear the garment in imitation of men's kimono attire. Women later wore the Haori mainly to prevent their kimono from becoming dirty or wet when out - it was worn as outerwear. Originally, the Haori was worn exclusively by the upper classes, gradually becoming allowable for lower class wear.

The Hapi (or happi) appears to result specifically from the relaxation of social restrictions regarding marks of rank. Considered a workers or artisan's jacket, the hapi holds a place similar to the hippari (112 Japanese Field Clothing). However, it is worn open, while the hippari is a folding type of kimono, closing with four ties.
The Hapi is often decorated with emblems which have their origins in the the system of monsho - symbolized by the hereditary crests of Japanese families. Historically, these crests were used to mark the formal kimono, household, utensils, lanterns, and gravestones of important families, as early as the Heian period (794-1185), and gradually became recognized as the household's special symbol. As such, the crests indicated the position, honor, and taste of the family and could be quite intricate.
For military families of rank (daimyo), the use was very different. On the battlefield, warriors needed to tell enemy from compatriot, and foot-soldiers needed a symbol with which to identify. The earliest crests, worn on armor and banners, were of necessity simple, legible, and easily distinguishable.
During the Edo period, the Hapi first appeared. Servants customarily wore their master's crests. The style of this work jacket (the Hapi) would have a large and bold decorative version of the crest dyed on the center of the back and on the front neckband.
More history and lots of information on how to screen print a crest onto your handmade Hapi is in the 129 Hapi and Haori pattern.

References: The Book of Kimono: Complete Guide to Style and Wear by Norio Yamanaka. Kodansha International. 1982.
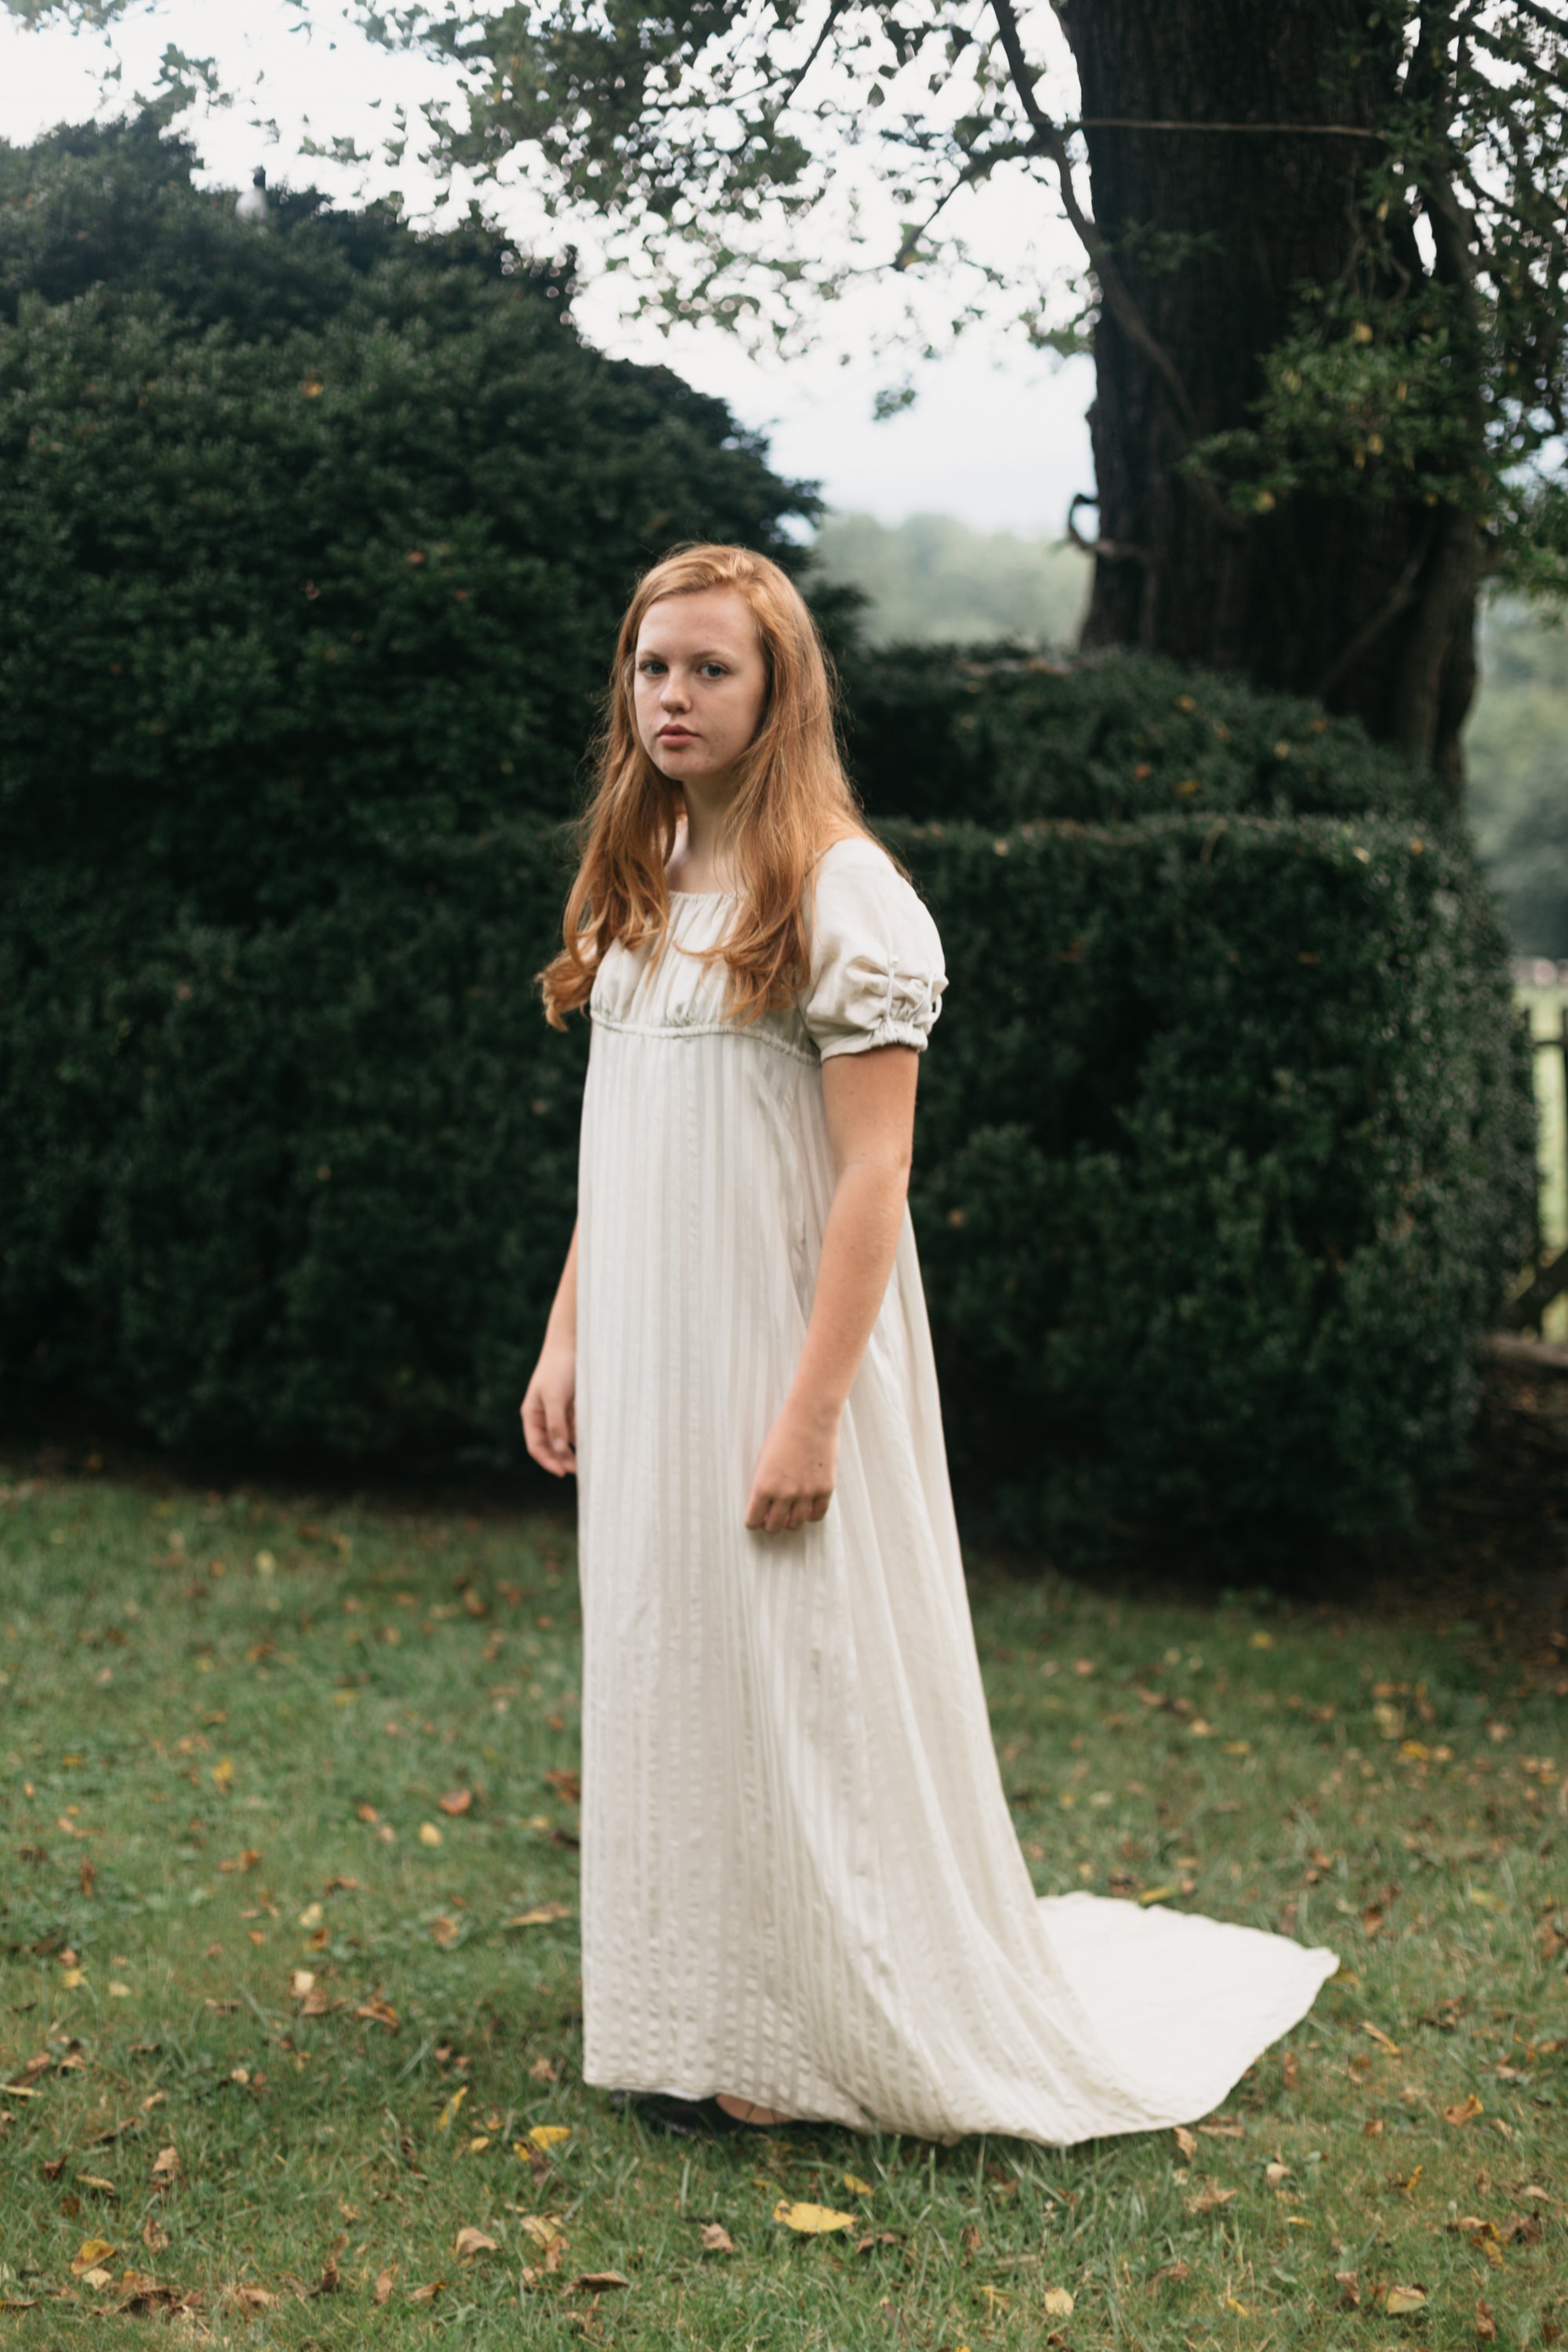
A narrow, high-waisted silhouette has recurrently expressed the epitome of grace and femininity in ancient Greece, medieval Europe, Napoleonic France, and into modern day. The Empire Dress of the period 1795-1815 is the simplest and loveliest example; its lack of ornamentation accents a pure integrity of line.
Fashion has always been influenced by political and economic factors, both directly and subconsciously. This was strongly evident during and immediately after the French Revolution, when cataclysmic social upheaval was accompanied by radical changes in dress. As in the decade following World War I, a wave of female emancipation brought short hair, rejection of constricting stays and corsets, and body-revealing clothes with the natural waist-line displaced or ignored.

The ascendancy of French influence on fashion had reached its peak a few years earlier with Rose Bertin, Marie Antoinette's couturiere, whose extravagant whims swayed Europe to an unprecedented degree. Even before the Revolution, however, simpler styles were beginning to appear from England, where newly-invented machines wove fine cottons from colonial India. The robe a la Creole, and unstructured sashed sack-dress, was followed in 1790 by the English chemise. During the Republic this gown, shaped only by drawstrings at the neck and below the breast, became more and more "Grecian". Necklines dipped lower, waistlines rose, and sleeves shortened. A more refined fit was adopted during the Directoire period when the bodice was cut separately, with the skirt sewn on.
The fall of the Bastille in July, 1789 had brought a definitive end to the glaring opulence of the upper classes. Men did not dare to appear in public wearing lavish clothes; from this time on, in fact, men have continued to dress less flamboyantly than women. In France it was not longer safe for anyone to wear silks and velvets. The silk weavers of Lyon were ruined, and the industry remained idle for twenty years. The guild system, rigid but effective, was abolished as undemocratic, resulting in inferior workmanship in fabric-making and other crafts. Fashionable modistes, tailors, and hairdressers fled to foreign capitals such as London and St. Petersburg.

In fashion, architecture, and even government structure, the forms of classical Greece and Rome were emulated, especially during the Directoire and Consulate periods. Women's dresses resembled slender columns, with the skirt's fullness carried to the back and lengthened into a train. White was the universal color in sheer fabrics worn over very simple, often flesh-colored undergarments. A few trend-setting socialites even sprinkled themselves with water to enhance the clinging effect of the garments. Dresses fine enough to be drawn through a woman's ring were worn summer and winter, contributing to epidemics of influenza, which was called "muslin disease". A contemporary rhyme lamented:
"Plump and rose was my face
And graceful was my form,
Till fashion deemed it a disgrace
To keep my body warm."
At first the only concession made to the weather was the shawl, which came into vogue after Napoleon's Egyptian campaign. These were similar to the Greek chlamys, about 5 by 8 metes, made in taffeta, muslin, or crepe in white or pale colors. Smaller cashmere shawls and Scottish Paisleys were worn for warmth, although only Josephine (emperor Napolean's wife) was allowed to wear real India shawls - she owned three or four hundred of them.
After 1800, the Spencer became popular, a long sleeved, high-necked jacket which reached to just below the armpit. Spencers were usually made of velvet in colors such as Egyptian earth, pea green, or tobacco brown. Only late in the decade did the more practical long redingote find favor.
To set off the delicate gowns, flat slippers were worn, laced and tied at the ankle.
When Napoleon proclaimed himself Emperor, pomp and circumstance and court dress returned. He was eager to revive the French textile industry, and was said to have sealed off fireplaces in the Tuileries to encourage the wearing of velvet instead of muslin. After 1808, gowns shortened, with trains worn only at court, bodices became less skimpy, fabrics and color more substantial, and undergarments regained importance. Beginning in 1815 after Waterloo, fashion, like politics, underwent a long transitional period before returning at last to conservatism and formality.
Folkwear presents this classic Empire Dress sewing pattern in three lengths, with two sleeve options. There is a traditional version, with drawstrings to fit the bodice firmly to the bust and tie in the back. And, a more contemporary version, with a closed back and elastic at the "waist".
--from Notes on the Empire Dress, 1981, Folkwear

Looking back through the Folkwear photo files, I found a few Afghan Nomad Dresses that I wanted to share. We are not doing a "fabric suggestion" post for this pattern because it has so many colors and combinations that could be possible! So, I thought I would share what other people have made. There are a few comments on construction/fabric when available.

This dress is in the Folkwear collection. It is probably over 20 years old, made with cotton prints, and voile/lawn. Quilting cottons are probably here too.


Dress made by Folkwear co-founder, Alexandra Jacopetti Hart. Made from velvet and cottons, with embroidery, handwork, beading, and fringe. Second image was from when the dress exhibited at the Museum of Art and Design's Counter-Couture exhibit.

This dress was made by a customer - she did used one of the embroidery patterns included in the pattern on the bodice.

Another beautiful version with trim and embroidery!

A simple and lovely version from a Folkwear customer.

Another Folkwear customer with a great combination of fabrics.


This customer did a beautiful job with different fabrics, even in the skirt panels. And she gathered the sleeves into cuffs at the wrists.


Erin, of Tuesday Stitches, made this amazing dress, and blogged about it here. She used quite a bit of fabric from her stash and some up-cylced fabric.


My own version - made shorter and with embroidered ribbon and organic cotton crocheted lace (from Botanica Tinctoria) on the bodice.

This amazing customer made her wedding dress from this pattern, adding crocheted lace to sleeves and bodice (also see first photo). So special!

And, another from the Folkwear collection. This one is made with some silk scraps for trim, and cottons.
This is a pattern to use your imagination and creativity to create something that is beautiful and is YOU! Have fun!

The 107 Afghan Dress is constructed primarily of rectangles, which makes it easy to alter for size and fit. The skirt, even in its narrower Westernized version, should require no adjustment for up-sizing since it measures 105" (267cm) wide at its lower edge. You can simply gather the skirt's upper edge more or less, as needed to attach to the bodice.
Chart of pattern piece dimensions:
|
Size |
Bodice Length |
Bodice Width |
Waistband Length |
Upper sleeve at shoulder edge |
Middle sleeve at upper edge |
|
Small |
23” |
10-7/8” |
10-7/8” |
26-1/8” |
25-3/4” |
|
Medium |
25-7/8” |
11-7/8” |
11-7/8” |
28-3/4” |
27-3/4” |
|
Large |
28-2/8” |
13” |
13” |
30-5/8” |
29” |
|
XL |
32” |
16” |
16” |
34-5/8” |
Match width of sleeve’s lower edge |
|
2XL |
35” |
18” |
18” |
37-5/8” |
|
|
3XL |
38” |
20” |
20” |
40-5/8” |
The measurements on the chart above for Small, Medium, and Large are the actual measurements of the pattern pieces themselves. These are the sizes of the rectangular pattern pieces you will cut. The numbers shown for XL, 2XL, and 3XL are only estimates of what the sizes of the pattern pieces should be, and should be treated as starting points to try out in paper or muslin. A quick test run of the bodice and upper sleeve in muslin or light-weight non-woven interfacing is an easy and inexpensive way to evaluate the fit of the adjusted bodice, waistband, and upper sleeve. Remember that the underarm gusset becomes a part of the waistband, so you will have an additional 6" (15cm) on each side of the garment (each gusset is 6" [15cm] wide where it attaches to the waistband). Note the bodice has little to no ease, as is typical of this dress.
Adding bodice length
To increase the length of the bodice, simply add to the top and bottom edges of the pattern piece A. Since the bodice and waistband, when stitched together, will extend further down the front and back body, you will also need to add to the bottom edge of the gusset (the edge that is stitched to the skirt) so that the top of the dress fits the skirt evenly.
Adding bodice width
The bodice and waistband widths should be the same, so if you widen the bodice piece, be sure to add the same width at each end of pattern piece B. A widened bodice will attach to the skirt without problem, because you can simply gather the skirt less.
Adjusting sleeve to fit lengthened bodice
The upper sleeve is pleated along the top edge where it joins the bodice to form the shoulder. The pleats in the sleeve can be made deeper or shallower to adjust to small changes in bodice length, but if you add a lot to the bodice length, be sure to add to the top edge of the upper sleeve pattern piece so that it is at least 2 to 2-1/2" (5-6.5cm) greater than the length of the bodice to allow for the pleating. The top edge of the middle sleeve should be cut to match the bottom edge of the upper sleeve, since no gathering or pleating is done on this seam.
Traditionally, the slit opening is worn in the back (denotes back of dress). However, I have found the opening to be very comfortable to wear in the front, so that may be another fit option to consider. Bodice pieces are the same size for front and back.
That should be about it for adjustments for fit for this dress! Again, traditional folk patterns are often very easy to adjust up or down. We hope you enjoy it and tap into your creativity with this beautiful dress!


