- Home
- About
-
Shop
-
Sewing Patterns
-
Fabric
- Sewing Supplies
- Folkwear Clothing
-
- Blog
- Customer Gallery
- Contact


Pressing as you sew is as important as the stitches you put in the fabric. A garment will simply not look or fit right if you wait until it is completely put together to press it; in fact, it probably won’t go together very well at all unless you press as you sew. Refresh your pressing knowledge by reviewing these tips:

 Press seam flat first.

Then press seam open.


It is the third and final day of the 503 Poiret Cocoon Coat Sew Along and we will finish the coat by adding the lining, hemming the sleeves giving them a professional finish, and learn a couple of tricks using a length of chain to weight the hem and add some ribbon to create a hem finish that Poiret actually used himself.
Check out Day One and Day Two of the Sew Along to see what we have already done in making this fabulous coat! Today we are going to add the lining and finish the edges.
Linings have a way of making a garment even more special and the the Poriet Cocoon Coat is the perfect piece for learning how to add a simple yet beautiful lining. Do not shy away from adding a lining just because it seems complicated. It is not. If you have avoided adding linings to your sewing project, give this one a try.
There are times when you may opt to not use a lining. If using a fabric like a brocade, cross weave, or damask that is equally beautiful on both sides, then consider going sans lining, and let the fabric show it's entire beauty. However, linings are often a pleasure to wear. There is nothing more decadent than easily slipping in and out of a garment that feels and looks amazing. This coat design really does beg for a lining, because of the way it drapes and dips in the back, allowing for a beautiful lining to peek out. There is something intriguing about catching the glimpse of a lining that adds an unexpected twist to a garment.
Linings have the added benefit of easily and cleanly encasing the raw edges of all kinds of garments. However, adding a bound edge (bias strip) can allow for not only a clean finish but another excuse for a pop of color or for an interesting eye-catching effect. Of course, simply finishing the hem with a turned under edged finished is fine too if you are not using a lining.
I will be adding a ribbon detail to the hem of the coat. The ribbon serves a functional purpose as well as adding a finishing detail. Adding ribbon to a turned edge to finish the hem works well too. Simply stitch a ribbon to the raw edge of the hem and hand stitch to the lining.
Note: Use the 1/2-inch (13mm) seam allowance for turning the hem edges on this coat. Using a wider hem with not allow the fabric to lay flat along the curves.
Preparing the Coat and the Lining
Inspect the raw edges of the coat and lining before assembling them. Be sure to clean up any stray threads. Check to be sure the dart points have been tied off.
Clip the seam allowance along the curve of each sleeve and trim the sleeve seam allowances by approximately half. Depending on the fabric, simply make a clean trim or use pinking sheers. Clipping and trim the excess seam allowance will allow the sleeve seam fabric to release as intended. Press the seam allowances open or towards the back of the coat.


Repeat doing the same for the lining. Because my lining fabric is delicate I trimmed the seam allowance using a straight cut.

Pining the Lining to the Coat
With right sides together, line up the coat body with the lining, matching the notches and the seams allowances. Go ahead and slip the sleeve lining into the coat sleeves just ensure they do not accidentally get caught in the stitching.

Once you start matching the notches, you may need to to remove the pins and realign, which is the kind of adjustment you should expect to make with a garment with long curved shaped edges. I found this to be the case for me between notches 8 and 9.

Even though the bottom hem between both notch 9’s is not stitched for turning purposes, align and pin anyway, to ensure correct alignment. This may prove beneficial when using a slippery fabric like silk which can wiggle around.

Hint: Remember to pin within the seam allowance if using delicate fabrics, because pins often leave visible pin holes on silk and velvet. Use more pins to ensure all stays put if using slippery fabrics.
Tip: When machine stitching layers of fabric, especially if a slippery fabric is one of the layers, it helps for the stable fabric to lay on the feed dogs of the sewing machine. This makes sense when linings are often slippery. If both fabric layers are slippery, then using a removable or tare-away stabilizing material is highly recommended. Practice with a sample of both slippery layers of fabric sandwiched between a top and bottom pieces of stabilizing material to see how beautifully it helps.
Tip: Use a new sharp needle and stitching slowly will yield the best results.
Adding a Lining WITHOUT a Piped Edge Neckband:
Stitch the coat body and lining together as you normally would on the 1/2inch seam allowance. Begin with a back-stitch at one of notches labeled 9 at the bottom hem, stitching around the entire outer edge of the coat, ending the stitching at the second notch 9 with a back-stitch. Remember do not to stitch up the seam allowance between the notches labeled 9. There should be a gap or opening at the very bottom of the hem, which will allow for turning the coat and lining right side out.

Carefully press the seam allowances towards the lining.

Tip: If you are not accustomed to using a ironing cloth, consider investing in an inexpensive 1/2-yard (46cm) of silk organza in white or cream. Keeping an ironing cloth handy is an undervalued and sometimes life saver of a tool that helps to prevent damaging or scorching fine or delicate fabrics. The sheer quality of using either white or cream silk organza, will allow you to see through to your project while pressing. Even with the organza folded, creating a double layer, will allow you to see through to your work well enough.

Press the 1/2 inch (13mm) seam allowance under in the open hem area (between the 9 notches) for the coat body (and the lining to the wrong side). This step will provide you with a clean and correct turned under edge ahead of time for finishing the hem by hand.


Now, turn the coat right side out and press slightly rolling the coat edge in towards the lining.


Adding a Lining WITH a Piped Edge Neckband:
If using piping, first stitch main fabric and lining together at the collar with a machine-baste stitch. Then make a second pass of stitching using a zipper foot to allow you to get close to the piping on the neckband for a snug finish. Refer to the photos in Adding a Lining WITHOUT a Piped Edge Neckband (above).
Begin stitching at one of notches labeled 9 at the bottom hem, using a regular presser foot to baste the layers together along the 1/2 inch (13mm) seam allowance, stitching around the entire outer edge of the coat, ending the basting at the second notch 9. Since we are basting back-stitching is not necessary. Remember not to stitch up the seam allowance between the notches labeled 9. There should be a gap or opening at the very bottom of the hem, which will allow for turning the coat and lining right side out.
For the final stitching, change to a zipper foot, to allow you to stitch close to the piping.

Note: Because the piping is sandwiched between the lining, and the neckband, plus the coat fabric, you will not be able to see the edge of the piping when stitching close to the piping with the zipper foot. This why keeping everything properly aligned on the 1/2 inch (13mm) seam allowance is important.
Hint: Hand baste close to the piping to help create a guideline for the final stitching with the zipper foot if you feel the need.
Sewing blindly with piping, is a bit tricky and basting (whether by hand or on the machine) allows for a first pass that can be then be adjusted when stitching again with assistance of the zipper foot. If you have a mishap, don’t worry. If the piping does get caught in the stitching, the needle can be moved away from the piping and you can re-stitch. If the stitching is not close enough to the piping, then the needle can be moved closer and re-stitch. Once the correct stitching is made, then the incorrect stitching can then be removed.
Take your time stitching around the angled bottom edges of the neckband. Check to be sure the lining and the coat align properly, look for puckering or any caught stitching that may have accidentally occurred. Once again, if the first pass is not perfect re-stitch where needed. Remember, sewing in sections is perfectly acceptable. You can see by my stitching below, how I had to adjust my positioning to make the stitching align close to the piping.

Carefully press the seam allowances to wards the lining.
Press the 1/2 inch (13mm) seam allowance under in the open hem area for the coat body and the lining to the wrong side. This step will provide you with a clean and correct turn under edge ahead of time for finishing the hem by hand.
Now, Turn the coat right side out and press slightly rolling the coat edge in towards the lining.
Adding a Decorative Ribbon to the Hem
This is an optional step, but one you should consider, because it can serve a functional purpose as well as adding a finishing detail. Depending on the drape of the lining fabric, and because of the cut of the bottom of the coat, the lining can sometimes fall away from the bottom edge. For this reason the ribbon helps to support the lining and provides a stable place to add a few hand stitches to tack the lining to the coat. If after trying on your coat you find that your fabric does this, hand stitch the inner edge of the ribbon through all the layers, taking tiny invisible stitches through to the outer layer.
Hint: Ribbon wider than 1 inch (2.5cm) may be tricky to get to lay flat along the curves of the coat, so we recommend a ribbon less than 1" wide. The weight of the ribbon is also be a factor. Thick or stiff ribbon generally is not as pliable and light-weight ribbon. For this reason grosgrain ribbon is not recommended. Bias tape or bias ribbon can be used, as well Petersham. I am using a 1-1/2 inch (3.8cm ) silk bias ribbon from Hannah Silks. Even though my ribbon is a bit wide it lays nicely along the curved edge of the hem without problem.

The ribbon can be added when finishing a turned edge too.
Note: Hand wash and air dry your ribbon before using. Not all ribbon should be laundered. Pay attention when you purchase your ribbon if it can be laundered. Press ribbon on low heat to ready for applying.
The instructions tell you to begin at the center back of the lining hem with a slight overlap, lay the ribbon on the seamed edge of the lining with the edge of the ribbon along the seam line. Pin or baste the ribbon in place around the inside edge of the entire coat, but only to the lining and seam allowances (not the coat body fabric). At the center back hem, overlap the ends of the ribbon, folding under the raw edges to create a finished overlap.
Because I do not have enough ribbon to go all the way around the inside of the coat, I decided to only apply the ribbon running along the bottom of the hem. I begin and end the ribbon close to the bottom edge of the neckband. For this reason I did not start with overlapping the ribbon at the center back.
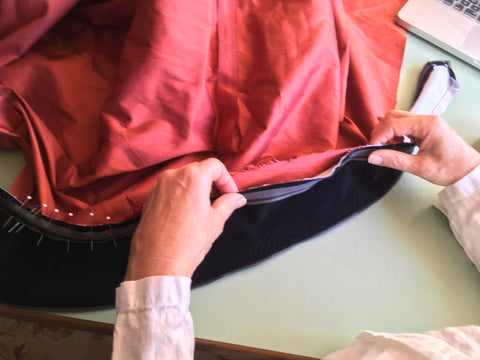
The idea in positioning the ribbon, is to only align and pin the bottom edge of the ribbon to the lining and the seam allowance underneath, while not catching the coat fabric in the pinning. Place your finger between the coat fabric and the seam allowance so you can feel the pin catch the seam allowance. If you are not sure, go ahead and pin the lining and the coat together at the outer edge and then place your fingers between the the lining and the coat fabric, then it will make sense. Notice the positioning on my fingers on the left hand.

See my thumb helping align and hold the ribbon to the lining and seam allowance underneath.

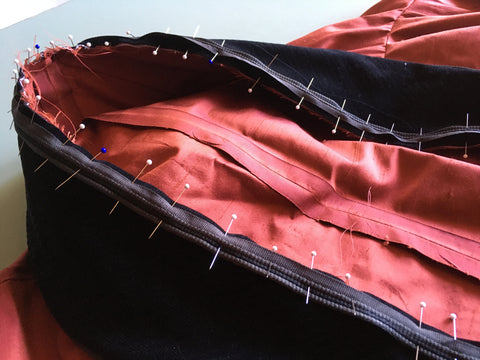
This is what the inside should look like ( the seam allowance between the lining and coat body fabric), with the ribbon pined to the lining and the seam allowance. You want to stitch the bottom edge of the ribbon to the seam allowance to provide to give it extra strength and stability.

Reaching between the outer fabric and the lining, hand stitch the ribbon to the lining and seam allowances along the outer edge first.
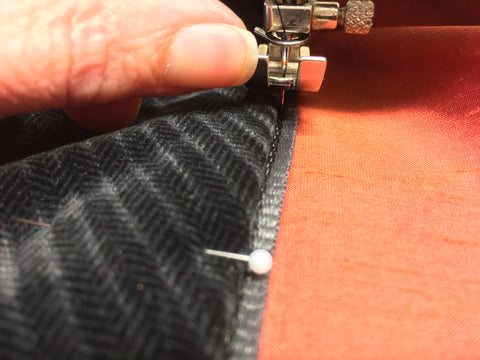
OR, I chose to machine stitch the bottom edge of the ribbon to the lining at the stitching line. I had to maneuver my work under the presser foot being careful that the bunched up fabric did not get caught in the stitching by accident. I took my time, sewing slowly, adjusting the fabric as I went.


Then using a steam iron, steam the ribbon as necessary to lay nicely along the curve of the coat hem edge. Stitch the inner (top) edge of the ribbon to the lining only. The bias silk ribbon I used rounded the curves without needing to use a steam iron. Pin ribbon to the lining and hand stitch in place.
Hint: In order to only pin the ribbon to the lining, I put a French curve or something flat with smooth edges between the lining and coat layer to help with pining. This helps to avoid catching the coat body fabric in the pining. Look closely at the photo below and you can see the French curve sandwiched between the coat body and the sheer lining.


Adding the Optional Weighted Chain
The hem of the Poiret Cocoon Coat will drape and hang even more beautifully if weighted. This is not an uncommon finishing hemming technique, but one often forgotten about. The pattern calls for a 24-inch (61cm) of chain, which can be purchased at any craft shop that sells jewelry supplies. The weight of chain should correspond to the weigh of the fabric that needs weighting. Just about any necklace or bracelet weight will work for light to mid-weight fabrics. Avoid a chain that is large enough to look lumpy when laying in the fold of the hem.

At the center back of the coat body hem opening, insert the chain weight into the fold of the pressed seam allowance, centering the chain on the center back seam.

Tip: Use a few tiny widely spaced (2-inches (5cm)) of hand stitches along the length of chain to secure and hold the chain in place.

Pin and hand stitch the seam allowances at the bottom edge of the ribbon using tiny stitching. Pin the pressed edge of the lining slightly above the pressed folded edge of the coat. Hand stitch the lining to the coat along the bottom edge of the ribbon. Catch the seam allowance of the coat hem and and a small amount of the ribbon/lining fabric, while avoiding catching the outer coat fabric in the stitching.

Finishing the Sleeve Hems
Learning to properly hem sleeves is a tailoring technique that can be used on any garment with lined sleeves. This techniques holds the lining in place and keeps it from being visible at the edge of the cuff, creating a lovely finish.
Turn and press the sleeve hems of both coat and lining to wrong side on the 1/2 inch (13mm). Apply the ribbon to the pressed (right side) edge of the lining, beginning and ending the ribbon with an overlap at the seam. Stitch the ribbon to the lining along both edges of the ribbon. You can do this by hand, but I had not problem using the sewing machine.


With the ribbon edge of the lining slightly above the folded raw edge of the coat sleeve, hand stitch the lining to the coat along the edge of the ribbon.


Adding the Button or Frog Closure
The loop-mate for the button was added in the last step on Day Two of the Sew Along. If using a button, sew it to the wearer’s left side of the coat as marked on the pattern piece. It is ok if you need to adjust the button placement to ensure it aligns with the button-loop... I did. Be sure the button slips smoothly through the loop and is secure at the same time. When adding the button, stitch through all the layers for a strong hold.
Tip: When sewing buttons to fabric with multiple or thick layers try using a heavier weight thread sometimes referred to as button twist.


If using a frog closure, add the ball side to the wearer’s left side of the coat front, as marked on the pattern for positioning. Sew the loop side of the frog at the point of the neckband as indicated on the pattern, adjusting if needed to make the frogs fit securely.

Note: Whether using a button or frog closure be sure the front overlap of the coat edge is aligned straight up and down, and not crooked.
For an extra bit of closure security, you may want to add a snap or add ties to the opposite end of the neckband and the corresponding point on the lining to keep the underlap in place.


Often when I remake a design made by someone who actually made history, I wonder if the inspiration I had in making the garment some how got back to the originator? If so, I hope Paul Poiret where ever he may be, took pride in knowing that his iconic Cocoon Coat, is still being made and enjoyed by sewists. Make your own coat wearing history using the Folkwear 503 Poiret Cocoon Pattern soon!

Join the talented Sarah Pedlow of Threadwritten Textiles for a virtual embroidery workshop concentrating on stitches and designs for the 142 Old Mexico Dress pattern. This workshop takes place on January 22, 2022, and registration is open now. Save your space and have something to look forward to in the new year!
Learn more about the workshop and register here. The embroidery pattern is included with your registration.
Get the 142 Old Mexico Dress Pattern here.
Watch a video about how to cut the yoke from this pattern

This is day TWO
For day ONE click here
To learn how to make the piping, click here
by Cynthia Anderson
I hope, you are pleased with the ease and simplicity in how Folkwear's 503 Poiret’s Cocoon Coat Pattern has come together so far. Check out day one of the sew along here.
Today, in Day Two of the 503 Poiret Cocoon Coat Sew Along, we will make the neckband or collar and attach it to the coat. You can read a separate blog post on how to make and use piping here. We will also add a button and loop closure as a final detail. After today, we have one more day of the sew along where we will finish the lining and add the trim.
Sewing often requires substitution or adjustments from the original plan. This is where flexibility can benefit your sewing enjoyment. In this sew along I decided to use trim instead of piping, because I wanted to try it and it was in my stash. I will talk about my experience using the trim in case you decide to do the same, but using piping will be very much the same experience.
Some people use fur (or faux fur) for the collar on this coat. If using fur, the collar does not need trim or piping, but edges should be finished if needed to prevent raveling.
Cutting Out the Neckband
If you have not done so already already, cut out the neck band. Cut the Neckband Pattern Pieces B according to the pattern instructions, being sure to flip one of the pieces to create two neckband pieces that are a mirrored image of each other, as seen below. Transfer any markings and notches too.

If your fabric has a nap or pile like the velvet corduroy I am using (in the photo above), be sure the nap or pile goes in the same direction. Remember, the neckband is a focal point.
Add Interfacing
After cutting out the neckband, add a woven interfacing cut from the same collar pattern piece, to the wrong side of each neckband pieces. The interfacing will add structure and strength to the neckband fabric and neckline once it is sewn to the coat. Baste the layers together along the 1/2 inch (13mm) seam allowance. I made this baste line using a long (no.4) stitch on my sewing machine. Sometimes the word baste can mean hand baste stitching to some sewist, which is perfectly fine. But in this case the 1/2 inch (13mm) stitch line will be used as a guide for aligning the piping or trim, so take care to stitch it with accuracy using a sewing machine. This basting line also helps to ensure that the bias cut neckband does not become stretched out of shape when applying the piping.

Tip: Use a thread color that is easy to see on the interfacing side of the neckband when stitching the 1/2 inch (13mm) seam allowance guideline. This stitch line will be used for aligning the piping or trim. For example, I used black thread for the top and bobbin thread that matched my neckband fabric and also showed up on the white interfacing. If I had used black colored interfacing I might have used a gray thread in the bobbin to make it was easier to see.
Constructing the Neckband
With right sides together, pin and stitch the Neckband Pattern Pieces B along the center back using the 1/2 inch (13mm) seam allowance, matching the notch. Be sure to back stitch at the beginning and ending of the stitching. Press the seam allowances open.

Hint: If using a fabric such as velvet (as I am) or corduroy do not press with an iron. Use your fingers to press and mold the fabric the best you can, or press on a needle board or terry cloth towel from the back side of the fabric. Using an iron on the top can scar and damage fabric with nap or pile.

Important Note: Whether you use piping or not, the outer edges of the neck band for this coat are finished before it is applied to the coat body. In each case the edges of the neckband are folded under to the wrong side to create a clean finished edge before being sewn on.
To make piping, see our blog post, Making Piping Basics.
Thoughts on Using Trim Instead of Piping
I used a pre-made trim instead of piping to edge my collar. This trim is more like a grosgrain ribbon with a tiny rounded edge that looks like corded piping. The grosgrain part makes it a bit stiffer and it may be a bit wide, but I made it work.
The instructions recommend starting at center back of collar, pinning and then basting the piping in place. Instead, I found it helpful to give myself enough piping length, starting at the angled points to be sure they worked well first.
It took a little trial and error to determine how much of the trim width would work so the corners would look nice. This was in part due to the thickness of the piping and the sharpness of the corners. I had to come to peace that the trim I was using was not going to allow for defined corners, but the results are perfectly acceptable.
Hence, this is a perfect example of why lighter weight fabrics work better when applied to corners. While determined to use the trim I had, my corners are more rounded, but lovely just the same.
Hint: If you are a seasoned piping master then feel free to align, pin, and stitch your piping in one go. If you are like me and only pipe occasionally, there is no shame in working in sections.
Piping and corners can be fiddly. If you have trouble stitching the corners on the sewing machine, you should hand stitch to make the corners look more sharp.
Adding the Piping to the Neckband
Note: Even though I am using trim edging I will refer to it as piping.
The idea behind adding piping is for the covered cord edge to just peek out of the seam allowance creating a beautiful finished edge detail. Adding piping is not difficult but it does take time to align accurately.
Using the pattern piece, mark the notches and squares on the piping to help with accuracy of fitting the piping to the neckband.

Be sure the piping is oriented correctly; the finished corded edge of the piping faces towards the center of the neckband. The raw edge of the piping runs parallel to the raw edge of the neckband edge. The extra piping will overlap at the center back of the neckband.

Use the 1/2 inch (13mm) basting line as an aligning guide. The idea is to align the stitch line on the piping to the 1/2 inch (13mm) seam allowance. Align by sticking a pin straight through the underneath, or wrong side, on the basting line and align the piping on top. With the pins still in place, use additional pins to secure everything in place and ready for machine sewing. Remove the original pins used for alignment or use them as well.


Align and pin the bottom edge of the piping at the corner points, matching the marks you made on the piping with the notches, squares, and bottom points on the neckband. Clip the piping seam allowance as necessary at the angles and points to allow it to bend around the corners smoothly.


Tip: You can use a bit of Fray Check if you fabric starts to fray too much with just for corners and angles.
After going all the way around the neckband in this manner you will end where you began… at the center back. On the wrong side at the center back, overlap and cross the piping exactly, leaving extending tails into the seam allowance as seen below.

Look closely to see how the piping overlaps at the center back of the right side of the neckband below.

Hint: Do not feel you have to sew the piping on with one continuous stitch line. I find it easier to stitch in sections. Stitch the long sections, then sew the points and angles at the bottom edge or the other way around. Often the best way is the way that feels right to you and the materials you are working with.
Hand baste or machine baste the piping to the neckband. Then make a final stitch using a zipper foot on the sewing machine. Sew along the previous stitched seams, which should be on the 1/2 inch (13mm) seam allowance for Folkwear patterns.

Tip: Not all piping is created equal and can be made in varying widths. If the piping is wider than the seam allowance of your project, just trim the excess away once you are sure you have everything stitched with proper alignment.
At the bottom points of the neckband, clip diagonally to the stitching line through the seam allowance of the piping and neckband to release the fabric so it will lay flat. Don't clip the stitching line. Sorry I failed to take a photo of this step.
With the exception of the long notched edge, fold the other edges under at the seam allowance to the wrong side and press. Hand baste the folded-under edges to the interfacing to hold it flat if necessary. Be sure not to catch the neckband fabric in the stitching. Because the trim I am using was a bit stiff, I decided it would benefit from hand basting.

The piping should just stick out from the seam allowance as seen in the photo below.
Note: If the piping is sticking out too much from the edge of the neckband seam stitching, this may be due to not aligning the piping correctly or not stitching close enough to the cording when making the piping. Depending on the severity of the gap this can sometimes be remedied by re-stitching, moving the needle closer to the corded edge.
If you are not using a piped edge, press the turned under edge being sure the seam allowance stitching line is not visible and the edges are clean and uniform.

Attach the Neckband to the Coat
Place the wrong side of the neckband to the right side of the coat body, aligning the seam allowances at the center back, matching the notches, square to seam, and dot to dart. Pin in place around all edges.
The pattern instructions recommend hand basting or machine basting all the layers together along the stitch line of the notched edge. I machine stitched as normal.

Working with right sides of the coat and neckband facing up, pin the unsewn edge of the neckband to the coat front. Make sure the neckband lays nice and flat to the coat body.
The seam allowances should already be turned under (whether using piping or not). Pin and hand baste the neckband to the coat body using a long running stitch to hold everything in place.

If you are not using piping, neatly hand whip stitch the neckband to the coat along the long un-notched edge and the angled bottom edges. Try to keep your hand stitching small and uniform, stitching just at the edge of the neckband and catching a small amount of the coat fabric with each stitch.
If using piping, be sure the bottom of the neckband lays nice and flat and double check that all edges are turned under.

Once the neckband is secured and ready to go, align your sewing machine needle and stitch in the “ditch” between the piping and the neckband to secure. I found it easier to sew one side of the neckband at a time, by starting at the center back of the collar, stitching slowly along the long edge and then around the angled edges at the bottom. Finish with a back stitch at the seam allowance at the end of the neckband edge.
Repeat on the other side of the neckband.

Now the collar is applied and stitched down, you can add a closure.
The ClosureBecause of the simple elegance of this coat design and in staying true to Poiret’s aesthetic I am using the button and loop closure suggested in the pattern instructions. Other closures are acceptable, but keep in mind the look and feel of your coat. The pattern also suggests using a frog closure, which can be hand made or pre-made. (Stay tuned for Day Three of the Sew Along for the frog closure).
You can think of the closure like jewelry and make the closure a special final touch. If you are going for a more casual coat, make the closure look like it was part of the design plan. Whether simple or eye-catching, an inspired closure will make your coat sing.
I have chosen to use a button from my stash. It is not quiet as large as the button size suggested in the pattern, but I am hoping the special-ness of this Czech-glass button will make up for any discrepancy in size. The button needs a loop and all that is needed is a scrap of left over piping fabric. Since I opted to not make piping I am using a scrap of the fabric used for the coat body.
Making the loop is simple, use a bias rectangle measuring 1-1/2 inches (3.8cm) by 3-1/2 inches (8.9cm).
(Oops: I actually cut my strip on the straight grain by accident, but it worked fine.)
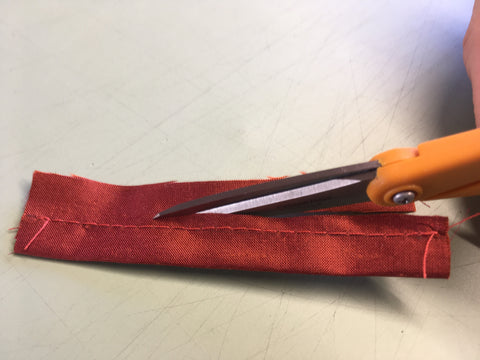
With right sides together, fold the rectangle in half lengthwise. Using the presser foot on your machine as a guide and stick about 1/4 inch (6mm) from the fold.

Trim away the seam allowance and turn right side out and then press.


Make a loop out of the turned strip. Test to be sure the button can easily pass through the loop. Remember the loop needs to be big enough for the button to slip in and out of once it is sewn to the coat.

Baste the loop in place at the bottom point of the band on the wearer’s right side of the coat, matching the 1/2-inch (13mm) seam allowance.
Even thought the right side of the coat is facing up, the loop is sewn to the wrong side of the coat edge as seen below. The edge is simply turned back out to make stitching easier in the machine.


That's it for the collar and button loop closure. We will finish up the 503 Poiret Cocoon Coat in the Day Three of the Sew Along coming soon. Have your lining ready if you are using one. If not, have a plan on how you want to finish the coat edges with either a simple turned edge or a bound edge. Please do not shy away from adding a lining, because it is not as hard as you might think!
Join in to learn how to add the lining, add a decorative (or not) ribbon trim to the hem edge, and add a length of chain to weight the hem. Plus, how to hem the sleeves, add the button to complete the loop closure, or add frog closure. The Folkwear 503 Poiret Cocoon Coat is a great piece for learning simple yet beautiful finishing techniques to apply to lots of future projects!
If you don't already have your pattern for this stunning coat, it not too late. It will be on sale until the end of October as a paper pattern or pdf.
Remember that Folkwear's sew alongs and how-to's are always free and accessible on our website, making it easy and convenient to get started any time you like. Click here to get started on Day One of the Folkwear 503 Poiret Cocoon Coat Sew Along.

by Cynthia Anderson
Making piping is not difficult, and piping can add lots of interest and dimension to your hand-sewn garments or homegoods. In this blog post, I am going to show you the basics of making your own piping. Several Folkwear garments can have piping added to them, and actually encourage sewist to do so (145 Chinese Pajamas, 242 Cowgirl Jacket, 503 Poiret Cocoon Coat, etc.). I hope you will be inspired to try it after reading this post, or if you have, that you may pick up a tip or two.
What you need for making your own piping:
Making your own piping is not hard, but you do need to calculate how much your project requires. Believe me when I say there is nothing more frustrating than taking time to make piping and then not have enough. So, whether you make your own or use pre-made piping, be sure you have all you need plus a bit more. If making your own piping be sure to calculate and purchasing extra fabric yardage.
Fabrics to Use for Piping
Ideally, piping should be cut on the bias, which allows for a bit of fabric stretch and give, enabling a smooth edging around curves and corners. For this reason light to mid-weight fabrics work best for garment making. If a fabric is too thick or stiff, it simply will not have a flexible “give” and will not lay nicely going around corners or curves. Heavy fabrics are used for piping on large projects like upholstery cushions. The thing to keep in mind, is application. For clothing, I particularly like to use fine cotton, linen, wool, and silk for the piping. I don't recommend using knit fabrics or fabrics that are loosely woven. My rule of thumb is to match the weight of the piping fabric to the weight of the fabric I am making the garment from. If you are unsure about what weight or fabric to use when making piping, take the time to experiment with different weights of fabrics to get an idea of how they behave.
Since a bias binding strip is the foundation for piping, have a look at Molly’s demonstration of how to make continuous bias binding or bias tape in this YouTube video. To make piping you often need a very long strip of bias tape and this is an excellent way to make it as it all comes out as one long strip.
Making Piping
If you used the continuous method to make bias tape you are probably all set with enough bias tape. Another way to make bias tape is to cut enough 2-inch (5cm) wide bias strips from a fabric of your choice to make the length you need, plus a tad more for extra measure.

If not doing the continuous bias tape method, pin and stitch the strips right sides together end to end to make one continuous strip.

Trim to the extra fabric to create clean edge and press the seams open.


With either method of making bias tape, fold the bias strip wrong side together along the length, with a long piece of the cording sandwiched in between the fold.

Tip: The cording should be longer than the bias tape. Leave a bit of extra cord length at the ends of the piping until it is applied to your project to help keep the cord from pulling out.
Be sure to line up the long raw edges and pin or baste the fabric in place close to the cord. Machine baste the fold closed to help hold the cord in place and to make the final, more precise, machine stitching easier.

Next, using a zipper foot, which will allow you to stitch closer to the cord, stitch through both layers of the folded fabric as close to the cord as possible, but not so close as to catch the cord in the stitching. It helps to stitch close to the cord to ensure a good alignment when adding it to the seam allowance.

Tip: Use a thread color that matches the fabric or that blends in well. You don't want to have visible stitching in the piping.
You are now ready to apply your handmade piping to your sewing project!

This is day ONE
To learn how to make the piping, click here
by Cynthia Anderson
Today we are starting a three-day sew along for our 503 Poriet Cocoon Coat! This coat has a simple construction, yet it is unique and it can help to have some extra instruction and photos to show you how the coat comes together. As well as how the details can be more easily implemented in the coat construction.
Folkwear’s 503 Poiret Cocoon Coat Pattern is one of Poiret’s most iconic designs. Poiret drew his inspiration from the theatre and Eastern Asian culture to create a coat that is just as much a show stopper today as it was in the early 1900’s. Poiret understood the French Public’s desire to see and to be seen as part of the new avant garde, whether at the theatre, a cultural event, or art galley exhibition. Poiret saw his clothing designs as an extension of the wearer’s experience, allowing them to be part of the drama and to participate in the spectacle of being seen. We may owe “Red Carpet” phenomenon to Poiret!
Check out the How Poiret Made History and the Cocoon Coat blog to learn more.

Poiret brilliantly introduced all his designs in the most luxurious and beautiful fabrics of the day, using radical and exuberant attention-getting color combinations. He was not afraid of pairing clashing and bold colors, which only added to the excitement that embodied his bold new approach.
Poiret’s use of layering details also added to his unique aesthetic. He used embroidery, beadwork, appliqué, avant garde painting techniques, and even the more crude aesthetic of stenciling on fabric. Fur trim was often used in radical ways, as in the Lamp Shade Dress. This level of innovation set his reputation as an artist, encouraging Poiret to crown himself the King of Fashion. His willingness to push boundaries seemed to elevate each new design to a wearable work of art.
To help you make the Folkwear 503 Poiret Cocoon Coat even easier, it’s construction is broken down here into three easy to follow sewing days. None of this is difficult, but it is always fun to have a bit of help and learn a few tips along the way.
The Sew Along Schedule:
Day One: The first blog is is simply to help inspire you, provide suggestions on fabrics to use, and getting started with the basic layout and construction. You can make a lining too.
Day Two: How to add the neck band and optional pipping.
Day Three: How to finish the coat by adding the lining, adding the optional decorative ribbon, hemming the sleeves, and adding a finishing closure touch.
Sizing
First, see the size chart below (or linked) to determine your correct size and the yardage that corresponds to your size. Take note that there is quiet a bit of ease built into the pattern, allowing it will fit larger sizes than the pattern indicates.
Use the "Lengthen and Shorten" line if you need to adjust the length. See the “Fitting Your Pattern” in the instructions inside the pattern for more details.

Choosing Fabrics
The same fabrics that made the Cocoon Coat such a head turner when it first introduced, are still excellent choices today. Poiret understood the dramatic effect of using velvet and silk to not only create a sense of enveloping luxury, but in how beautifully these fabrics made the light dance making the wearer appear illuminated. You can make the coat using a double layer of differing silk weights or a combination of velvet with a silk lining for a truly decadent coat or robe. For best draping results mix any combinations of medium to heavy-weight fabrics such as velvet, silks, rayon, or jersey. Typically, use a heavier weight fabric for the coat and a lighter weight for the lining. Have fun and use different textures and colors combinations for outer coat fabric and lining fabrics for stunning results.
Fabrics like Polar Fleece would make a unique and fun garment for lounging about or giving an outdoor activity a new twist. Just imagine wearing a cocoon coat made of polar fleece and lined with silk to a football game or socializing around an outdoor fire pit with your friends and neighbors. Rip-stop-nylon would turn the Cocoon Coat into a unique windbreaker or beach cover up.
Any fabric that has a nice drape is an excellent choice. Besides the usual offering in cotton, wool, and linen, consider fabrics like a soft corduroy in a cotton blended. Look for cozy cotton and wool blend flannels. Silk/cotton organdy or a gauzy open weave fabric to make a truly unique cover-up for warmer weather, especially if you leave it unlined.
Follow in Poiret’s footsteps by using the Folkwear 503 Poiret Cocoon Coat Pattern to show off your skills in embroidery, quilting, dyeing, appliqué, or hand painting. Or use Pre-embroidered fabrics, metallic fabric, and quilted fabrics. This coat makes the perfect canvas for making your own wearable work of art and honoring the creative genius that inspired fashion history.
Note that fabric less than 45-inches (114 cm) wide will not work for this pattern because the pattern pieces are too large to fit on smaller width fabric. Just keep this in mind when choosing a fabric.
Getting Started
To get started in making your own 503 Poiret Cocoon Coat you will need:
For this sew along, I will be using silk duponi as the coat body fabric, a cotton/linen sheer woven fabric for the lining, and a striped cotton/rayon velvet for the collar.
Note: I like to use the selvage when possible, especially when using a delicate fabric. For this coat I am using the selvage of the fabric to help create a sturdier center back.

The Basic Construction
The Cocoon Coat is deceptively simple to make, but it is help to be familiar with the layout and construction before getting started. The main body is comprised of two pieces cut from Coat Body A. Pattern Piece A includes portions of both the front and the back of the coat. It helps to know there are no side seams in this coat design, instead the two Coat Body A pieces are stitched together at the center back seam. The sleeves are created by folding them in half and sewing up the seam. The front pieces overlap equally to create a simple balanced closure.
Cutting the Pattern and Fabric
You will need a large area to lay out the fabric and pattern for cutting - a large table or the floor.

Helpful Hints
To avoid disappointment please read the information below before cutting the fabric out.
Laying Out Fabric With a Directional Considerations
If you are using a fabric with a directional nap like velvet or corduroy, be sure that both pattern pieces are laying on the fabric in the same direction. Note: If one of the pieces is flipped up-side-down then the nap will go in opposite directions on each side which will look odd.
If using a fabric with a large directional (printed or woven) repeat design you will likely need more fabric to allow you to match the design. Due to this particular coat design, you should try to match the pattern at the back seam. And honestly, you could cut the coat without a back seam if you have fabric that is wide enough. You may also find it helpful if to trace two copies of pattern piece Coat Body A. Having two pieces to work with will help take the guess work out of matching the pattern design of the fabric or aligning the pattern.
For help in understanding how to matching large repeat design patterns… See the blog: Helpful Hints in Making the 122 Folkwear Hong Kong Cheongsam.
Cut fabric for main body of the coat, lining of the coat, and collar. Be sure to transfer all pattern markings from the pattern to the fabric with temporary markings or tailor's tacks.
STEP ONE: Coat Body
Note: You will use the same Coat Body pattern piece for the main coat as for the lining, and repeating the same steps are below. I am going to make a lining, but will resist providing photos since I would simply be repeating the process.
Darts
Start by making the darts at the neck of the coat. Transfer the lines, dots, and circle provided on the pattern to the wrong side of the pattern piece of the Coat Body.

Working on the wrong side of the fabric, fold the fabric so the lines match. Use pins to align and match the lines and to hold the fabric securely in place. At the neck edge of the Coat Body A, start the stitching at the dot with a backstitch, continue stitching using the line as a guide, ending at the circle point with a long thread tail. Tie off the thread tail with three knots.


Press the dart away from the center back.

Center Back Seam
With right sides together, pin and stitch the coat bodies together along the Center Back seam, matching notches 1 and 2.


Press the seam open. Notice the selvage was used to create strength in the center back seam.

Repeat for lining.
Sleeves
Fold the sleeve in half lengthwise (perpendicular to the sleeve hem). Stitch the sleeve seam, matching notches 3 and 4. Clip the curves and press the seam open.
Repeat on opposite sleeve.


Repeat for lining.
I hope you have enjoyed the easiness of the construction of the 503 Poiret Cocoon Coat so far.
In the next Sew Along blog we will cover how to make the collar and learn how to add the optional pipping, plus a few more tips and hints.
FYI: The Folkwear 503 Poiret Cocoon Coat Pattern and PDF are both on sale until Oct. 31. Thanks and see you again soon!

Our 143 Japanese Michiyuki pattern is a versatile and elegant piece that can be styled for a variety of functions. Cottons for a light windbreaker or beautiful smock, flannels for a warmer jacket, and silks for a smooth evening coat are all great choices for constructing this piece. Here are some suggestions we've curated for exciting takes on this beautiful pattern, as well as some information on sourcing and choosing Japanese silks for a more authentic garment.
According to Hanami: Mai's Blog, Michiyuki are more of a protective, traditional garment. Like a coat to be worn over the kimono, their function is predominantly for warmth and to keep clothing from getting damaged. Because of their utility, Michiyuki tend to be subdued in their coloring and simple in patterning, which also would make them easier to coordinate with multiple different ensembles. However, I feel this garment has the potential to be styled in a way that is more statement-piece friendly, and have chosen some fun fabrics to explore that avenue.
To start, we have this subtly adorable cotton dobby fabric from Hart's Fabrics that blends traditional and modern in its patterning. The wave/scale pattern is a mainstay of Japanese aesthetics, but the twist is this one includes cats in it. I can't get over it, it's too cute.

Next, also from Hart's Fabrics, is a tasteful Autumn stripe fabric. This cotton flannel would make for a cozy and warm jacket.

Bolt's Fabric Boutique has a precious floral gingham print that would make for an adorable Michiyuki with a slightly playful edge.

Also, making the Michiyuki out of rainwear fabric would make a really beautiful and unique raincoat. This navy rainwear, cotton with latex backing, from Marcy Tilton would be very nice, especially paired with some stand-out buttons.

Finally, for a more traditional route, you could look to source authentic Japanese kimono silk. Luckily, there is an abundance of deadstock or otherwise unsewn kimono fabric to be found online. Places like Ebay and Etsy are good choices, though a bit transient in their offerings. A couple keywords to be aware of in your search: You would find good results searching for Chirimen, or Rinzu silks. Both are types of silk that are different, but appropriate for use in this application. Additionally, be careful not to buy fabric that is intended for the obi. An obi is the waist sash that is tied around the kimono, and will be too thick for sewing a Michiyuki. You can get a sense of obi fabric if it is thick, has a lot of embroidery or metallic threads, and looks like it is designed to sit sideways with its motifs.
That said, here is an authentic kimono silk bolt from ebay with several yards available that would be perfect for a Michiyuki or other Japanese garment. Since kimono fabrics are regularly singular bolts, be sure to check with the seller or the listing to make sure it will have enough yardage for what you need.


If you are taken with the flair in which Phryne Fisher wears the glamorous coats in the PBS series Ms. Fisher’s Murder Mysteries, or relished in the flamboyant entrance of Shirley MacLaine’s character Martha Levinson in Downton Abbey, then you owe your adoration to Paul Poiret. If you dream of possessing a Cocoon Coat of your own, then Folkwear has the pattern to make your dreams come true. To best appreciate the Folkwear 503 Poiret Cocoon Coat one can not separate it from the extraordinary man that designed it and the time in which he lived.
The extravagance of the Belle Epoch or The Beautiful Age would give way to one man’s radical vision of the modern world, enabling him to distill and reflect back the desires and ethos of a new modernity. For the first time women were given the opportunity to dress according to how they saw themselves, forever changing fashion. While Worth was credited for founding haute couture, Poiret (1879-1944) is recognized for completely transforming it, crowning him the first “modern” designer. Paul Poiret revolutionized women’s fashion, dismantling six-hundred years of how women in Europe wore clothing. Except for a brief Classical Grecian influenced moment during the French Revolution, the female body was divided into two separate halves, like an hourglass. Poiret was frustrated with the lack of creativity in how women dressed and set out to change things.

Many of Poiret’s ideas came from his observations as French society’s became more restless for change. Paul Poiret ushered in many firsts that were a culmination of his multifaceted view of what modern life should look like. Many of his revolutionary ideas continue to to shape our ideas today. Poiret cultivated an aesthetic that was expressed through not only the clothing he designed, but through his recognition that fashion was a natural continuation of a life-style. He designed not only clothing, but furniture, textiles, interiors, and fragrances. He made headlines for the legendary parties he threw and in the way he traveled around the world to showcase his collections. Poiret compared his work with the work of Picasso and counted among his friends and sometime collaborators numerous artists of the period. He was inspired by the the Ballet Russe and collaborated with Sergei Diaghilev. The Fauvist painter Francis Picabia was a good friend and the two shared a love of bright colors and bold pattern. Modern art in all its forms would remain a driving force in inspiring Poiret’s work.


At the turn of the century, the world was changing quickly and Paul Poiret was eager to make his mark. He drew his influences from every corner of the globe. His desire was to create a new vision of modernity, which encompassed freeing silhouettes to reflect new attitudes. He relied on drama and spectacle to catch the attention of Parisian society. A Classical Grecian dress designed for Isadora Duncan created a frenzy for the Ancient Greece silhouette that the designer is best known for. He introduced a pants derived from a costume worn by Egyptian dancers girls that shockingly exposed women’s legs (think Sybil’s Harem pants in Downton Abbey). The rage for everything Asian-inspired was in part fueled by Poiret’s theatrical geisha kimonos.

Unfortunately, Poiret failed to acknowledge these influences let alone give credit where credit was due. He took inspiration from other cultures, molded them to his extraordinary vision, never acknowledging their origins.

One of the most distinguishable designs was the Lampshade dress which was paired with the infamous Hobble Skirt. The exuberant costumes and productions of the Ballet Russe not only inspired the designer, but he would use the stage in a brilliant marketing scheme to reveal his own designs to the French public. He even used his own wife Denise Boulet as a model, catapulting an ordinary young woman into a celebrity muse.

Poiret’s vision for the modern woman did not include the constraints of the corset. While he is often credited with freeing women of the corset, it was actually, Madame Vionnet (an early mentor of Poiret) who first abandoned the rigid structure of the corseted figure. Poiret was patient with society's hesitancy to completely discard the corset. He let the recommendations by doctors over medical concerns and the principles of the Suffragettes help to pave to way. Poiret did claim to be the inventor of the brassière. He explained that his designs celebrated the freedom from structured undergarments. This brassière was made of a thin band of fine cotton or silk that covered the bust and was held in place by narrow shoulder straps. Fashionable women took to the new comfortable physical sensation without much hesitation. Poiret gave women permission to free themselves from corsets while being mindful to provide them with a little something to help maintain their respectability. It would appear Poiret was calculating in how he unveiled his visionary ideas, being careful to not upset the applecart all at once.
Poiret was frustrated with how he saw fashionable women’s clothing relegated them into living dolls. He intend to upend this feminine ideal with his own vision. Poiret would replace tedious pattern construction with new silhouettes derived from draping techniques. Poiret’s designs were revolutionary in their complete abandonment from the rigid and highly sculpted bodices and nipped waists that had confined women’s bodies for hundreds of years. He shifted the focus of the female figure away from the waistline to a long, lean line, beginning at the shoulders and ending in a narrow hem at the ankle. Poiret’s fluid and sensual designs were intended to free women and as he explained,


The designer was not without a contradictory misstep, taking the sleek silhouette to an absurd extreme with the design of the Hobble skirt. The skirt was so tight from the knees to the ankles that sometimes the legs had to be taped together to prevent splitting the skirt while attempting to walk. Poiret himself commented that he had “freed the breasts but shackled the legs”. A torrent of outraged protests from the press and a Papal condemnation led to slit skirts, buttoned hems, and pleats that allowed for mobility. Despite or maybe because of the uproar, the narrow silhouette was here to stay.


The basic shapes of Poiret’s designs are fairly simple. He was not revered for his construction techniques, proving you do not have to be an engineering genius to produce amazing results. His real genius is revealed in his daring and extravagant use of color and stunning fabrics. He favored the bright, unrestrained palette of the Fauves and fabrics of rich brocade, velvet, and silk embellished with opulent trimmings and furs.

The Folkwear 503 Poiret Coccon Coat, from around 1913, is the perfect example of a very simple design that coveys opulence through drape, shape, and of course, the choice of fabric and trim. The coat incorporates the signature long, unbroken line from the shoulders to the narrow, ankle-length hem while draping in deep, voluminous swags in the back. Its influences are clearly Eastern and yet its look is definitely modern.

Perhaps Poiret’s most lasting influence was in his understanding of the power clothes hold over human desires. He concocted a potion made of cloth and dreams that would lure women into a web of consumerism that has motivated the world ever since.
Designers continue to look to Poiret’s vision for inspiration and his legendary impact has been hard to match. One other showman-designer has dared to try. John Galliano's 1998 Spring Collection fashion show for Christian Dior, held at the Paris’s Opera Garnier, created an intoxicating extravaganza to rival Poriet. While, Galliano's muse for the collection was The Marchesa Casati, is could also be a tribute to Paul Pioret. Below is Galliano's take on the Cocoon Coat, proving Poiret's magic still has the ability to mezmerize and intrigue us still.

Let one man's vision inspire you to make and enjoy your own legendary Folkwear 503 Poiet Cocoon Coat. The printed pattern and pdf version are both on sale throughout the month of October... just in time for cozy couch lounging or a special upcoming holiday occasion. Keep watching for a two part Sew-along blog that will solve the mystery of making your own Ms. Fisher fantasy Coat!

By Victoria Watkins
Learning about how embroidery has varied across cultures and historical eras is one of the exciting benefits of developing as a sewist. Throughout our catalog, Folkwear includes many variations of folk and historical embroidery, and our 209 Walking Skirt motif includes one example. I find that I am a person who learns best by doing, and working on this motif has given me a chance to accumulate a little bit of experience in the realm of hand embroidery.
To those new to embroidery, or looking for a refresher on how to transfer the patterns to your fabric, you may want to take a look at our previous blog that demonstrates different methods for transferring your embroidery motifs. Once your design is transferred, you're ready to begin embroidering.
Admittedly, this process was a learning experience for me. It also gave me a deeper appreciation for the accomplished embroiderers of the past, as well as reminded me that sometimes instructions can be flexible guidelines as opposed to unchangeable law. One area I found this to be the case was the first step, in which the directions say to embroider a running stitch a small distance around the marked circles of the motif. Personally, I found it easier to create clean and appealing work once I started experimenting without using this running stitch. Others certainly would find it useful to use them as directed.
The main stitch used for this pattern is a buttonhole stitch, which effectively creates a knot around the edge of the fabric. This in turn allows us to cut out the centers of the ovals and circles, giving us handmade eyelets. I found the most attractive success in pulling the thread tail up toward the center of the circle to tighten the knot, then pulling it back down toward the outside. This seemed to arrange the knots in a way that created a unified and tidy edge.

Once the round was complete, I drew the thread to the back of the work and slipped it behind a couple of the previous stitches, then clipped. This is another point in which I deviated a little from the instructions. They suggest taking tiny stitches to hop from circle to circle so you don't have to cut the thread each time. However, because the brown of the thread was so distinct from the yellow linen, I decided not to do this. If the colors are closer together, I could imagine this being a great way to avoid hassle.
At this stage, it's time to cut out the center, which is a bit nerve-wracking! However, if you've made a tight and consistent circle of buttonhole stitches, you'll find that this is not as terrifying as it initially seems.

It can be a little awkward trying to get scissors down into the taut fabric, so I found that first piercing it with a seam ripper was an effective solution. The instructions also suggest using something like a tailor's awl to this effect. After gently creating a small tear with the ripper, I cleaned up the edges with scissors. This is a step in which it pays to be patient and steady. If you clip too closely to the embroidery thread, you may undo your work and find the entire thing unraveling. However, if you don't clip closely enough, the eyelet is a little ragged on the interior. Of course, this particular example is very stark due to the high contrast between the color of the thread and the fabric base. During this part of the process, I imagined that embroidery that uses matching fabric and thread colors could result in a gorgeous, impressive piece that hides some of the roughness that sometimes characterizes handmade work.

Speaking of roughness, these photos do show the evidence of my initial attempts at this method. While it is a bit vulnerable to show the first shaky steps into a new skill, I hope it also demonstrates something that is part of the reason we are drawn to sewing in the first place. Sewing is a way to expand our capacity for self expression and creativity, and if we don't take the first steps into a new skill without a bold ineptitude, we'll never have anything to show for it. Now after being prompted to tackle this motif as a demonstration, I'm interested in playing around with embroidery at home for personal projects!

If you'd like to play with the embroidery motif featured in this blog post, as well as sew your own Walking Skirt, it's available in both our paper and PDF pattern formats. And the instructions for this embroidery technique are included in the pattern!
Have you dipped your toes into any new techniques lately? We'd love to hear about any learning experiences you've had!
Also, if you want to watch a video of me demonstrating this technique, it is on our YouTube channel (and below).
by Cynthia Anderson
In Buttonhole 101: Part One, the basics about buttons and buttonholes was covered. In Part Two we will learn how the relationship between the partners really works.
Once you understand the particulars about buttons and buttonholes, the trick is to understand how to place them so they work together as they should. Once you master the placement, then your machine is left to do all the work.
Patterns are designed with a specific button size and buttonhole placement in mind. This affects fit and proportion. This is important because it also establishes the center front of a garment. You do not want to tamper with the location of the center front.
Using a Different Size Button?
That is not to say that you can not use a different size button than the size designated on the pattern. Selecting a button that is 1/4-inch (6mm) larger or smaller is generally not a problem. However, there will be times when you will want more flexibility when it comes to button size. This adjustment can be applied to sizing a button up or down.
If the size of the button you want to use exceeds the 1/4-inch (6mm) size increase or decrease rule, then adjustments will need to be made to the pattern by increasing or decreasing the finished edge. This adjustment is easy, but needs to be made before you cut out the fabric. A correct adjustment is important because it will maintain the proper fit and proportion of the garment.
Note: Remember if making a woman's blouse the buttons go on the LEFT side as you wear it, which is the side that will be adjusted.
Once you understand the correct proportion between the width of the button, the center front placement of the button, and the edge of the garment it will all make sense. Remember the pattern has been designed to correctly fit a specific size. If you use the pattern required for your size as it is, but decide to use a dramatically different size button than the one suggested on the pattern, two mishaps will happen.
For example: The the pattern calls for a 1-inch (2.5cm) button, but you want to use a 1/2-inch (13mm) button instead. Since the pattern was designed for a 1-inch (2.5cm) button the following mishaps will happen.
Mishap #1:
If you place the button on the center front line like you know you should, then the amount of fabric that extends beyond the button edge will grow from the correct 1/2-inch (13mm) to an incorrect 3/4-inch (19mm). While this might not seem like a large increase, it is. When working with small proportions they add up. In this case it would look strange and like a mistake to have too much fabric extending beyond the button edge. See the illustration below.

Mishap #2:
It is not a good idea to move the button 1/4-inch (6mm) closer to the edge to compensate for the extra 1/4-inch (6mm) of extra fabric width. This creates more problems, because now you have moved off the center front. Not only have the buttons moved 1/4-inch (6mm) off the center, but the size is now off. The circumference of the garment has increased a total of 1/2-inch (13mm). Making an increase of 1/4-inch (6mm) on both the left and right sides of the blouse. See the illustration below.

The Correct Thing to Do
In order to use a 1/2-inch (13mm) button the edge of the pattern needs to be adjusted correctly. The is easy, if you follow the rules.
Rule One: Buttons should ALWAYS be placed on the center line whether on the front or back of a garment. This insures garment will fit correctly when it is fastened and the buttons align down the center front. Otherwise, symmetry and fit are off.

To prevent this from happening, extra fabric is added to the edge. Patterns are always drafted with for a specific button width. The pattern we started with was drafted for a 1-inch (2.5cm) button. But we want to use a 1/2-inch (13mm) button. No worries, forget about the pattern being drafted to use a specific size button and focus on the center line.
Note: This adjustment works for sizing up as well as down.
Ok, we need for the button to not hang off the edge. But since the button is already sitting on the center line, all we need to do is add more fabric to the edge. But how much?
Second Rule: Ideal Proportion Rule: The amount of fabric that extends beyond the edge of the button should be equal to the half of buttons width. It is easy... add the width of the button to the center line to extend the edge of pattern.
This should leave a fabric extension half the width of the button. In this case 1/4-inch (6mm) is visible beyond the button edge. See the illustration Below.

When the garment is fastened, the amount of fabric that extends beyond the button should be half the width of the button as well. For example if a 1/2-inch (13mm) button is sitting on the center front line, the the edge of the fabric should extend 1/4-inch (6mm) from the edge of the button.

Now that the edge extension on the left side has been added correctly, the same extension adjustment of adding the width of the button to the center line needs to be made to the right side. Remember the buttonholes go on the right side. Next, you need to draw out the buttonhole length in the correct position on the right side of the garment.
We already know that the buttonhole length equals the width of the button plus 1/8-inch (3mm).

In this case the length of our buttonhole is 5/8-inch (16mm).

The length of the horizontal buttonhole should extend 1/8-inch (3mm) over or beyond the center front line, toward the finished garment edge. The buttonhole should fall in the same spot as the button.

We have cover a lot, but before you make your final buttonholes lets look closer at the variables of using different fabrics and get some tips to making a successful buttonhole on any fabric.
FabricsAll fabrics differ in the way they behave, which is something you should be prepared for when making buttonholes. Fabrics can be thick, thin, or somewhere in-between; loose or tightly woven; light and airy, stiff, drapey, slippery, or stretchy. Some fabrics are stable which means they do not give, stretch, or contort out of shape. Until you become proficient with making buttonholes stick with stable woven fabrics. They are the easiest to work with and are generally thought to yield favorable results.
However, that is not to dissuade you from working with any fabric you like. Just about any fabric can be made easier to work with using a stabilizer and interfacing.
Interfacing
Interfacing is an additional permanent layer of strengthening material that is sandwiched between two layers of fabric to provide strength. This keeps the fabric from stretching, twisting, and puckering during sewing and adds lasting strength. Areas that include buttons and buttonholes greatly benefit from interfacing for all these reasons. Interfacing is either sew-in or fusible (iron on).
Fusible interfacing can have adhesive on one or both sides. Sew-in and fusible interfacing comes as woven and non-woven versions. They also comes in different weights.
Note: Some interfacing need to be pre-washed. Be sure to check when purchasing.
Tip: If your fusible interfacing is crinkled do not iron it. This does not work. You will end up fusing it to your ironing board or to the bottom of your iron. Non-fusible interfacing iron just fine.
Stabilizers
Extra stability often makes sewing easier, especially when it comes to fine stitching, like making buttonholes or machine stitched embroidery. Stabilizers are added to the outside of your fabric to help make it more stable when machine sewing. After the stitching is complete, the stabilizer is then removed. This works well when a fabric is fine, delicate, stretchy, slippery, thick, or has a pile. Stabilizers come as tear-away and even come as water soluble, allowing the stabilizer to dissolve when wet.
Typically stabilizers are added to the underside of your project, but sometimes it is added to the topside as well. Tissue paper, Swedish Tracing paper, and regular paper can be used a well. Experiment to see what your project needs.
Draw out the placement of the buttons on the left side if making a woman's blouse (as you wear it). And draw out the placement of the buttonholes on the right side (as you wear it).
The placement of the button is determined first, then the buttonhole is place on the center horizontal line of the button. The buttons and buttonholes should align as in the illustration below.

Note: Check the owners manual to see if the bobbin thread needs to be threaded through the hole in the finger of the bobbin. This extra step can make all the difference in the thread tension when making buttonholes.
Make one final buttonhole test if you feel you need to. All that is left is to sew your buttonholes!
Once the buttonholes are made clean up any stray threads by either trimming them away or thread the tails to a needle and pull through to the underneath side of the buttonhole, then tie off. You are almost done.
You did it! Now the buttons need to be added, but first the buttonholes must be cut open. Taking care to not cut into the stitching of the buttonhole is important. The idea is to only cut the fabric slit between the thread beads and tacks.
Tip: Before cutting... Use Fray Check.
Fray Check is a liquid seam sealant that works beautifully to prevent the cut fabric from fraying and keeps threads tidy. Apply the sealant to the entire button hole front and back, or just one side.
Some sewist only apply the sealant to the fabric area that is to be cut using a toothpick. Either apply the sealant before of after cutting the buttonhole open. Be sure to let it dry before cutting if you apply before cutting.

Tip: Be sure to test the Fray Check on a sample buttonhole to be sure the color of the thread and fabric do not bleed. Always allow the sealant to completely dry.
Cutting Tools
There are several different tools for cutting buttonholes and it is worth experimenting to see what you feel the most comfortable using.
Tip: Use straight pins placed on the inside of the tack edge to prevent cutting into or past the stitching.

Hint: If you make more than a small cut using scissors, be sure the half foldline matches up perfectly or you may make an unfortunate cut.
Note: If despite your best efforts, if you still end up with a buttonhole longer than needed or if you decide to use a smaller button, simply cut the buttonhole opening slightly smaller. Back off from cutting right up to the tacks.
Now comes the final anticipated touch... adding the buttons! Hopefully, you now have a solid understanding and can implement everything offered in this blog to insure buttonhole success. If everything went correctly, then all you have to do is sew the buttons where you diligently placed them on the center line.
If you need a refresher on how to sew on flat or shank buttons refer back to the Buttonholes 101: Part one.
It may seem like a lot of information just to make a buttonhole, but that's because details add up for successful results. Learning how to correctly execute buttons and buttonholes will enable you to sew them with confidence and ease no matter the project. It is not uncommon for sewists to sew for years, "winging" their buttonholes. Only after making copious amounts of buttonholes does something finally click... and it all makes sense. It is never too late to master buttonholes or learn new tricks and tips!

by Cynthia Anderson
Buttons seem innocent and straightforward enough; however, it is a rare sewist that does not feel a flutter of trepidation when inevitably faced with making buttonholes, especially lots of them. The voice in one’s head taunts, “If I screw up the buttonholes, I will ruin my project and all will turn to sourness and ruin!” For others they consciously or subconsciously avoid patterns that require buttons and buttonholes. The truly afflicted ponder the possibility that their personal sewing aesthetic is more suitable to snaps, hooks & eyes, loops, or safety pins. That is not to say that all the aforementioned do not have their place.
But once you get the hang of buttonholes, you may find they add to the beauty of your sewing. Not only are buttonholes a functional detail, but they can frame and show off a button to it’s fullest, making a garment sing. Buttons and buttonholes are simply hard to avoid if you make clothing. They can be so pretty and add so much.
With that said, no one wants to diligently work on an otherwise happily executed project to have it end in despair because the buttonholes disappoint. The next two blog posts are for anyone who needs to learn buttonhole basics or for anyone who needs a refresher, with a few tips along the way. Buttonholes are not difficult, but they do come with variables you need to know how to handle. Where to place and space them, how they best work together, how to handle when applied to different fabrics, and how buttons actually determine the button/buttonhole relationship.
This month Folkwear is featuring the versatile 133 Belgian Military Chef's Jacket paper pattern or the pdf version. The curved seam construction of this jacket is truly flattering on everyone. The back is semi-fitted, and curves gently to a center point; double-breasted front panels can button to either side. Set-in sleeves are finished with curved cuffs. This is a great fall jacket addition to any wardrobe and a perfect piece for perfecting buttonholes at the same time. The button details truly make the 133 Belgian Military Chef's Jacket special.
Of course there are many Folkwear patterns to that are designed using buttons and buttonholes. For some Folkwear Fall Favorites check out the 202 Victorian Shirt ( and pdf), 216 Schoolmistress' Shirtwaist & Skirt, 222 Vintage Vest, 229 Sailor Pant ( and pdf), 230 Model T Duster, 231 Big Sky Riding Skirt (and pdf), 242 Rodeo Cowgirl Jacket, 251 Varsity Jacket pdf, 263 Contryside Frock Coat, and 270 Metro Middy Blouse (and pdf) , to name a few!
Go ahead and gather the materials needed to make a buttonhole and set them aside for now. And, note that we are only covering making machine-made buttonholes in these next two posts. There are lovely ways to make hand-sewn buttonholes that perhaps we will cover in another blog post.
Materials:
In order to make a buttonhole the correct size you need to start with the button. Therefore, it is helpful to know a bit about how buttons differ in the way they are structured, used, and sewn.
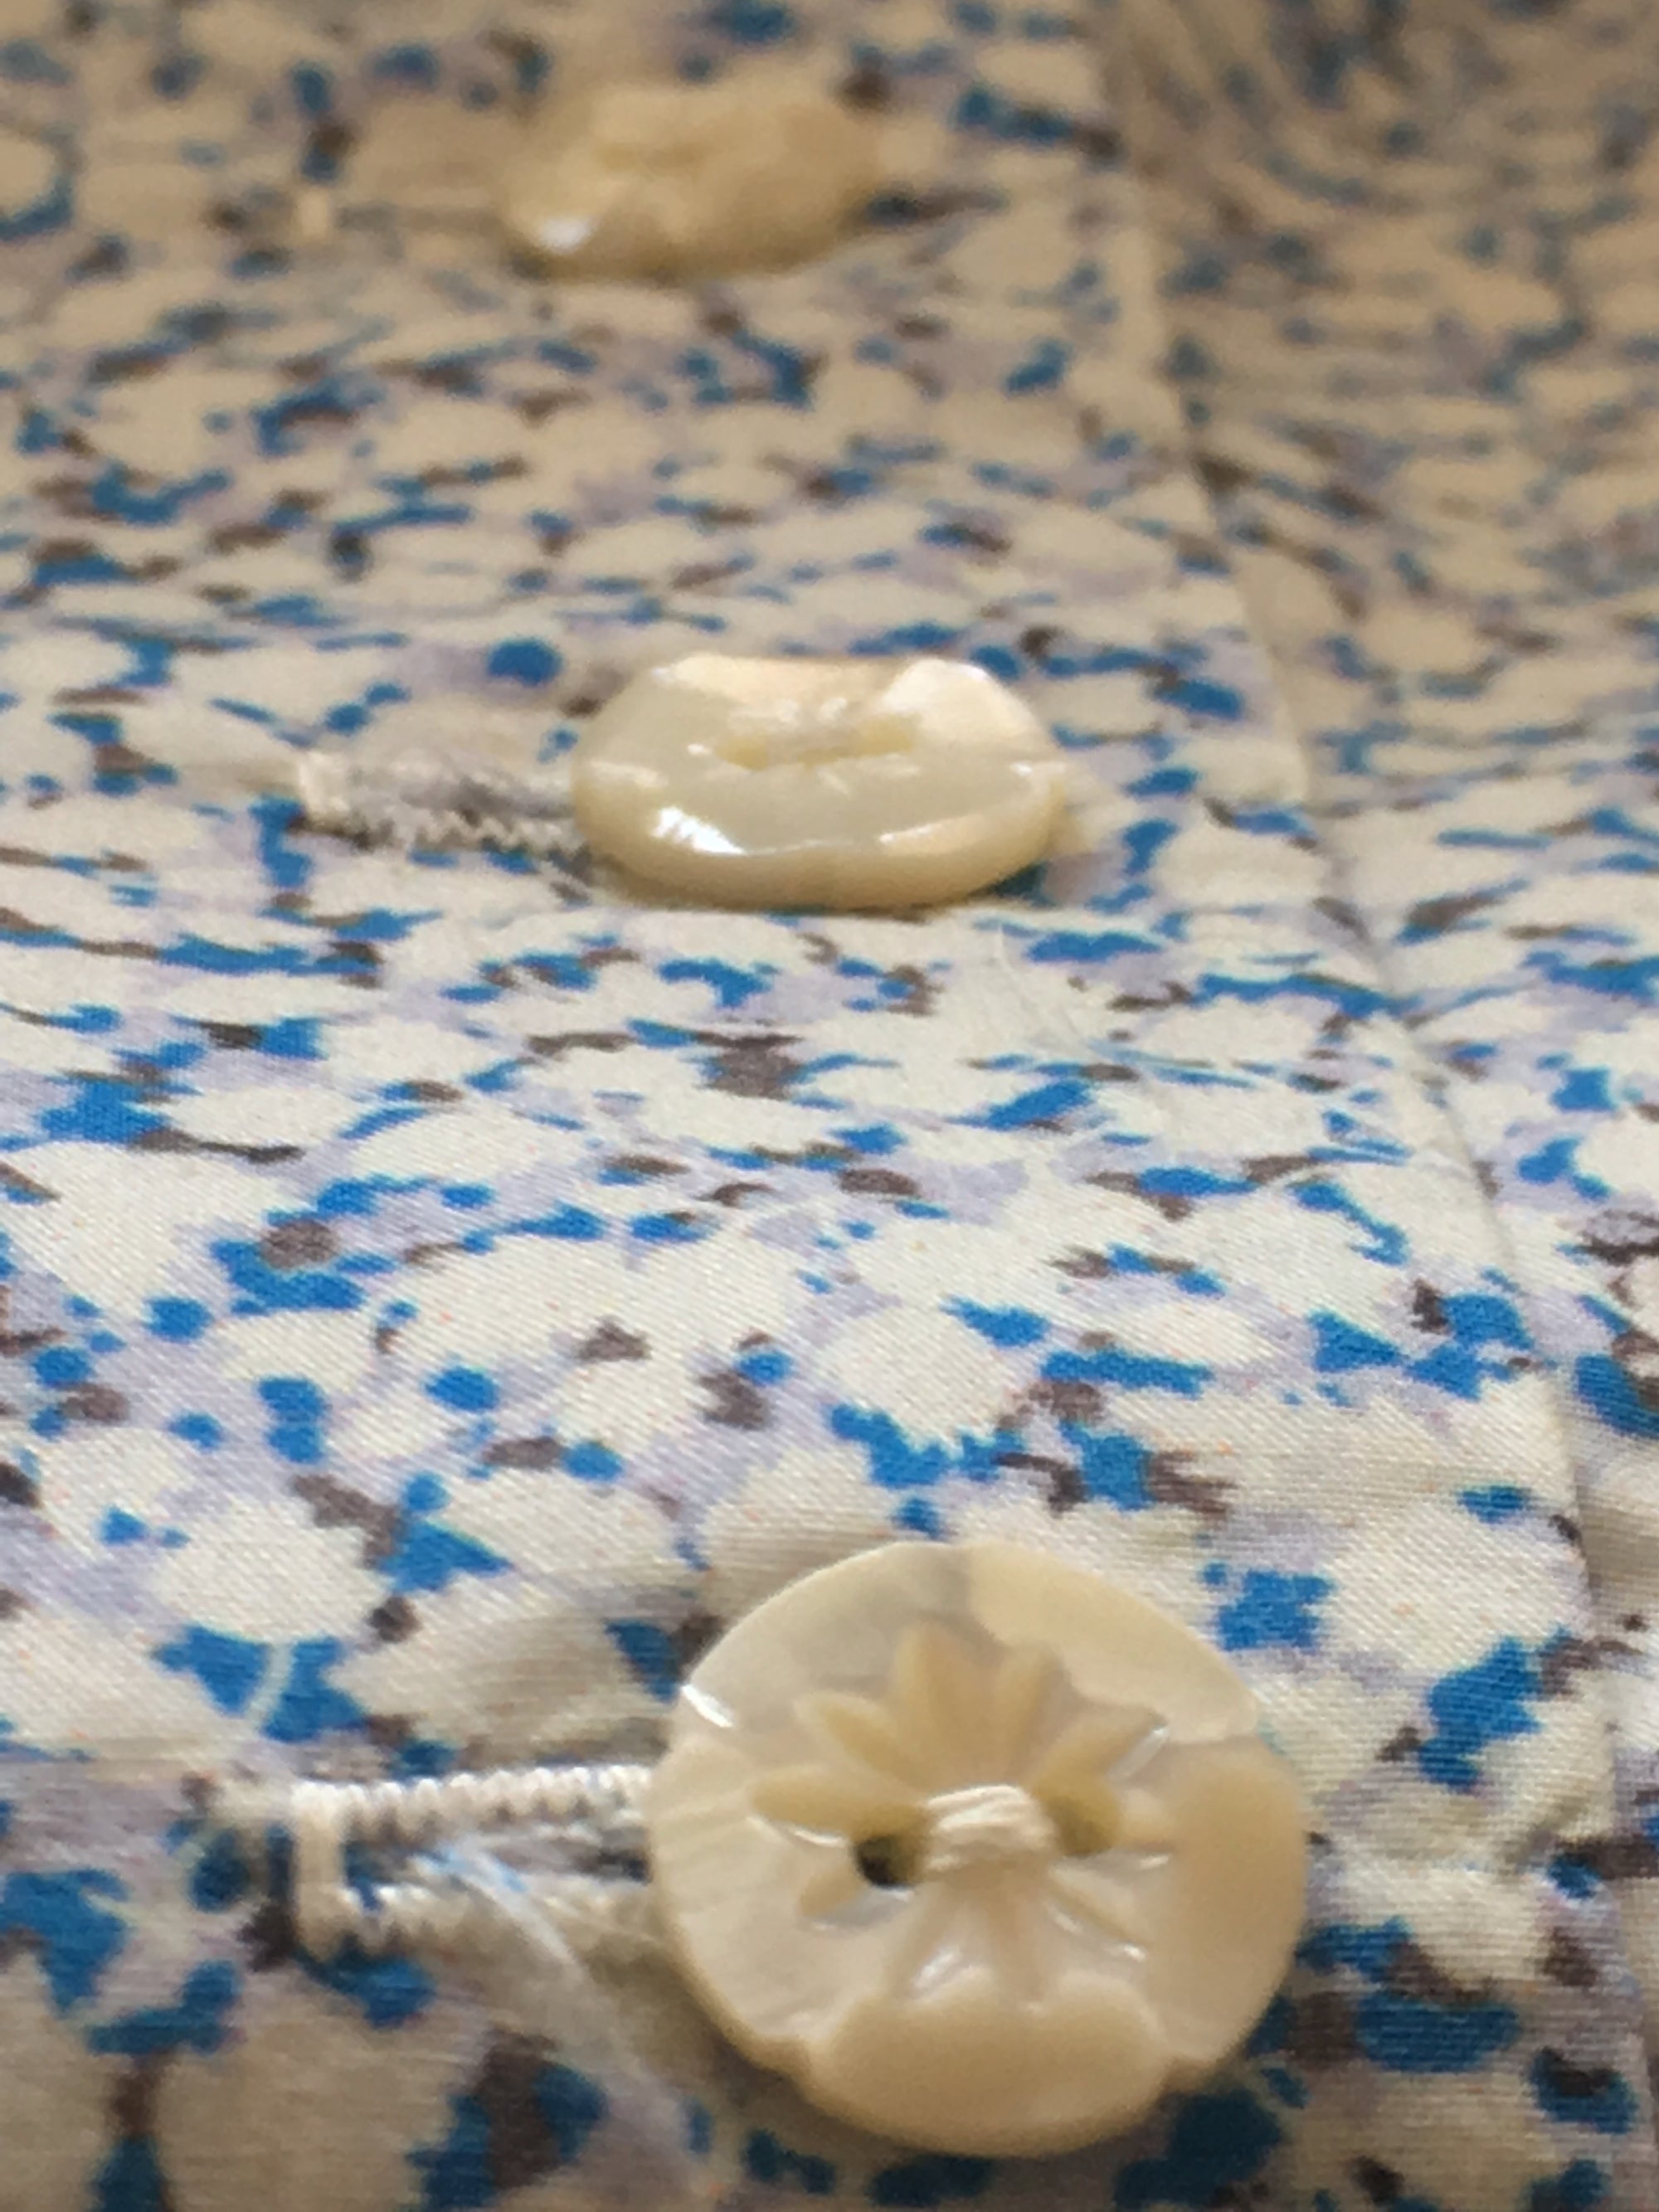
Buttons come in all shapes and sizes and are made out of all kinds of materials including: mother-of-pearl (shell), wood, bone, antler, bamboo, leather, stone, metal, glass, resin, and plastic. They come in all colors and can be decorative or plain.
Buttons typically fall into two categories…flat and shank.
Flat buttons come with either one (antique), two, or four holes and are referred to as buttons with visible holes. They are sewn to fabric through the holes using thread, either by hand or using a sewing machine. Two hole buttons are used for light to mid weight fabrics and four hole buttons are typically used on heavier fabrics or when extra security is needed.

For a flat button to sit properly, it should be sewn so it rests just above the buttonhole when fastened. To achieve this extra bit of space, a little shank is made by slipping a sewing needle or toothpick between the underside of the button and the fabric it is to sewn to.

With the button slightly elevated above the fabric a thread shank is easily created when sewing the button in place. This extra bit of space allows the two layers of fabric to sit comfortable under the button. This thread shank also gives the button a little movement and prevents abrading the fabric. Make the shank by making a few passes with the thread through the button and fabric and then wrap the thread underneath the button around the threads a couple of times for strength.

They are sewn to fabric by hand sewing, using a needle and thread that passes through the shank hole and into the fabric. Shank buttons are generally used on heavy and thick layers of fabrics, but not always.
Note: For shank buttons, the shank should be positioned and sewn with the shank running parallel to the buttonhole, both for horizontal and vertical buttonholes.
Hint: If using buttons on the back of a garment, flat buttons are going to be more comfortable. Simply consider if you would want to lean back on or sit on a button that has a shank or is rather thick, or large.
Yes, buttonholes have anatomy and it helps to understand it. Not all machines make buttonholes in the exact same way. Machines can use a one-step or 4-step method and those methods can vary in how they are executed. But no matter the way a sewing machine sews it's buttonhole, the anatomy is still the same.
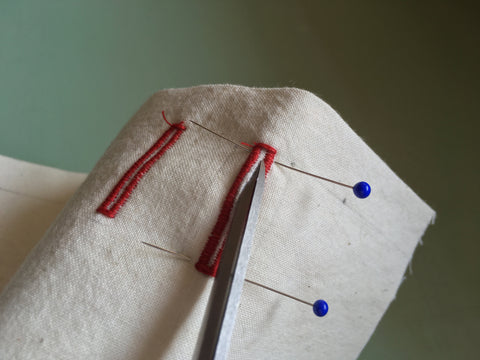
Buttonholes use two parallel rows, or beads, which are created with an extremely short zig-zag or satin stitch, connected at each end with a longer zig-zag stitch called a bartack.
The thin channel of fabric between the beads is slit open for the button to pass through. A buttonhole is actually a cut in the fabric framed by stitches to provide integrity and stability.
Note: Buttonholes are never made on the wrong or back side of the fabric because the bottom tension thread will then be visible and you don't want this.
The illustration below shows the typical four-step buttonhole method. In this example the stitching starts at the back of the machine and moves forward. The red portion with the arrow indicates the stitches sewn at each step in creating the buttonhole.
Note: that some machines start their buttonhole stitch from the front to the back.

The most common buttonhole offered on today's machines are the Standard, No Bartack, Keyhole, and Top Bartack.
The Standard buttonhole is the most common and works nicely on mid- to heavy weight fabrics. This style of buttonhole is offered on all sewing machines.

The No Bartack buttonhole is rounded on both ends. This design works well on fine fabrics such as silk, because the round edges do not damage the delicate fibers of the fabric.

The Keyhole buttonhole is best used on heavy fabrics when using thick buttons or buttons with shanks are used. The shape of the “keyhole” enables the button to pass through the thick layers of fabric more easily. Coats and jeans often have this type of buttonhole.

The Bartack buttonhole is used on fine to mid-weight fabrics. This style is often found on children’s clothes and finer women’s garments.

Depending on the machine, some offer lots of buttonhole options, while others may be more basic. For our purposes we will focus on using the Standard buttonhole.
Buttonhole sizing depends on the size of the button. Sizing generally refers to the length of the buttonhole. To create the correct buttonhole length, a button’s diameter (width), thickness of the button, and whether it has a shank, should be taken into consideration.
Buttons come in standard sizes including; 1/4-inch (6mm), 5/16-inch (8mm), 3/8-inch (9.5mm), 1/2-inch (13mm), 5/8-inch (16mm), 3/4-inch (19mm), 1-inch (2.5cm), and continuing on up. There are no hard and fast rules when it comes to which size of buttons to use. But typically, smaller buttons are used on shirts and fitted blouses and children’s clothing. Garments like coats and jackets are often made from thicker fabrics and need heavier and larger buttons.
To determine the size of the buttonhole, measure the width or diameter of the button and add an extra 1/8-inch (3mm). This extra 1/8-inch (3mm) makes the buttonhole a tad longer, helping to ensure there is enough room for the button to pass through the buttonhole. Both horizontal and vertical buttonholes receive this additional length. Vertical buttonholes receive the additional 1/8-inch (3mm) at the top of the buttonhole. Horizontal buttonholes receive length on the finished edge of the garment.

The thickness or height of a button matters too. If the button is thick or domed, the buttonhole opening will need another tad more length to make the opening larger. Add another 1/8-inch (3mm) and test.
Now that you know how to determine the size of a buttonhole, make a test. Draw a line the length of your buttonhole on the right side of the fabric, using a pencil or fabric pen like the illustration below. For now, do not worry about positioning, just sew a buttonhole the length you marked. Draw a line like the one below.

Note: When making the final buttonhole guideline you will want to use a non-permanent method, like a heat sensitive or water soluble pen (water erasable marker) made for this purpose. Or make a Tailor's Tack by using a needle and single thread to create the line. Remember that buttonholes are made on the right side of the fabric, so you don't want the guideline to be visible.
Now test making a buttonhole using your machine according to instructions in the manual. Push your work under the foot and place your needle exactly at the buttonhole start. Set the stitch spacing according to your manual instructions. Align the guide on the foot with the drawn line, to keep the buttonhole straight. Keep practicing making different lengths. Adjust stitch width as necessary depending on the length.
Note: If your fabric seems to drag and not move easily when stitching the buttonhole, lengthen the stitch. If the stitch is too small or tight the feed dogs can have difficulty moving the fabric as it should.
Tip: Test the buttonhole to be sure the button will easily pass through the cut opening. Nothing is more frustrating than the thrill of beautifully executed buttonholes, only to then discover that they are too small for the buttons.

Now that you have successfully made a test buttonhole. Lets play around with button placement as a design element.
How many? This depends on how many buttons you have and how many you think look aesthetically pleasing. Typically buttons don't look very good spaced too far or too close together. But this is up to you.
Hint: Some sewists like to use an uneven number of buttons, but that is personal preference.
Take the time to experiment with different configurations and spacing possibilities. Buttons can be evenly spaced or grouped. A pair of tiny buttons can be treated as one button, spacing them just far enough apart to set each pair off. I have a thing for copious amounts of tiny shoe buttons running down the front of a vintage inspired blouse. Depending on the garment and size, four or five evenly spaced can be all the buttons needed. Buttons can make a statement or have a more subtle effect depending on the button and color of thread used used to frame them. If you are feeling adventuresome, mix your buttons up! How you use your buttons is totally up to you.
Hint: If you want your buttons understated, use a thread that blends with the color of the button and fabric.
Use a Simflex (folds like an accordion), for more accurate spacing of your buttons. Or simply space your buttons out freehand to get an idea of what appeals to you and then use a ruler for accurate spacing.
Note: The rule is, typically ,that women’s blouses buttonholes on the right (as worn), which means the buttons go on the left. Buttonholes on Men’s shirts go the left (as worn). To help you remember… just remember “women are always right.”
There are strategic considerations for where to start and spacing buttons. Below are a some scenarios to help you get started:
Note: Top buttons are generally placed 5/8-inch (16mm) down from the top edge of the garment at the neckline, depending on the size of the button.
Note: Buttons are not usually positioned close to the bottom edge of a garment. Men’s shirts vs women’s blouses are a good example to study. Keep in mind whether you will wear the garment tucked into a bottom garment or worn loose.
Hint: Don’t neglect other places that buttons could be placed. Cuffs, collars, and tabs come to mind. Use the same the aesthetic through out your project, making your garment cohesive and harmonious.
Because buttons are always placed on the center line, it is the buttonhole that must be positioned correctly either horizontally, vertically, or at an angle to work properly with the button. Each position has it’s own advantages and reasons for doing so. Angled buttons are more complicated, so we will leave them for now, and focus on horizontal and vertical buttonholes.


Hint: Sometimes the top and bottom buttonholes will be sewn horizontal to serve as more stable anchors. The top buttonhole on a man's shirt is often sewn horizontally.
Hopefully, you have learned some new things about buttons and buttonholes, but there is more to come. In Part: Two of this blog you will learn how the button and buttonhole come together to create a functioning detail.
The Folkwear 133 Belgian Military Chef's Jacket is not only a great wardrobe addition for fall, but also the perfect opportunity to try your new buttonhole knowledge. The pattern is available as a printed version or pdf and both are on sale throughout the month of September. Purchase your pattern just in time for the next blog installment Buttonhole 101: Part Two, where we will finish up all you need to know to make lovely buttonholes.

It is the tail end of summer here where I live and I'm working to navigate our new routines for the autumn and school year. No matter the distractions, my mind shifts to the difficulties of the world. The plight in Afghanistan is close to our hearts here at Folkwear, where we feel a connection to the cultures and histories of our patterns and the folks, often women, who created beautiful garments and art with textiles and thread. We want to do what we can to help. We are donating 10% of all our retail sales for the full month of August to two organizations working to support women in - and escaping from - Afghanistan.
In addition to our support for these two groups, we encourage you to investigate refugee resettlement organizations in your own community. Many of these local groups are actively working now to find homes for refugees from Afghanistan and many other parts of our world in your town. Whether you support them with financial contributions, or by offering a welcoming hand to a family making a start in a strange land, this work is very important. Supporting and welcoming newcomers to our neighborhoods is a very human and individual way to do good in the world. I've found that sewing and making, or showing interest in clothes, bridges lots of cultural gaps and creates beautiful connections.


