- Home
- About
-
Shop
-
Sewing Patterns
-
Fabric
- Sewing Supplies
- Folkwear Clothing
-
- Blog
- Customer Gallery
- Contact


Got a Cowgirl spirit? Then you definitely need the Folkwear the 243 Cowgirl Skirt to channel that energy! Whether heading for a wild rodeo, saloon, country picnic, or dance floor this Western-styled skirt has lots of flair. This skirt has all the details needed and then some to make an everyday or a fun occasion piece. This easy to make pattern is on sale all month. The Folkwear 243 Rodeo Cowgirl skirt comes as a PDF Pattern.

Both Views included in the pattern feature a flared A-line silhouette, shaped waistline with front and back darts, waist facing, lace-up back closing, and several easy-to-apply hip yoke shapes for fun. View A sports a shaped hem applique. View B has a swishy hem flounce and hip/pocket yoke.

For the perfect cowgirl fabrics to make the skirt consider denim, cotton, linen, suede, leather, lace, or silk. Then add your personal cowgirl statement in fringe and embroidery or studs and applique patches, to create an adventurous collection of skirts for everyday, weekend, and party wear.
Every cowgirl knows that a true cowgirl skirt needs a sassy swish of fringe! Customizing your skirt with fringe is easy and fun to do. Fringe trim can be found ready made or easily make your own. Keep reading to learn to make your own fringe!

Either dress your skirt up or down depending on your mood. Even change the fringe out for another color. Fringe can be applied to the wrong side of your garment, just under the hem edge or other edges. Use a quick and easy whip-stitch to secure the fringe. If you decide to remove the fringe... then just snip the whip-stitch and wear sans fringe for a simple everyday look (see photo below). Dress up your cowgirl skirt or not... adding fringe is easy and commitment free!

Make Simple Fringe
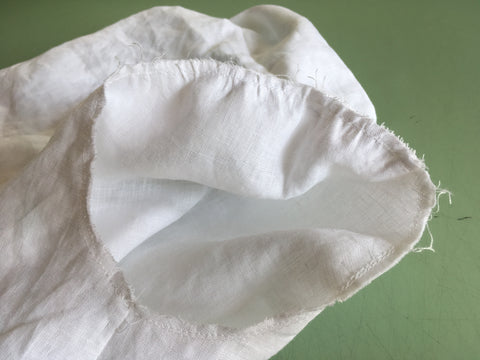
To make your own fringe, cut strips of fabric 4-inches (10cm) wide, along lengthwise or crosswise grain. With chalk or thread, mark the 1/2-inch (13mm) stitching line along one edge. Cut the fringe ends 1/4-inch (6mm) wide, stopping at the marked line. During garment construction, sandwich the fringe strip between pieces being stitched together, matching the raw edges. Insert purchased or custom fringe in any seam you desire or topstitch to finished seams or hem.

Tips for Fringe Making


Happy Trails!

In this blog post the 210 Armistice Blouse will undergo a few simple modifications to turn it into an everyday summer wardrobe staple. Make as simple or embellished as you like, the Edwardian Charm is not going anywhere. Just shortening the sleeves and turning it into a pull-on version does the trick for making the 210 Armistice Blouse into a refreshing top to beat the heat!
Check out the post, 210 Armistice Blouse... a Symbol For Change, for a bit of inspiring history to help get you started in what will become a new favorite summer top.
I am making this version of the Armistice blouse, with a nod to it’s history by using white handkerchief linen and adding a few small tucks to embellish the Vestee. I am also using French Seams as Edwardian women would have. Since I am demonstrating how to make a pull-on-over-the-head design, the Vestee is sewn to the front of the blouse on both sides, eliminating the need for buttonholes and buttons. However, you could add buttons for decorative touch? To keep the top loose and comfy I have decided to leave off the back shaping tie. However, there is no reason not to include the tie on the next version. The sleeves will be shortened. And I need to add a bit of length too.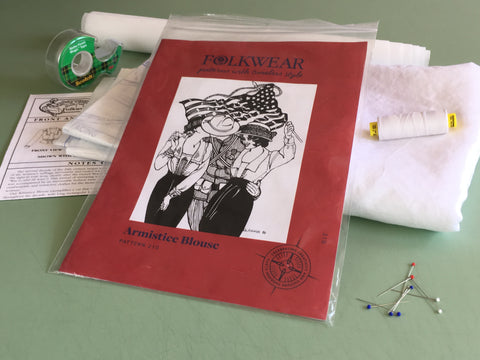
The Armistice Blouse was traditionally made of light-weight gauzy linen and cotton fabrics. Keep in mind that these early Edwardian blouses were worn with sometimes two or three layers underneath, which helped to prevent see through. Just keep the fabric opacity of the fabric you chose in mind. Though sheer fabrics are a lovely excuse to add a dainty camisole underneath.
White was the color de jour for fabrics and synonymous with the Edwardian period (See 210 Armistice History blog to learn more), that is not to say that colored fabrics, as well as prints and stripes were were not popular too. Take a good look at the lovely use of white stripes used in the version below.

Just about any woven fabric is an excellent choice for making this blouse for modern wearing. Since we are focusing on a summer version, light weight to mid-weight fabrics are ideal. To achieve the crisp-airiness of the original designs look for light-weight cottons, like cotton batiste, voile, lawn, broadcloth, shirting, seersucker, and eyelet.

Of course, you can not go wrong with handkerchief linen. Consider light-weight silk like haboti or cotton and silk blends as well. For a truly comfortable fabric and in keeping with the soft Edwardian-look, pick a fabric with a nice soft drape. If you like the idea of naturally dyed colored cotton and linen fabrics with eyelet laces and ribbons to match check out www.botanicatinctoria.com.
Making Pattern Adjustments
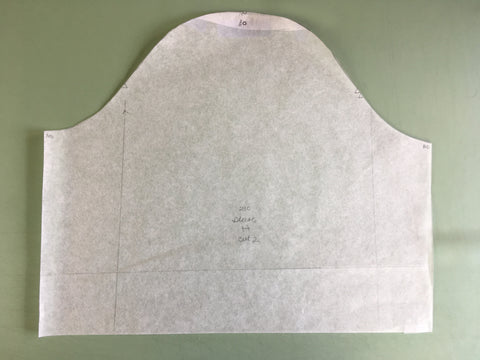
To get started I need to make a few pattern adjustments first. I am adding 1/2-inch (13mm) to the length of the size medium. That means I need to add a 1/2-inch (13mm) to The Front A, Back B, Front Facing F, and Vestee C pattern pieces. The sleeve is simply cut to the length I have decided on, including the hem.

Adjust Vestee to Accomodate Hoizontal Tucks
Even though the pattern comes with a vestee pattern piece with vertical tucks, I want to add horizontal tucks to my vestee. Folding up the fabric to make tucks takes up the length, so I need to accommodate for this by adding more length. But how much? Well that depends on the width of the tuck. I am using five 1/4-inch (3mm) tucks. When folded each tuck takes up 1/2-inch (13mm) of fabric "real estate", so to speak. This results in 2 1/2-inches (6cm) being used up to create the five tucks.
That means I need to add back the 2 1/2-inches (6cm) to the orignial length of the size medium. Plus, the 1/2-inch (13mm) I decided to add to the blouse length.

To keep the vestee approximately the width the pattern intended, use the extra width at the foldline as the seam allowance. The idea is to have 1/2-inch (6mm) seam allowance on each vetical edge of the vestee. (See the photo above).
Cutting Out the Pattern
To keep this version of the Armistice blouse simple, I am eliminating the need for pattern pieces; Tie D, Turn Back Cuff J, Cuff K, and Placket I. And I am not using the wider vertical tucked version of pattern piece C.
Decide on Seam Finish Before Starting Construction
Once all the pattern pieces are adjusted and cut out, decide how you want to finish the seams? The Armistce Blouse is a perfect project for using French Seams. The use of French Seaming was popular in Edwardian garment making. Before sewing machines were available, fine French Seams were sewn by hand. Luckily, French Seams can easily be made using a sewing machine. This technique is not hard, creating a strong encased seam, with a lovely finish. Using French Seams is a way to celebrate a historical technique that is still considered fine craftswoman-ship today. French Seams are ideal for fine fabric seamwork. So consider giving French Seams a try using Folkwear's 210 Armistce Blouse Pattern!
Use the usual 1/2-inch (13mm) seam allowance and finish the seams as you like... if not using French Seams.
Note: French seams are not used for all sewing construction needs. Typically, only the shoulder seams, side seams, and the sleeves seams are made with French Seams. Sleeves that have a tight curve at the shoulder can be tricky, resulting in a finished seam that will not lay nicely and may pucker-up. It is perfectly ok to pick and choose where French Seams work best.
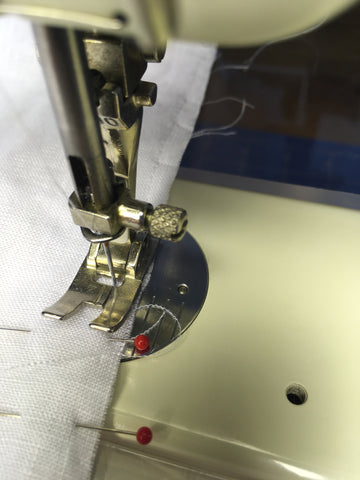
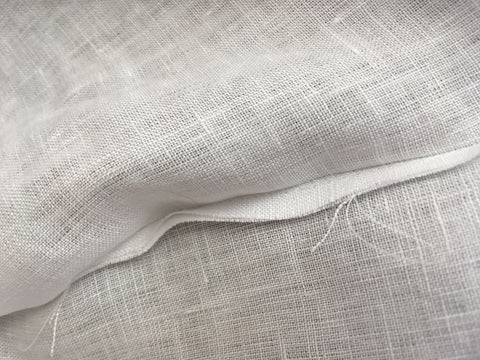
French Seam Shoulder and Side Seam Construction Using 1/2-Inch (13mm) Seam Allowance
French Seams are made by starting with the WRONG sides of the fabric together... NOT right sides together, as you normally would. On the raw edge of your work, align and match any notches, stitch a scant 3/16-inch (4mm) seam. Press the seam to one side (either will do). Turn right sides together, encasing the tiny seam, and press the edge neatly or pinch the fabric with your fingers to create a clean edge. The tiny seam should be sandwiched between the two layers of fabric. Then stitch a 5/16-inch (8mm) seamline, taking care to avoid catching the tiny raw edge encased in the fold.
The idea is to only use up the amount allotted for the seam allowance. In this case the seam allowance is 1/2-inch (13mm). You will need to adjust your French Seam calculations depending on the width of your seam allowance and how small you want the finished French Seam to be. Experiment with different weight fabrics and varying seam allowances widths to see what the limitations are. Extremely small French Seams were a badge of pride and craftswoman-ship for Edwardian sewists.
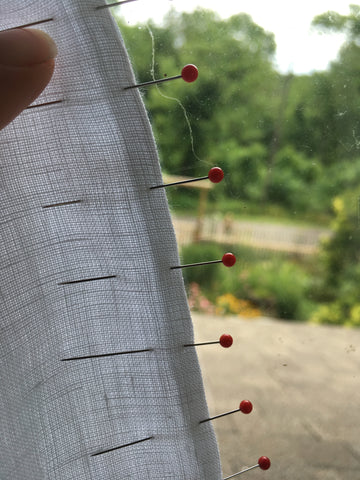
Before the shoulder seams are made, the gathers at the shoulders need to made first. Make two rows of gathering stitches outside the 1/2-inch (13mm) seam allowance as indicated on the Front A pattern piece. Pull the gathers up so that the Front fits the Back at the shoulder, pin to hold in place then stitch the seam allowance. Remember... wrong sides together and a scant 3/16-inch (4mm) seam if making French Seams.

Below is a view with wrong sides together and the scant 3/16-inch (4mm) seam. The gathering is made below the 1/2-nch (13mm) seam allowance.


The right sides turned together with the scant seam sandwiched in between the two layers of fabric. This is where the right and wrong sides can get confusing, but follow along.
Sew the next stitch line at 5/16-Inch (8mm). Besure to back stitch at hte beginning and ends of the stitchline.

Repeat for the opposite shoulder seam.
Sew the side seams now as you prefer. Side seams are perfect for French Seams, so use the same technique as above.
Notice below, the side seams are pinned with wrong sides together. The gathered seam at the shoulder is rightside facing up.

Stitch a scant 3/16-inch (4mm) seam.
Turn the right sides together sandwiching the scant seam allowance inside.
Stitch the next seam allowance at 5/16-inch (8mm ) on the wrong side.

Press the side seams towards the back.

Notice that the shoulder is pressed up towards the back of the blouse and the side seams are pressed towards the back of the blouse.
Neck and Front Facing
Next, construct the Front facing. With right sides together, stitch the Neck Facing to the Front Facings F matching the notch. Press the seams open. Press under on the 1/2-inch (13mm) Fold Line on the Facings.
Note: It is not recommented to use French Seams in this sort of situation, because the seams are too bulky. In this case the seams should lay as flat as possible.
It is always a good idea to make a stabilizing stay-stitch along any curves, as seen on the Neck Facing.

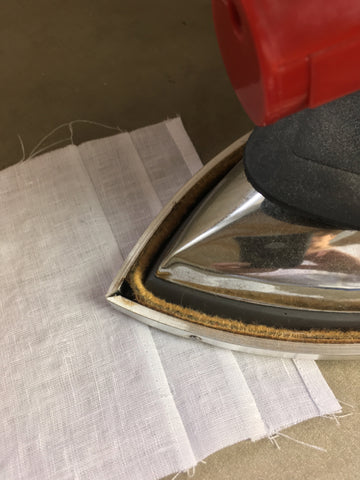
To make pressing a turned under edge easier and quicker, make a long basting stitch to use as a guide (see below). The basting stitch can easily be removed later.


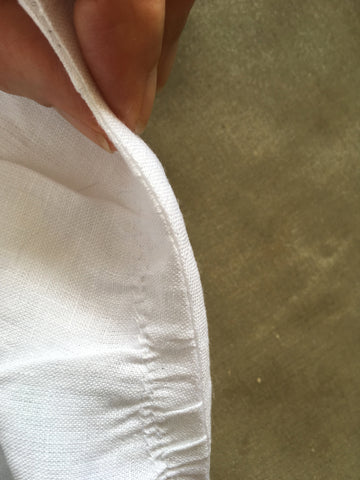
The Collar
With right sides together pin and stitch Collar Piece(s) C, using 1/2-inch (13mm) seam allowance, stitching on all un-notched sides. Trim the seam allowances and corners. Turn the collar rightside out and press, being sure to slightly roll the edges under to create a clean finish.
Note: If you are embellishing your collar with lace, be sure to see the pattern instructions for more helpful details.


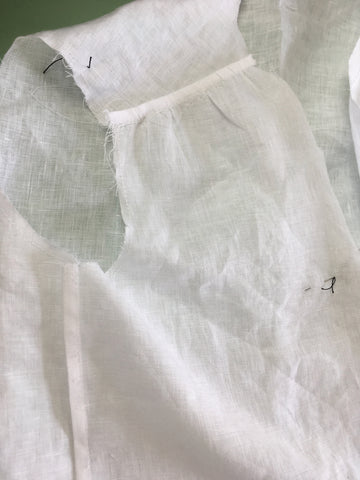
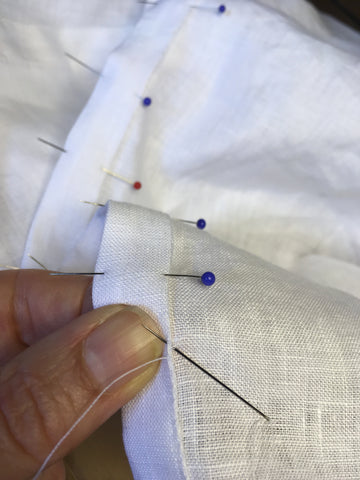
Attach the Collar and Facing to the Front
With the right side of the blouse facing up, pin the Collar to the edge of the blouse neckline, matching the Center Backs and notches. Be sure to treat both layers of the collar as one layer. Baste to secure the collar is in place.

With right sides together, pin and stitch the front and Neck Facings to the blouse at th Neck and Front Opening, sandwiching the Collar in between. Match the shoulder seams, Center Backs, and the notches. Trim the seam allowances to cut down on the bulk fabric at the neck and collar. Trim the seam allowance down the front facings as well.


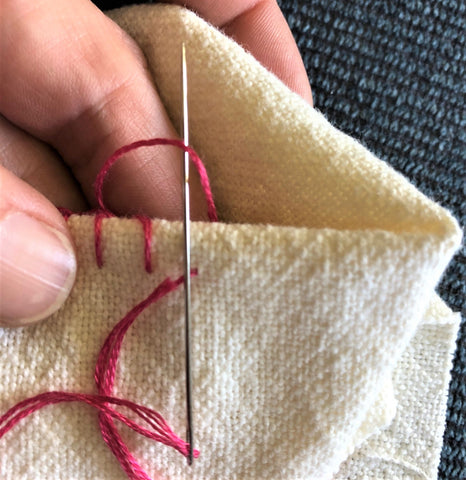
Turn the facing to the inside of the blouse, press creating a clean edge, and hand whip-stitch the pressed-under edges to the inside of the blouse. Please do not let hand work disuade you. Sometimes the only way to achieve a nice finish is to to use a needle and thread. Handstitching forces you to slow down, it is relaxing (if you give it a chance), and sometimes allows for more control than machine sewing.
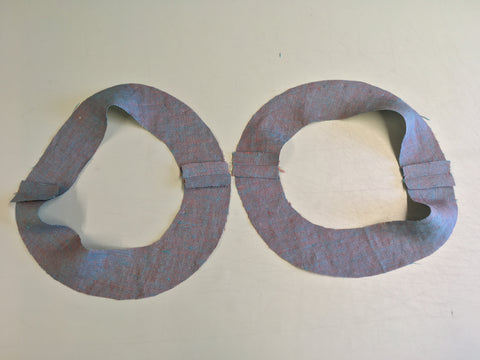
The Vestee Tucks
I am using the narrow Vestee C pattern piece. The top edge is finished with two 1/4-inch (6mm) turned under edges according to the pattern instructions, four evenly spaced 1/4-inch (6mm) tucks are added (I change my mind from my original tuck making plan). Then the bottom edge is hemmed and the vertical side edges are finished with two 1/4-inch (6mm) turned under edges.
Below shows the pinned fold where a 1/4-inch (6mm) tuck will be sewn.

Sewing the tuck using the edge of the presser foot as a guide.

Below the wrong side of the Vestee Facing is facing up and the tucks are pressed downward. FYI: Tucks generally fold downwards and outwards.
See "Adjust Vestee to Accomodate Hoizontal Tucks", earlier in the blog to see how to calculated and add the tucks.
Sewing Vestee to Blouse Front
Next the Vestee is added to the blouse front. By sewing the vestee to the blouse on both long sides, the blouse becomes a pull-on-over-the-head version. So easy!
Stitch the right side of the Vestee to the right side of the Blouse. Attach the Vestee underneath the Front Facing, liniing up the pressed edge of the Vestee and whip-stitch or machine stitch, matching the large O's at the top as marked on the pattern. It is helpful to turn the blouse the blouse and Vestee with wrong side facing up. Before you completely stitch the Vestee to the blouse, double check the placement of the Vestee to be sure there is enough room to comfortably pull-on-over-your head. You don't want the Vestee to be too low either. Keep reading and learn what not to do.


Repeat for the left side. To make aligning and pining the left side easier, place a thin book or pad of paper sandwiched inside the blouse. An ironing board works too.
The instructions recommend hand whip-stitching the Vestee to the front sides, which I did the first time. ALERT. Notice, I said the "first time?" I hand whip-stitched the vestee into place... then after trying it on... discovered it was too low. The second time I machine stitched it. The look is different but it works.

Below shows the stitching hidden under the collar and ending at the top of the Vestee.

The front is all complete, even if I did not end up with the hand sewn finish as I had planned.

Sleeves Side Seam
Stitch the side seams of the sleeves right sides together as normal if you are not using French Seams. Because this pattern is ideal for French Seams the sleeves are finished neatly and cleanly. Refer to French Seam Shoulder and Side Seam Construction if you need a reminder follow the visual aid below.


Sleeve Hem
Once again I am using a basting stitch as a guide for turning under edges of the sleeve hem. Once the sleeve edge is turned, give it a clean press and stitch close to the fold edge. It is fine to hem sleeves before attaching to the armhole if you are confident about the sleeve length.


Whether using French Seams of not, to finish the sides seams of the sleeves be sure to press the seam towards the back.

Adding the Sleeves to the Armhole Using a French Seam
Below is the armhole ready to receive the sleeve if using the normal method for setting a sleeve. Notice the shoulder seam and side seam are wrong side facing up, the black thread marks the cap of the shoulder, and the pin is pointing to the double back notch. Add a stay-stitch to the armhole, inside the seam allowance, if you have not already done so.

If adding the sleeve to the armhole using French Seams be sure to work with wrong sides together. To set the sleeve, ease the sleeve into the armhole, matching the underarm seams, shoulder cap, and notches as in the photo above. Note: The seam with the gathers that we first sewed fall forward on the front of the blouse and are not the actual shoulder seam. The shoulder seam is marked by a notch on the pattern.
For French Seaming following the same technique demonstrated previously. Follow the photos below for a visual aid.
Below the first scant seam for the French Seam is sewn.

Whether making French Seams or not, lots of pins will help ensure your sleeve will lay as flat as possible to the armhole. Setting sleeves can be tricky, so take your time to avoid doing over.

Notice the tiny puckers inthe photo below. Despite all the pins, sometimes you stil get some puckers. Luckily they will press out.
The rights sides are turned togther and the edges aligned to create a clean edge. The pin to secure and sew the last 5/16-inch (8mm) seam line.


Press the seam towards the sleeve.
Hem the Bottom Edge
To hem the bottom of the blouse edge turn the raw edge under 1/4-inch (6mm) and press. Turn under again 1/4-inch (6mm) for a total of 1/2-inch (13mm) and press. Hand whip-stitch the hem or machine sew, stitching close to the folded edge.
Be sure both edges of the blouse front are even.

A Final Touch
To better secure the Vestee and preventing it from gaping, simply hand whip-stitch to the facing edge.

I hope you found this blog helpful, in not only how to make an everyday pull-on version of Folkwear's 210 Arnmistice Blouse... but in the extra tips as well. Tag this blog as a reference on how to make French Seams and for the technique behind making tucks. Learning new tip and techniques makes sewing such a pleasure.
The 210 Armistice Blouse Pattern and the PDF version are on sale through the month. Don't delay, get your copy and discover why the 210 Armistice Blouse is a Folkwear Favorite!


The Folkwear 210 Armistice Blouse is typically associated with the romantic aesthetic of the Edwardian period. However, there is more to it's story. This blouse became synonymous with the fight for women's liberty in the early 20th century. The "War to end all wars" would unexpectedly create new found opportunities for women both state side and in Europe.
With WWI raging in Europe, women were asked to take on the roles previously held by men, who were called to fight on the battlefields. Filling the roles once held by men gave women a sense of purpose and the resulting independence was liberating. These new challenges empowered the minds and spirits of women to new possibilities.

The war would allow for a new day to dawn that would not be turned back and women took their opportunity to demand change. Women fought to claim the freedoms they had been previously denied. The Suffragette movement was established, uniting women like never before and transforming a generation of women, setting a lasting precedence. After a long and determined fight by both Black and white women, women's right to vote was partially won in 1920. This right was only granted to white women over the age of thirty, however. Black women were pushed aside by many white Suffragettes both within the voting rights movement and in the larger movement for civil rights for all. The fight would continue.

Nannie Burroughs holding banner reading, "Banner State Woman's National Baptist Convention" posed with eight unnamed women
Library of Congress, Lot 12572

The popularity of the Armistice blouse coincided with this time of great social change and unrest. This shift in society caused women's fashion to change as well, creating an irreversible fashion trend towards less cumbersome and restrictive clothes. Both white and Black women were called to work outside the home and their clothes required the practicality of movement. This resulted in clothing that liberated the body (a bit) while remaining feminine.
While the Armistice blouse, with its shirt-waist style is generally thought of as romantically Edwardian, it was a transitional garment that physically removed the bindings of previously restrictive clothing, leading the way to our modern fashion aesthetics.

The easy straight forward construction of the Armistice blouse made it popular with women of all social and economic classes. While the blouse design itself was basically the same, each wearer could make a version uniquely their own. The front center "Vestee" was the focal point of the blouse design, with or without it's framing collar. The Armistice blouse was a perfect canvas for encouraging varying creative uses of scraps of laces, trims, tucks, and embroidery. The Armistice blouse became a proud rallying call of women's solidarity, while creating an opportunity for feminine individuality to shine.

Credit: Decor to Adore Blog: The Armistice Blouse
The Folkwear 210 Armistice Blouse exemplifies a cut that was popular throughout the decade, with long rectangular lapels over a center panel called a "Vestee.” Until about 1915, this vestee was collared demurely like Gibson Girl blouses of the Victorian era (see the Folkwear 205 Gibson Girl Blouse Pattern or PDF Version), but by 1917 it had become a simple squared inset. Because of a steadily dwindling supply of fabric, waistlines were less defined and casual deep necklines, lapels, and cuffed sleeves were much in favor.

Our blouse can be made in a simple untrimmed version or trimmed with lace on the collar, cuffs, and Vestee (as seen illustrated on the pattern cover). Tucks and/or drawn-thread work can be added on either version. Other variations you may wish to try include making the collar and cuffs out of contrasting fabric or novelty laces, or adding tucks to the front and the shoulder. You can learn more about all the beautiful techniques for embellishing the Armistice blouse in the bonus material included in the pattern.
Traditionally the Armistice Blouse was made of sheer gauzy white fabric. This was in part because dying technology had yet to be perfected, making white the main fabric choice. White also shows off fine hand sewn details that are synonymous with the Edwardian period.
In the spirit of liberty and celebrating the women who have set the path for our own freedoms, I hope you will join in making the Folkwear 210 Armistice Blouse. The blouse is on sale throughout the month and it is also available in a PDF version.

Economist, attorney and civil rights activist, Dr. Sadie Tanner Mossell Alexander in a vestee-fronted blouse paired with a matching skirt. Note the very sheer fabric on the pleated vestee front and the sleeve ruffles. source BlackThen.com
In the next blog, learn to use the 210 Armistice Blouse Pattern to make a simplified-easy-breezy-everyday version to liberate you from the summer heat!

This is DAY THREE of the Chupa Sew Along. To start at the beginning, click here to see Day One.
Now that the 131 Tibetan Chupa is constructed, all that is left is finishing the neckline and armholes with facings, hemming the skirt, and making a simple loop closures that is paired with a button, and adding hook & eyes for closure security.
Finishing the Neckline
If you have not already cut the facings and interfacing for the Chupa now is the time. Note: If you are working with a bulky fabric, you may wish to substitute a lighter-weight lining fabric for the facings.
To ensure that the neckband facings are made more stable and strengthened, baste or fuse the interfacing to the wrong sides of Left Neckband E and Right Neckband F. Be sure to handle (when stitching or pressing) the facing pieces with care, especially if your fabric is a lose weave. Any time a fabric is cut off grain and especially on a curve the fabric is not stable and may stretch.
Be sure to apply the interfacing to the Neckband pieces, not the facing. It is easy to confuse which is the neckband and which is the facing. When cutting two, the neckband will be pattern piece on top, with the right side facing up.


Simply pick the top pattern piece up and place it on the interfacing to ensure you have the correct pieces paired.
If using a non-fusible interfacing, stitch the interfacing to the Neckband pieces within the seam allowance. Make a stay-stitch 1/4-inch (6mm) from the outer edge this will work nicely, helping to stabilize the curved edges.


With right sides together, stitch the Left and the Right Neckband at the center back, matching the notches. Press the seam open.


Repeat doing the same with the Neck Facings pieces. Don't forget to stabilize the edges with a stay stitch 1/4-inch (6mm) from the edge.

Press under 1/2-inch (13mm) along the curved notched edges of the neckband facings. Trim away half of the seam allowance, leaving to 1/4-inch (6mm). Remember the 1/4-inch (6mm) stay-stitch I made to help stabilize the facing curves? It now conveniently serves as a cutting guide.

Hint: Any time you need to fold and press an edge neatly and cleanly, simply sew a basting stitch to use as a guide. This simple guide technique helps to create a smooth and even edge quickly and easily. Then the basting stitch can easily be removed.
With right sides together, pin and stitch the neckband to the neckband facings along the long curved unnotched edge and both ends, being sure to match the center backs. Trim the seam allowances and the corners, clip the curves to help release the fabric, turn, and press.


Prepare the Neckline for the Neckband and Facing
Clip to the stay-stitching along all the curved neckline edges to release the fabric so that the neckband and facing will lay nicely together along the curves.

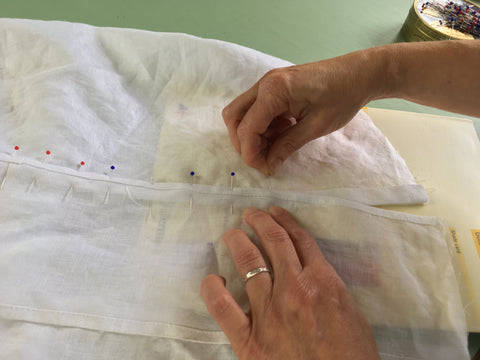
With right sides together, baste and then final stitch the neckband to the chip neckline. Match the center backs, notches, and small dots on neckband to shoulder seams. The idea behind basting the neckband on first is to allow you to easily fix any puckers or adjust any easing that might need to occur. Once the neckband and the neckline align and fit together properly, then make the final stitching on the 1/2-inch (13mm) seam allowance. Trim the seam allowances and press the seam towards the neckband.
In the photo below the neckband is sewn to the neckline and I have left pins that correspond to the center back, shoulders, and notches.


Slip-stitch the pressed edge of the neckband facing over the neckline seam. Note: Finish the shoulder seams before sewing the facing down.
If you like topstitch the neckband 1/4-inch (6mm) from the edge, meeting the stitching at the side opening. I decided not to topstitch the neckband this time. I hand stitched the neckband facing in place and decided it looked nice without any extra stitch work.
Finishing the Armholes
The armholes are finished with a simple facing that folds to the inside of the garment and is not visible on the right side.
With right sides together, stitch Front Armhole G to Back Armhole H at the shoulder and the underarm seams, matching the notches. Stitch and press the seams open.

Turn under 1/4-inch (6mm) along the outer unnotched edges of the armhole facings and press or baste to hold the edge down securely. If basting, you will eventually remove the basting stitching. I found pressing was enough to keep the fabric laying nicely after pressing. But this will depend to the fabric you use.


To attach the facing to the armhole; with right sides together stitch the armhole facing to the armholes, matching the notches, shoulder seams, and underarm seams. Trim the seam allowances, clip the curves, turn facings to the inside of the armhole, and press.


Making the Closures
Since the Chupa bodice is a wrap design, it needs a little help from a few pairs of Hooks & Eyes in strategic places to help ensure a secure closure. I also decided to use a couple of snaps just to see how they would work?
The wrap closure to the Chupa is on the right side of the garment as you would wear it. Align all the edges to be sure your hook & eye (snaps in this case) placement will nicely match-up. Sew a hook & eye on the right side opening where the side extension meets the bodice side seam. Typically the eye goes on the top of the underneath edge and the hook goes on the underneath side of the top edge. In the case of using snaps, the part with the whole goes on the top of the underneath edge and the part with the point goes on the underneath side of the top edge.

I decided to add another snap to keep the sides neatly closed. Whether using hook & eyes or snaps be sure to place them inside the edges far enough from the outer edge that they are not visible on the right side of the garment.

With the right side of the garment facing up, sew a couple of hooks on the hemmed edge of Front Underflap, one at the bottom and the other just below the neckband. Be sure to place the hooks in a bit from the hemmed edge. I lined the curved tip of the hook with the stitch line of the hemmed edge (see below). Set the eyes aside for now.
In the photo below the Front Underflap has been pulled to the outside of the garment so you can better see the hook placement.


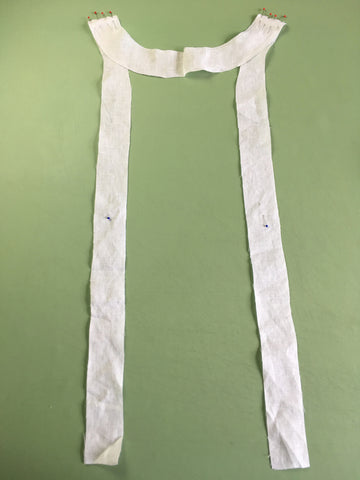
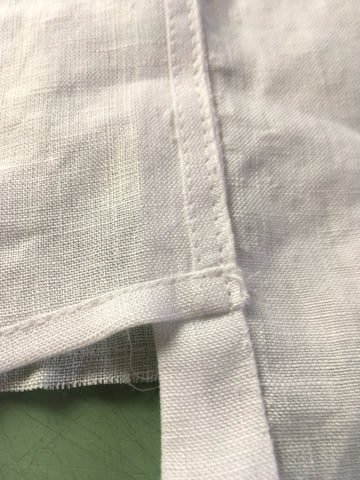
Making Loop Closure
Now, for the decorative wrap closure. This simple closure is make using two strips of fabric cut using pattern piece I (i). One of the strips is made shorter by cutting 2 1/2 -inches off one end.
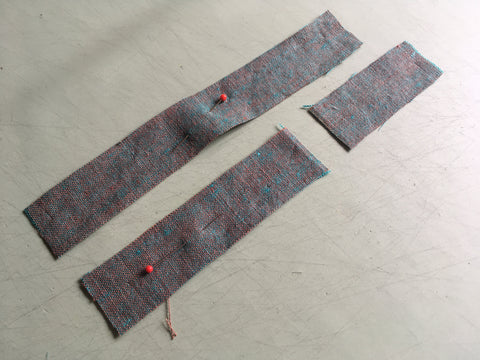
On both closure pieces, press under 1/4-inch (6mm) along both long edges. Use a Bias Tape Maker to make this task easier. Then fold again along the center foldline and topstitch close to both long edges. It is difficult to back stitch on such a small strip of fabric, so do not feel it is necessary.


Front Loop Closure
Slip the shorter closure into the shank of the button. If the shank is too small to accommodate the closure strip, fold the strip in half and hand stitch the button to the fold. I am using a 3/8-inch vintage shoe button.

Press under the raw ends of the closure strip 1/4-inch (6mm) and position on the neckband so the button just extends beyond the corner edge. Topstitch the pressed-under ends securely in place.


Hooks & Eyes on Front Underflap
Try on the Chupa to help you make any wrap adjustments. The extensions wrap around to the back and tie in the back or wrapped around and tied in the front. Place a pin vertically where the button meets the right side (this may fall forward or backward of the side seam). Also place pins along the left dart on the front, making sure the pins are even with the two hooks already sewn on the edge of the Front Underflap.

Be sure the hooks are securely attached to the dart at the stitching line.


Sew two eyes at the pin markings on the left dart on the inside of the front. The pins will should help determine the spot in which to sew the eyes. The idea is to align the hooks & eyes.
Back Loop Closure
Fold the remaining (longer) Closure strip in half. Press the raw edges under 1/4-inch (6mm), and position on the back. Stitch to the right side of the back using a topstitch close to the folded under edges to secure in place. Be sure to position so the loop end overlaps the pin. Since the front loop with the button is already in place you can also use the button to help in postioning the back loop. I found it easier to topstitch the looped end to accommodate the button first, before attaching the loop closure to the back (as seen below). Either way is fine.
Top stitch close to the edge of the closure being sure to allow for enough space at the looped end to accommodate the button easily.


The Hem
Try the Chupa on and have a look at the hem to see if you need to make any adjustments. When wrapped, the edges of the extension may not be even with the rest of the hemline. Due to the wrapping of this design, there is some forgiveness in the hemming. Personally I am perfectly ok with this as long as there is not an obvious unevenness.
If using a lighter-weight fabric, press under 1/2-inch (13mm) along the raw edge, then turn up along the hemline and slipstitch or machine stitch close to the folded under edge.


If using a heavier-weight fabric, stitch hem tape (or a preferred trim) along the raw edge and turn up once along the hemline and slipstittch or machine stitch into place.

I hope you have enjoyed this Sew Along, and will enjoy wearing your new Folkwear 131 Tibetan Chupa all summer long. If you have not yet made a Chupa, I hope this Sew Along will answer any questions you might have had about its construction. It is such an easy piece to make and so flattering to wear.
Be sure to check out @WeepingMyrtle on Folkwear's Instagram page for a truly beautifully made Chupa! The hand stitching details are so lovely! Not only do we love seeing what you have been inspired to make... we can not help but beam with pride.


by Cynthia Anderson
This is Day 1 of the sew along.
Click here for Day 2.
Click here for Day 3.
The Folkwear 131 Tibetan Chupa is a wrapped jumper that has a centuries-long history in Tibet. Along with its deep traditional roots, the Tibetan Chupa makes a beautiful contemporary garment that is perfect for any season. The Folkwear team thought we would introduce you to the Folkwear 131 Tibetan Chupa & Skirt pattern in a Sew Along to inspire your summer sewing.
In this Sew Along, you will learn to make pattern that is not only simple to make, but flattering to wear. The pattern makes the dress shown, but also includes a versatile Chupa-Inspired Wrap Skirt that will make an exciting and fun addition to any skirt collection.
The Chupa was traditionally worn with added layers of aprons, woolen sashes, and a panel coat (like our 118 Tibetan Panel Coat). It can be worn alone or with a blouse (like our 111 Nepali Blouse). The Chupa design features an asymmetrical bodice wrap front, front and back shaping darts, wide neckband, simple faced armholes, and unique side extensions that wrap around the back to tie in front. The resulting silhouette is slim, yet the wrapped extensions provide enough leg room to make walking easy. Both the Chupa and Chupa-Inspired Wrap Skirt can be made in the traditional ankle length or below-knee length. Of course, you can alter the length any way that best suits you.
Front & Back Views of the Chupa and Skirt

To get started consult the Sizing and Yardage Requirement chart (on the back of the pattern sleeve) to choose your size and fabric yardage needed for your project.

Also, have a close look at the Finished Length Measurements provided (bottom left hand column on back of pattern) for the Chupa & Skirt to help in determining the best size for you.

Be sure to read the bonus material included in the Folkwear 131 Tibetan Chupa & Wrap Skirt Pattern for more history and information to inspire your sewing.
Here's the Sew Along Schedule:
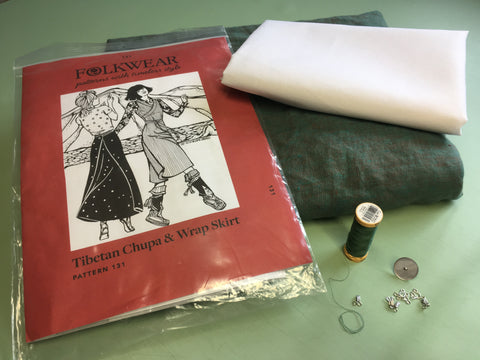
Materials Needed:
Choosing Summer Fabrics
Any natural fiber fabric would be ideal for making the Chupa or skirt for everyday summer wearing. Look for light to medium weight cottons and linens. Fabrics that breathe and whisk away moisture are a joy when the temperatures rise. When picking a fabric remember to consider the drape. This pattern is made even more lovely when made with a fabric that has flowy-ness. For this reason rayon and tencel would be nice. Pick a solid, patterned, striped, or eyelet fabric and rest assured this pattern makes up beautifully in just about any fabric you choose. Do keep in mind that the fabric you choose will be doubled with the wrap extensions and the ties should withstand being tied a multitude of times. Woven fabrics tend work better than knit fabrics for this pattern.
Use more than one fabric design and have some fun. The ties, neck facing, and armhole facings could be made in a different fabric from the main body fabric of the Chupa. I do suggest making a muslin before using a combination of different fabrics so you will understand the construction and how you might creatively use different fabric combinations. Once you understand the construction of this design, your creativity can take off!
Even though this Sew Along focuses on summer Chupa sewing, I must say after having just made this dress for the demonstration purpose of this blog, I am already planning a version for Fall... just so you know. If you are already experiencing winter somewhere in the world or like to plan ahead, I have you in mind too.
Choosing Fall/Winter Fabrics
When you consider the cold winter climate of Tibet, it is not hard to understand how the Chupa was developed to be both versatile and practical. Of course, what was good enough ages ago can still be relevant in modern wardrobes too.
The wrapping of the design at the waist helps lend a warm comfort like a cozy blanket. In the winter the Chupa was traditionally worn fur-lined or padded for extra protection from the cold. Maybe a faux fur-lined version would be prudent just in case the power goes out?
Any cozy fabric that is not too stiff would be a great choice. Look for light to medium-weight wool, such as flannel, gaberdine, and tweeds. Medium-weight cottons such as denim, corduroy, velveteen, and poplin are good choices. For a dressy or casual look consider silk fabrics like haboti, charmeuse, and noil. Once again look for light to medium-weight silk fabrics, with a bit of drape.
Getting Started: Prepare Your Fabric
Once you have your fabric, it is a good idea to test for washability and shrinkage. Cut a small swatch 3"x4" (8cm x 10cm) of fabric from the corner of your yardage. Place the swatch on a piece of paper and trace around it. Keep the tracing for a reference. Wash and dry your swatch the way you intend on laundering your finished garment. Now, lay the swatch back down on the tracing and compare. Did the swatch shrink? Did the fabric change in an unacceptable way? If your yardage shrank in a substantial way, you may need more yardage or a different fabric. This little test helps to eliminate any unfortunate surprises resulting in disappointment.
If you are fine with your swatch test, go ahead and prepare to wash and dry your yardage according to how you intend to launder the final garment, or according to any care instructions that the fabric requires.
Before you wash, you can serge the raw edges, or sew a straight stitch or long basting stitch, to the raw edges of your fabric yardage. This will prevent your fabric from unraveling and getting tangled, when being put through the rigors of washing and drying.
After you launder your fabric, determine the right side of the fabric. If it is not apparent, you can choose which will be the right side. Thread a needle with a bit of contrasting thread and catch a few threads of the right side of the fabric, in the selvage. Tie the marking thread off with a few tiny knots to secure. This step can save a lot of time second guessing yourself on which is the right side.
Give your fabric a good pressing, not only to smooth it out so the pattern will lay down well, but to force yourself to give the fabric one last inspection before you lay out your pattern.
Trace off your pattern
In order to preserve your pattern and keep it intact, consider tracing off the pattern size you require and make any adjustments needed on the traced pattern and not on the original. News print or a roll of paper will work, however, Swedish tracing paper is really fabulous for this. Swedish tracing paper behaves like a cross between paper and fabric. It is durable (will take endless pinning and folding) and it is transparent enough to make tracing your pattern easy. It takes both pencil and ink well. It irons well too.
Trace and cut your pattern out accurately. Be sure to add all notches, dots, and instructional markings too.
For now gather your materials, trace and cut out your paper pattern in your size, and prepare your fabric. Join me next week for Day Two of the Sew Along and learn some tips when laying out your pattern on your fabric and the beginning construction of the Folkwear 131 Tibetan Chupa. The pattern is on sale though the month and a pdf version is available too.

Embroidering the edges of your garment is a great way to to add a simple embellishment as well as a great way to get started with embroidery. Edge stitches can be very simple and go very quickly. And at the same time, they add something special to your garment that makes it personalized and unique. Use a contrasting thread to make the stitching stand out or complimentary thread to blend colors. Use edge embroidery on neck lines, cuffs, hem edges, pocket edges, or along the front of a jacket or open shirt.
![]()
Lots of Folkwear patterns are perfect for adding edge stitching to (and are even traditional to the pattern). 142 Old Mexico Dress often has stitching along the neckline and sleeve and hem edges. You can see an example in the photos above of a white 142 Old Mexico Blouse with a complimentary light peach thread used to do a blanket stitch on the neckline, sleeve hems, and yoke edge; and our blue sample with colorful crewel embroidery along the neck edge. 109 Little Folks has a Mexican Blouse as well as Turkish Shirt that both look very cute with embroidered edges. The 157 Moroccan Djellaba is another great pattern for adding this type of embroidery to the edges. You can also use these stiches on ready-made garments that you want to add a little color or interest to.
There are several stitches used to embroider edges, and I will cover two common ones here: blanket stitch (also called buttonhole stitch because when done very close together, it can finish a handmade buttonhole) and herringbone stitch (or cross-stitch). These stitches can be purely decorative, or they can actually finish the edge of the fabric. When stitched close together, these stitches can finish hems, depending on the fabric and finishing techniques and vision (and how it will be handled - hand-finished edges may not stand up to heavy duty washing machines, etc.).
Materials needed
You will need an embroidery needle or crewel needle - one with an eye big enough for the thread you will use.
For thread, use Perle cotton, crewel yarn (used in blue sample above), or embroidery thread/floss (used in white sample). You will need to decide if you want a more delicate stitch or if you want it to stand out and even add some texture to the garment. For a more delicate stitch, use 3 strands of embroidery thread or #8 (or #12) Perle cotton. For a heavier look, use all 6 strands of embroidery floss or #5 perle cotton or crewel yarn.
You may want to use an embroidery hoop, but for edge stitching, I usually do not.
Starting and stopping
To begin, I often tie a knot at the end of my thread and just begin. But, experienced embroiderers take a few tiny criss-crossing stitches in the back of the fabric to secure the thread. If you are going to machine stitch over the ends of the edges (i.e. enclose them in a seam), you don't need to secure those edges.
To end, I usually tie off my thread with a knot in the back of the fabric. Again, you can take a few tiny criss-cross stitches to secure instead. I usually hide my thread tail inside the fabric hem as well, cutting it after I've run it to the inside of the hem a few inches.
Blanket stitch
This is probably the most common edge stitching and there are several variations.
To make this stitch, come up from the back of the fabric, bring the needle up and through the loop made by the thread before it is pulled tight. Then, pull thread tight enough to lay flat against the fabric.

Then, repeat this the entire length of the edge.

There are several variations of this stitch that add a little more decoration. You can do a pattern of long and short stitches, for example, long, short long (see illustration below). Add in a double space between the sets of stitches. Or double up two blanket stitches for a bit more texture and boldness.

Cross stitch, or Herringbone stitch
This is not true cross stitch and stitching aficionados might look askance at calling it Herringbone stitch also (since it's not quite perfect). But, it is close enough. This is another simple stitch that adds a bit of interest to edges. This one is also great to use along seams as well. It's perfect along the yoke/dress seam of the 142 Old Mexico Dress.
To make this stitch, stich from the lower left of the stitch to the upper right, then bring the needle up just below the upper part of the stitch to make another diagonal stitching line. Continue the diagonal stitches across the area where you want the cross stitching. Then, cross the stitches with a lower right-to-upper left stitch. You can make the stitches wide or more diagonal, cross the tops and bottoms of the Xs (this is what herringbone stitch is like), or keep the stitches (Xs) very separate from each other.


These two stitches are combined below in one of our 142 Old Mexico Dress samples using crewel yarn for a colorful and fun look. These stiches were taken right along the edge of the bottom of the yoke of the dress. You can see the small stitches at the end/beginning of the cross stitch where they anchored the thread. The yarn for blanket stitching here was variegated and changes colors in different areas of the garment.

Hints: if you have trouble with keeping any of these stitches even, you can use tiger tape that you can peel off your fabric after stitching. Or mark your fabric with water soluble marker at intervals that you want to stitch.
Whatever embroidery stitches you choose, use your creativity with color, texture, and style to make something unique to you and, most importantly, have fun with it!
Did you learn anything? Do you have questions? Do you have some tips to add? Leave a comment! And happy stitching!

by Whitney Remington
As a beginner sewist, I used to think of sewing patterns as a strict set of shapes and instructions to be followed to the letter, and that changing anything within would "ruin" it-- much as substituting the ingredients in a treasured family recipe might result in a very unfavorable reaction at the dinner table from guests who expect the original dish.
Following patterns right from the packet (other than the usual fit adjustments) certainly produces functional and beautiful garments to be sure! But with passing time and growing skill, I realized that patterns are merely guidelines to make garments that you can customize to your own shape, needs, and tastes. Don't like a design feature? Omit it. Too long? Cut it short. Too simple? Fancy it up! Body changes over time? Alter your clothes to fit your body! Not only is it totally ok to think outside the pattern envelope, whether in subtle or more extreme ways. It can be fun and produce awesome clothes that suit your individuality, and your own creativity is the limit. Here are a few examples of my own modified makes.
----
While my #128 Russian Settlers Dress is loose and billowy in the main body, the top band-- which is one solid piece-- started to feel uncomfortably tight, likely due to quarantine weight gain. I wasn't content to let this dress languish unworn in the closet, but I didn't want to part with it either! So I cut open the top band at center front, neatly finished the edges, then hand-sewed eyelets at either end to insert a ribbon. As I had already included the nursing slit when I first made this dress, it was incredibly quick to make this adjustment. The nursing slit now serves as an adorable keyhole opening (with the excess length safety-pinned shut for modesty), and the top band can easily be adjusted to fit with the ribbon tie.


----
The #261 Paris Promenade Dress is the first Folkwear Pattern that I've ever sewn, and I adore it for its effortless grace and comfort. When I first sewed it up, the only "change" I made was to go 2 sizes smaller than recommended for my measurements. This dress is still a favorite, three years later! But I decided it needed a bit of a refresh. So I lowered the top of the front apron piece by a few inches and shortened the sleeves a bit-- standing in front of a mirror, folding and pinning things into place to determine exactly how much I needed to adjust until it looked right. It's a subtle change, but doing so vastly improved the style lines for me!


----
I put so, so much effort into making muslins and fine-tuning the fit of these #240 Rosie The Riveter Overalls! When the sewing was done, the fit was absolutely *chef's kiss* perfect! Then just a few months later, my body changed... and the overalls became uncomfortably tight at the waist. (I'm blaming quarantine yet again for this one.) But I wasn't about let that throw Rosie's wrench into my awesome 1940's overalls-wearing plans! So I opened up the side seams and inserted diamond-shaped patches to expand the fit at the waist. To determine how much I needed to adjust, I took a new measurement of my waist (adding in a couple more inches, just in case), subtracted the waist measurement of the original overalls, and made the total width of both diamond patches reflect the difference, plus seam allowance. Now my overalls are comfortable to wear again!


----
The last few examples were of subtle changes... well now here's an example of deviously dramatic deviations from the pattern! I definitely used the #503 Poiret Cocoon Coat shape more as a base guideline, and proceeded to just toss fabric recommendations and instructions out the window! For both of my versions, I experimented by using poly chiffon and African wax print cotton, rather than the heavier fabrics suggested on the pattern envelope. I also omitted linings and collars, and shortened the sleeves by simply cutting them from the ends, resulting in wider, airier sleeve openings. To achieve a drapier look and tone down the floatiness of the lightweight fabrics, I used tassel trim to weigh down the hems of both, which also has the bonus of adding fun movement with the wiggling tassels! For the African wax print version, the characteristic stiffness of the fabric posed an interesting challenge, as it really wanted to puff outwards rather than slink down as would befit this garment. While the tassel trim alleviated some of that, adding tucks at the waist helped to tame the voluminosity even further, while also defining the waist in a way that I find very flattering.


Thanks so much for reading, and I hope learning about my creations will inspire you to try out some modifications of your own, whether they be tiny tweaks to full-blown pattern-hacks!
You can find Whitney, and see lots more of her Folkwear (and more) sewing makes as well as her adventures as a truck driver, on Instagram at @whitneygoose

I have been thinking of my summer wardrobe lately - thinking about what I want to add to my summer staples. And I knew I wanted a new button down short-sleeved shirt for everyday wear. One I could wear with jeans, shorts, and simple skirts. When we decided to feature 256 At the Hop, I remembered that I have admired the shirt in this pattern, and I saw a customer make one several years ago and rave about how great it was. While the skirt can be a canvas for lots of fun art and statement, the shirt can be a workhorse of daily fashion. I found 1.5 yards of a beautiful hand block printed cotton from Ghana in my stash. And decided to make it.
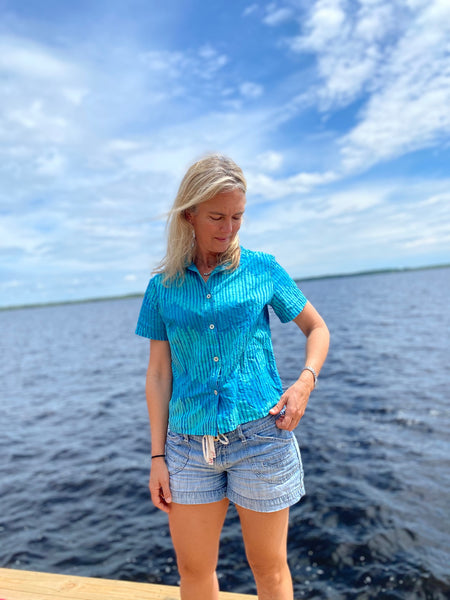
This is probably the simplest button down shirt I've ever made - or maybe the quickest one I've made. There is a fold-over front placket, rounded collar, bust darts, and front and back tucks. It came together very simply and easily. I loved the little darts and tucks that give it a bit of shape. You could add a front side pocket to it if you want to, but you'll need to draft it because there is not one is the pattern (probably also contributing to how quick this was to make).
I did make a few adjustments to the pattern I want to share. First, I added a little over an inch to the front and back. My torso is a bit longer than our typical Folkwear block. This was perfect for me. I also added interfacing to the front button plackets - just about an inch wide - to provide some stability to the buttonholes and button area. You could also add interfacing to the collar/facing if you feel your fabric warrants it. The pattern is not very clear in one step, but I folded the front button plackets to the inside by about 1/2" (13mm) to enclose the raw edge of fabric then I top stitched close to the edge - topstitching both at the edge of the shirt and at the edge of the turned-under edge - creating parallel lines one inch (2.5cm) apart on the placket. If you actually cut the front pieces on the selvage, you don't need to fold under that edge.


The one drawback of this pattern is that it is graded in a fairly small size range. When Taunton Press owned Folkwear (in the 1980s), they put out several patterns all in a narrow, and small, size range. Over the years since, Folkwear has adopted a slightly different grade rule, but we still have a patterns in the old Taunton grade rule. When we have the chance (i.e. a pattern is coming up for print) and the ability (i.e. pattern pieces are small enough, not super expensive, etc.), we try to grade it up. But, we have a LOT of this pattern in stock. While the pattern is on the smaller side of sizing, it makes a great shirt, cute skirt, and lovely sweater. And, we should have a tutorial on sizing the skirt up soon too. But, I would definitely encourage you to make this shirt if you can! It's a great one to add to your summer wardrobe!


by Cynthia Anderson
While the roots of the our 256 At The Hop pattern belong in the 1950’s, time moves forward with each new generation having a voice in need of expression. This circle skirt, also known as the Poodle Skirt, originally evolved as a fun garment, that allowed women a bit of glamor and a way to express a playfulness that had been suppressed due to a world war (read more on the history of this skirt here). It was an innocent garment for an era trying to regain it's optimism. However, this iconic skirt would embody and bond a generation of women. The poodle or circle skirt was not just a fun skirt to make and wear, but it became the voice of hope for a generation of women.


There is always more to clothing than we realize. Clothing reveals and reflects the cultural and social mores of a society at any given time. Clothing has always been and always will be, so much more than a way to protect and adorn the human body. There are times when clothing says more than we can speak ourselves. Typically, we go about our daily lives in clothing that subtly reveals something about us. But, sometimes clothing can be a platform for a bolder statement or idea.
In the desire to honor this iconic skirt's history and in the hope of keeping it's creative spirit alive, Folkwear hopes you will be inspired to treat this simple circle skirt as a canvas to express your own creativity and ideas.
In this blog, I will explain my thought process on how I decided to use the 256 At The Hop skirt pattern to commemorate one of the most iconic women in American History. My intent was to use this pattern as a wearable canvas to honor the courageous spirit and determined voice of Ruth Badder Ginsburg and celebrate her legacy.
Being a former graphic designer, I knew I should to keep this project simple. Being a sewist, I envisioned a multilayered and detailed quilted master piece. However, due to a deadline and other Folkwear projects on my plate, I went for simple with the hope of still honoring my subject. I decided a big-bold, black-and-white design with a splash of significant color would suit my vision. I made a muslin of the skirt, which allowed me to experiment with my ideas without the risk of messing up my final fabric.
Deciding how to execute any project is half the battle and what materials will most likely allow for "realistic" results was a good part of my planning process. Most importantly, I wanted to feature a portrait of Ruth that would actually look like her. Andy Warhol's silk-screen portraits came to mind. So did the campaign posters for former President Obama.
My next consideration was how to work with the shape and drape of the 256 At The Hop skirt, using it as my canvas. Having a large area to work with can be as daunting as having too little space can be limiting.
To procrastinate making an immediate decision on how to proceed and to allow myself to think through my project, I cut my canvas out first, according to the pattern instructions.

I knew this skirt would be really easy to construct, but the construction would come last. Working flat makes creating the art part much easier. I cut the front and back of the skirt using the pattern. Instead of using the "Lengthen/Shorten Here" line to shorten the skirt, I measured and cut 4 1/2-inches off the bottom of the skirt, which I reserved for the hem to be added later.
Due to the manipulations the fabric inevitably goes through, I stabilized the waist with a stay-stitch just inside the seam allowance, and finished the side edges and bottom edges with the serger, being careful not to move too much fabric, keeping the intended skirt length in mind.
I found a graphic portrait and using the computer program Photoshop, (you can also use Illustrator), I enlarged the portrait and printed it off on my desktop printer. Because of the size of the image, I tiled and taped the pages in place like you would a pdf pattern.
Plan A was to cut the portrait out of black fabric and applique it to the skirt fabric. Even though I was pleased the cut fabric portrait still looked like Ruth, I decided hand applique would take too long and machine stitching the intricate edges would not work well for me. Plan "B"... paint.

Because of the shape and drape of the circle skirt, positioning a vertically orientated image straight up and down needs be done with the skirt hanging as if on the body. This is where having a skirt muslin really came in handy. Notice the position of the portrait when hanging on the dress form compared to the position of the skirt laying out flat.


Once I was satisfied with the positioning, I consulted the Folkwear blog How to Transfer Embroidery Designs to Fabric. Even though I was not using embroidery, a simple tracing technique from the blog still applies.
After tracing the portrait, I placed a scrap piece of cardboard under my work and used black acrylic paint to paint the portrait. This was a slow process, being careful not to create a paint mishap. During the process of painting I avoided moving the fabric around on the cardboard. The paint seeps through the fabric to the cardboard and moving either would create an undesirable effect. When using acrylic paint on fabric, be careful to not use paint that is too thin. Strive for a paint consistency that will flow without bleeding. After the portrait was painted, I let it dry completely.
The RBG initials were created using Photoshop and tile printed due to the large size. I taped the pages together and this time I cut the letters out with scissors to create a pattern to trace around. Because I was working with black fabric I used a white lead pencil to trace with. Once the letters were cut out of the fabric, I positioned the letters according to my planned idea. I used white sewing thread to baste the letters in place... with the idea that I would keep the basting stitches as part of the design. Once the basting was complete I machine zig-zagged around the edges of the letters with the same white sewing thread. To my surprise, I liked that the zig-zag stitching related well to the painted collar design in the portrait!


Next I turned to the back of the skirt. This blank canvas was so empty, but the perfect place for a famous RBG quote. The "Notorious" quote seemed to epitomize Ruth's spirit. Because of the wide sweep of the skirt, I opted to place the quote on the bottom curved edge. Using Photoshop I drew the bottom edge of the skirt curve using a scaled snapshot of the skirt pattern as a guide. I decided on a font and positioned it on the curve, playing around with the positioning until I liked it.
Once again I printed out the type and tiled the pages together. Just like the portrait... I traced the quote using a pencil.


Now the fun part . . . seeing it all come together! I constructed the skirt according to the pattern instructions: adding a side zipper with fusible interfacing for reinforcing the zip area, stitching-up the side seams and hemming the bottom edge. Because I wanted the hem to have a bit of weight I used the extra fabric previously cut off the bottom of the skirt, sewing the hem on separately.
The waistband was cut and made wider than the pattern required, in order to accommodate the ribbon used to cover the waistband.
A rainbow ribbon to represent Ruth's support for Gay Rights (and a nod to Pride Month) was edge-stitched to the waistband and finished off with a couple of snaps to secure.
There is so much wrapped up in being inspired to make something that did not exist before. The creative process is unique to everyone and during this project I could not help but wonder if Ruth ever wore a poodle skirt? I hope she would like this skirt.


I hope that you will look at this skirt pattern for new and unique possibilities. Use the 256 At the Hop skirt pattern as a canvas to express something that inspires you and celebrate your own voice! We can hardly wait to see what you have been inspired to make!
Special Thanks to Folkwear's latest team member and model... VICTORIA!


There are few garments that conjure up American nostalgia quite like a poodle skirt. This skirt became synonymous with the 1950’s carefree lifestyle of the post war years and a dance floor icon that exemplified the energy of new cultural phenomenon called Rock n’ Roll.
Our 256 At the Hop pattern is a time-capsule of 1950’s women’s fashion that embodied the spirit of a new generation. This nicely curated collection of classic garments comes with all the extra details needed to add as much 1950's nostalgia as you like. The pattern includes not only the iconic Poodle Skirt, but a classic short sleeve blouse pattern, and knitting instructions for a cropped cardigan. To complete the look, coordinating winter holiday and poodle dog appliqués and knitting designs are provided to embellish the skirt and sweater. The seasonal holiday and poodle motifs are in keeping with the original history of the first poodle skirts designs as you will learn.

Women’s Fashion was put on the back burner due to the war years starting in 1939 and lasting thru 1945. Once the WWII was over and the country began to prosper, a new cultural energy and ethos began to stir. The whole country was ready for better times, as well as something exciting and new. In 1947 such an exciting change came to women's fashion. The New Look by Christian Dior was unveiled, introducing a skirt with a full and flowing shape and a nipped waist. This new look was in sharp contrast to the practical clothing of the war years and women embraced this new symbol of high-style with enthusiasm. The fact that it was easy to make only added to the craze among women across all spectrum of society.
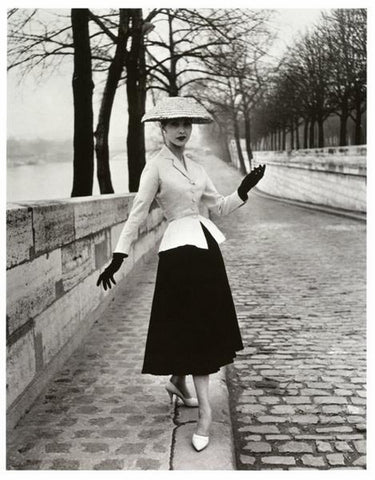
Christian Dior's iconic New Look.
During the winter holiday season of the same year, a young budding actress named Julie Lynn Charlot had an invitation to a Christmas party and nothing to wear. Julie was newly married and broke, but her mother owned a factory that used felt. Needing a holiday outfit Julie decided to draft her own skirt pattern (like Mr. Dior’s) and used the easy-to-work-with felt she had on hand. Sewing was not a skill Julie was good at, so she cut a big circle with a hole in the middle for her waist, which eliminated the need for seams. On this first party skirt, Julie included seasonal holiday appliqués just for the fun of it. The new couple not only enjoyed the Christmas party on a budget that year, but Julie’s skirt drew quite a lot of attention.

A Christmas Holiday Skirt designed by Julie Lynn Charlot.
Before long, Julie was selling her felt holiday skirts in Beverly Hills boutiques, where they flew off the racks. It did not take long before non-holiday themed embellishments were requested and the trend took off like skirts on fire! You never know when making something for yourself could turn you into a fashion designer?

Julie also established the skirts iconic fabric of choice. Felt may have been what Julie had on hand, but it was a perfect choice, once again making the skirt easy for anyone to sew. To add to this charming story, Julie was not stingy with her designs and worked with a pattern company to make her designs accessible to women world wide. She helped to create a whole generation of women who delighted in creating skirts with fun scenes and stories using easy to apply appliqué techniques.
As it so happened, the first Westminster Dog Show that year, had created a rage for all things dogs. As a result, Julie was commissioned to make a skirt depicting a story of three appliquéd dachshunds.
Julie in her own Dachshund Dog design skirt.
Due to the high profile dog show and their fancy haircuts, poodles became a symbol of refinement and high class. As fate would have it, the appliquéing of poodles on skirts was beyond huge. Before long, just about anything became a possible embellishments for these wide circle skirts. Grown women adorned their skirts with the Eiffel Tower, Martini glasses, flower pots, and seasonal themes. Teenage girls embellished their skirts with trendy images like records, catchy phrases, hot rod cars and anything that inspired.

Ladies of the 1950's modeling different themed circle skirts.

Horse Race skirt design by Julie Lynn Charlot.

Dance Floor skirt design by Julie Lynn Charlot.
Designer Bettie Morrie even appliquéd a backgammon board on her skirt, which she used for an impromptu game when it arose.

After the difficult years of the war, women were in need of not only glamour but the country was overdue for some much needed fun. Mr. Dior's flowing skirt design was not only fun to move and dance in, but it was the perfect canvas for displaying one's individual expression. It would be Julie's idea of adding appliquéd embellishments that would transform the skirt into a popular conversation piece. Even walking down the street became more interesting and fun for everyone!
Of course, each garment in the pattern in the Folkwear's 256 At The Hop pattern is a classic, easily made for everyday wearing no matter the season. Use this pattern to make a costume, historical reenactment, a theater production, a sports or hobby themed skirt, or as a canvas when inspiration strikes.

Halloween made more fun!
This is truly an American story of how a fashion icon was created out of one mans awareness of how to fulfill a desire for glamour and the necessity of one young woman to dress herself for a party. So, it just goes to show how once a momentum gets started, anything can happen! It is amazing how a simple skirt bound a generation of women and created wonderful memories in the process.
Find your own inspiration using the this pattern and please share what you make, whether a masterpiece or a lovely everyday look.
Be sure to stay tuned to what we were inspired to make using the 256 At the Hop skirt pattern in the next blog (coming this week!).

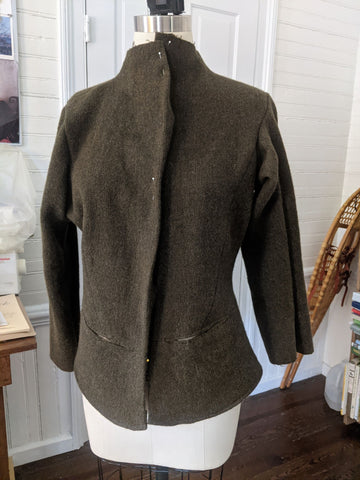
Well hey there, howdy, hi. I’m Sarahbeth. A (mostly) retired, previously-award-winning indie apparel designer coming to you from Mars Hill, NC with a hopefully inspired, and also tragically comedic, adaptation of the 267 M’Lady’s Corset.
A bit about my history in apparel design: Many many moons ago I had an indie apparel line called Unabashed Apparel. I did it all: designed, drafted, sewed, produced product line, photo shoots, etc. Now I create for myself and my loved ones and take a few commissions when the mood strikes me. I’m most interested in how we inspire and encourage one another as creatives. I drafted patterns for every piece I made for my apparel line. I drafted a prototype, then several sizes for each piece in a collection. I personally handmade each piece. In custom bridal, I created a custom body block for each client and then a pattern for the gown from there. I sewed muslins before cutting into silk, but my original patterns were spot on and so after a few years I scratched the muslin part of the process. It was nerve wracking at first. For the last decade I’ve mostly draped any piece that I want to create. There have been times I’ve been frustrated that I didn’t create a pattern to return to, but it’s rare. For personal use, Folkwear has been the only pattern company whose patterns (other than my own) I have reused time and again. I’m a big fan not just of the quality but of the fantastic women who have been stewards of this pattern company.

The tale of this jacket is one of beautiful woe.
Mostly it goes like this: pride cometh before the 2 dozen things you have to do to make a grand idea live-able. You know the old phrase, when someone tells you they like something you made, say thank you and then clamp your mouth shut? This is not that. I want you to be inspired, I want you to grab the bull by the horns, (I want you to use a different lining for your project…)
In short: A while back I designed a jacket for a particularly beautiful Merchant & Mills wool. Then inspiration struck! It was similar enough to the 267 M’Lady’s Corset my buddy Cynthia asked me to model for her recent Folkwear blog post. Why reinvent the wheel? I fetched the pattern and planned to adapt it to my design.
Now, I feel I should tell you I’m more a Jack Pollock than a Jo Vermeer type. Of course, I wish I was refined and dedicated to the exact right brush stroke, but in truth, I really don’t have patience and just throw spaghetti on the wall. I’d rather yelp and fix than wait and plan it perfectly. It’s good to know thyself, because it turns out I was a bit rusty and a bit over-confident with my adaptation and ideas. I had a lot I had to fix with this project. I learned/remembered a lot too and that’s always a great boon to an old grizzled pro.
The idea: Seamed peplum wool jacket, lined with soft jersey for comfort and a casual effect.
Add to the pattern: Sleeves, High neck, Pockets, an Elizabethan flare, be comfy & warm.
Reality: Lined with soft, lightweight jersey? Please. Send help.
1. Prewash. I pre-wash almost everything, including wool. I hand wash my woolens, and to be able to do this, I throw my fabric in the washing machine before I cut out a pattern. It might change the look (and it did change this wool) but I find I want to be able to personally wash things 99% of the time. I buy 1/3 more of my wool than a pattern calls for for this fact. You can see here that the fabric was looser before washing. I prefer the tighter and fluffier outcome post washing and drying. I can’t tell you the number of times a bride I’ve designed for will call me about stains/dirt, and when I say, throw your gown in the bathtub, wash it with some gentle soap – wring it out, hang it to dry – they cry. I prewash errythang.

2. Lay it out, think it through. Add about an inch to the pattern body to turn a fitting corset into a jacket. Cut.
Consider the neck. Of course the original pattern had a scoop neck, and I wanted a warm jacket. I like things to cover the base of my neck and ride a bit high in the back. I used my French curve ruler to sort it out. Always allow for more fabric (shallower curve), you can trim away for the correct shape.

3. I love a selvedge. I use them all the time for the center front of jackets. The stability is priceless.

4. Peplum Front: I straightened the pattern piece to match a jacket front, knowing I would want to continue my closure.


7. Sleeves. Ok here’s the catch and how I (successfully) planned for it:
A) The M’Lady’s corset pattern has a rather squared off underarm. I rounded it and added a bit of fabric to my cut with a “that looks right” eye on the pattern pieces, there are 2 pieces here to consider. Always cut it higher, again, you can trim away, you can’t add back. The multiple seams at the side also give you plenty of room to adjust your fit. You’ll learn the true non-symmetrical reality of your body in this add-edit-and-cut process. Lack of the body’s symmetry is one of the secrets to understanding personal fit success.
B) What sleeve pattern piece to choose: You can see this is one of my old drafted pattern pieces. How to pick a sleeve: Pick a sleeve from a pattern you already have that is loose enough to be a jacket sleeve. I chose a single piece rather than a double piece because it was for a loose rather than rigid jacket idea. This is most important: You can always make an ample sleeve fit a jacket by pinning it and editing it to what you’re creating. It follows more fabric = more editing options principle. The only thing to be aware of is not to cut too deep a curve away from the top of the sleeve to the underarm edge, while this allows for more underarm room in principle, it only does so if you have matching and loose shirt/jacket designs and pattern pieces. Again, cutting away is easy, adding back is not impossible, but more gnashing of teeth than it’s worth. Make sure you pick a woven sleeve pattern. Creating a good sleeve hang is easily achieved through pinning it to the armseye and adjusting the ease from there.

8. Pockets. Now the pocket part was brilliant, forgetting to recut them in a matching fabric was my 2nd whoopsie of this project. I wanted you to see that little French-seamed, wonky silk habotai pockets are easy and awesome to add, particularly where you have a natural waist seam, so I cut a couple out of this pale beige silk and then forgot to remake them in the correct and matching green color for the jacket. That’s right. I added them in, after I remembered to rip out the seam where they needed to be inserted. See next photo.


13. Finishing: Mmmhmm. Well, I’d planned to attach the jersey lining to the hem. Ridiculous in reality due to the pulling of the jersey to wool situation but I hadn’t cut the jacket long enough for a double hem. Solution: I tea-stain dyed some cotton lace and used it to hand finish the wool hem. I hand stitched the jersey to the wool at the front placket and neck. I wanted a subtle edge to both.


I’d do it all again with a silk stretch charmeuse lining. I’d cut the lining the same size as the rest of my pieces and I’d be happy as a peach.
I hoped you enjoyed reading about my adventures of my extreme pattern hack of this fab pattern, 267 M'Lady's Corset (and maybe you learned something too). And are inspired to tackle your own pattern hacking. Folkwear patterns are a great place to start.


